Lab 3: Overview of Anypoint Design Center
Overview
The previous lab exercise provided an overview of Anypoint Exchange and how to search for APIs and other assets we could reuse. In this lab exercise, we assume you did not find anything you might be able to reuse. So, we will design a new REST API using a top-down (a.k.a. design-first) approach. More specifically, the top-down approach involves creating the API specification first, then validating it, and finally implementing or coding it.
In this lab exercise, more specifically, we will design an Order process API. In its fundamental nature, a process API unifies data into processes and implements business logic and business rules. First, we will leverage Anypoint Design Center to create our API specification. Then, we will utilize its Mocking Service capability to validate our API design.
|
As per best practices, we would share our API’s mocking service URL with consumers for two reasons. First, we want to elicit feedback on its specification and incorporate their feedback before implementing or coding it. Second, consumers can start implementing but, more importantly, testing their client application at their earliest convenience. In other words, they don’t have to wait for a fully implemented API. |
Learning Objectives
-
Become familiar with Anypoint Design Center and its visual and text editors.
-
Create an API specification with RAML, the Restful API Modeling Language.
-
Validate the API specification with the Mocking Service.
Step 1: Login to the Anypoint Platform
-
If you are not logged into the Anypoint Platform, open your web browser and navigate to https://anypoint.mulesoft.com.
-
Enter your credentials into the Username and Password fields.
-
You should see the Anypoint Platform landing page once logged in.
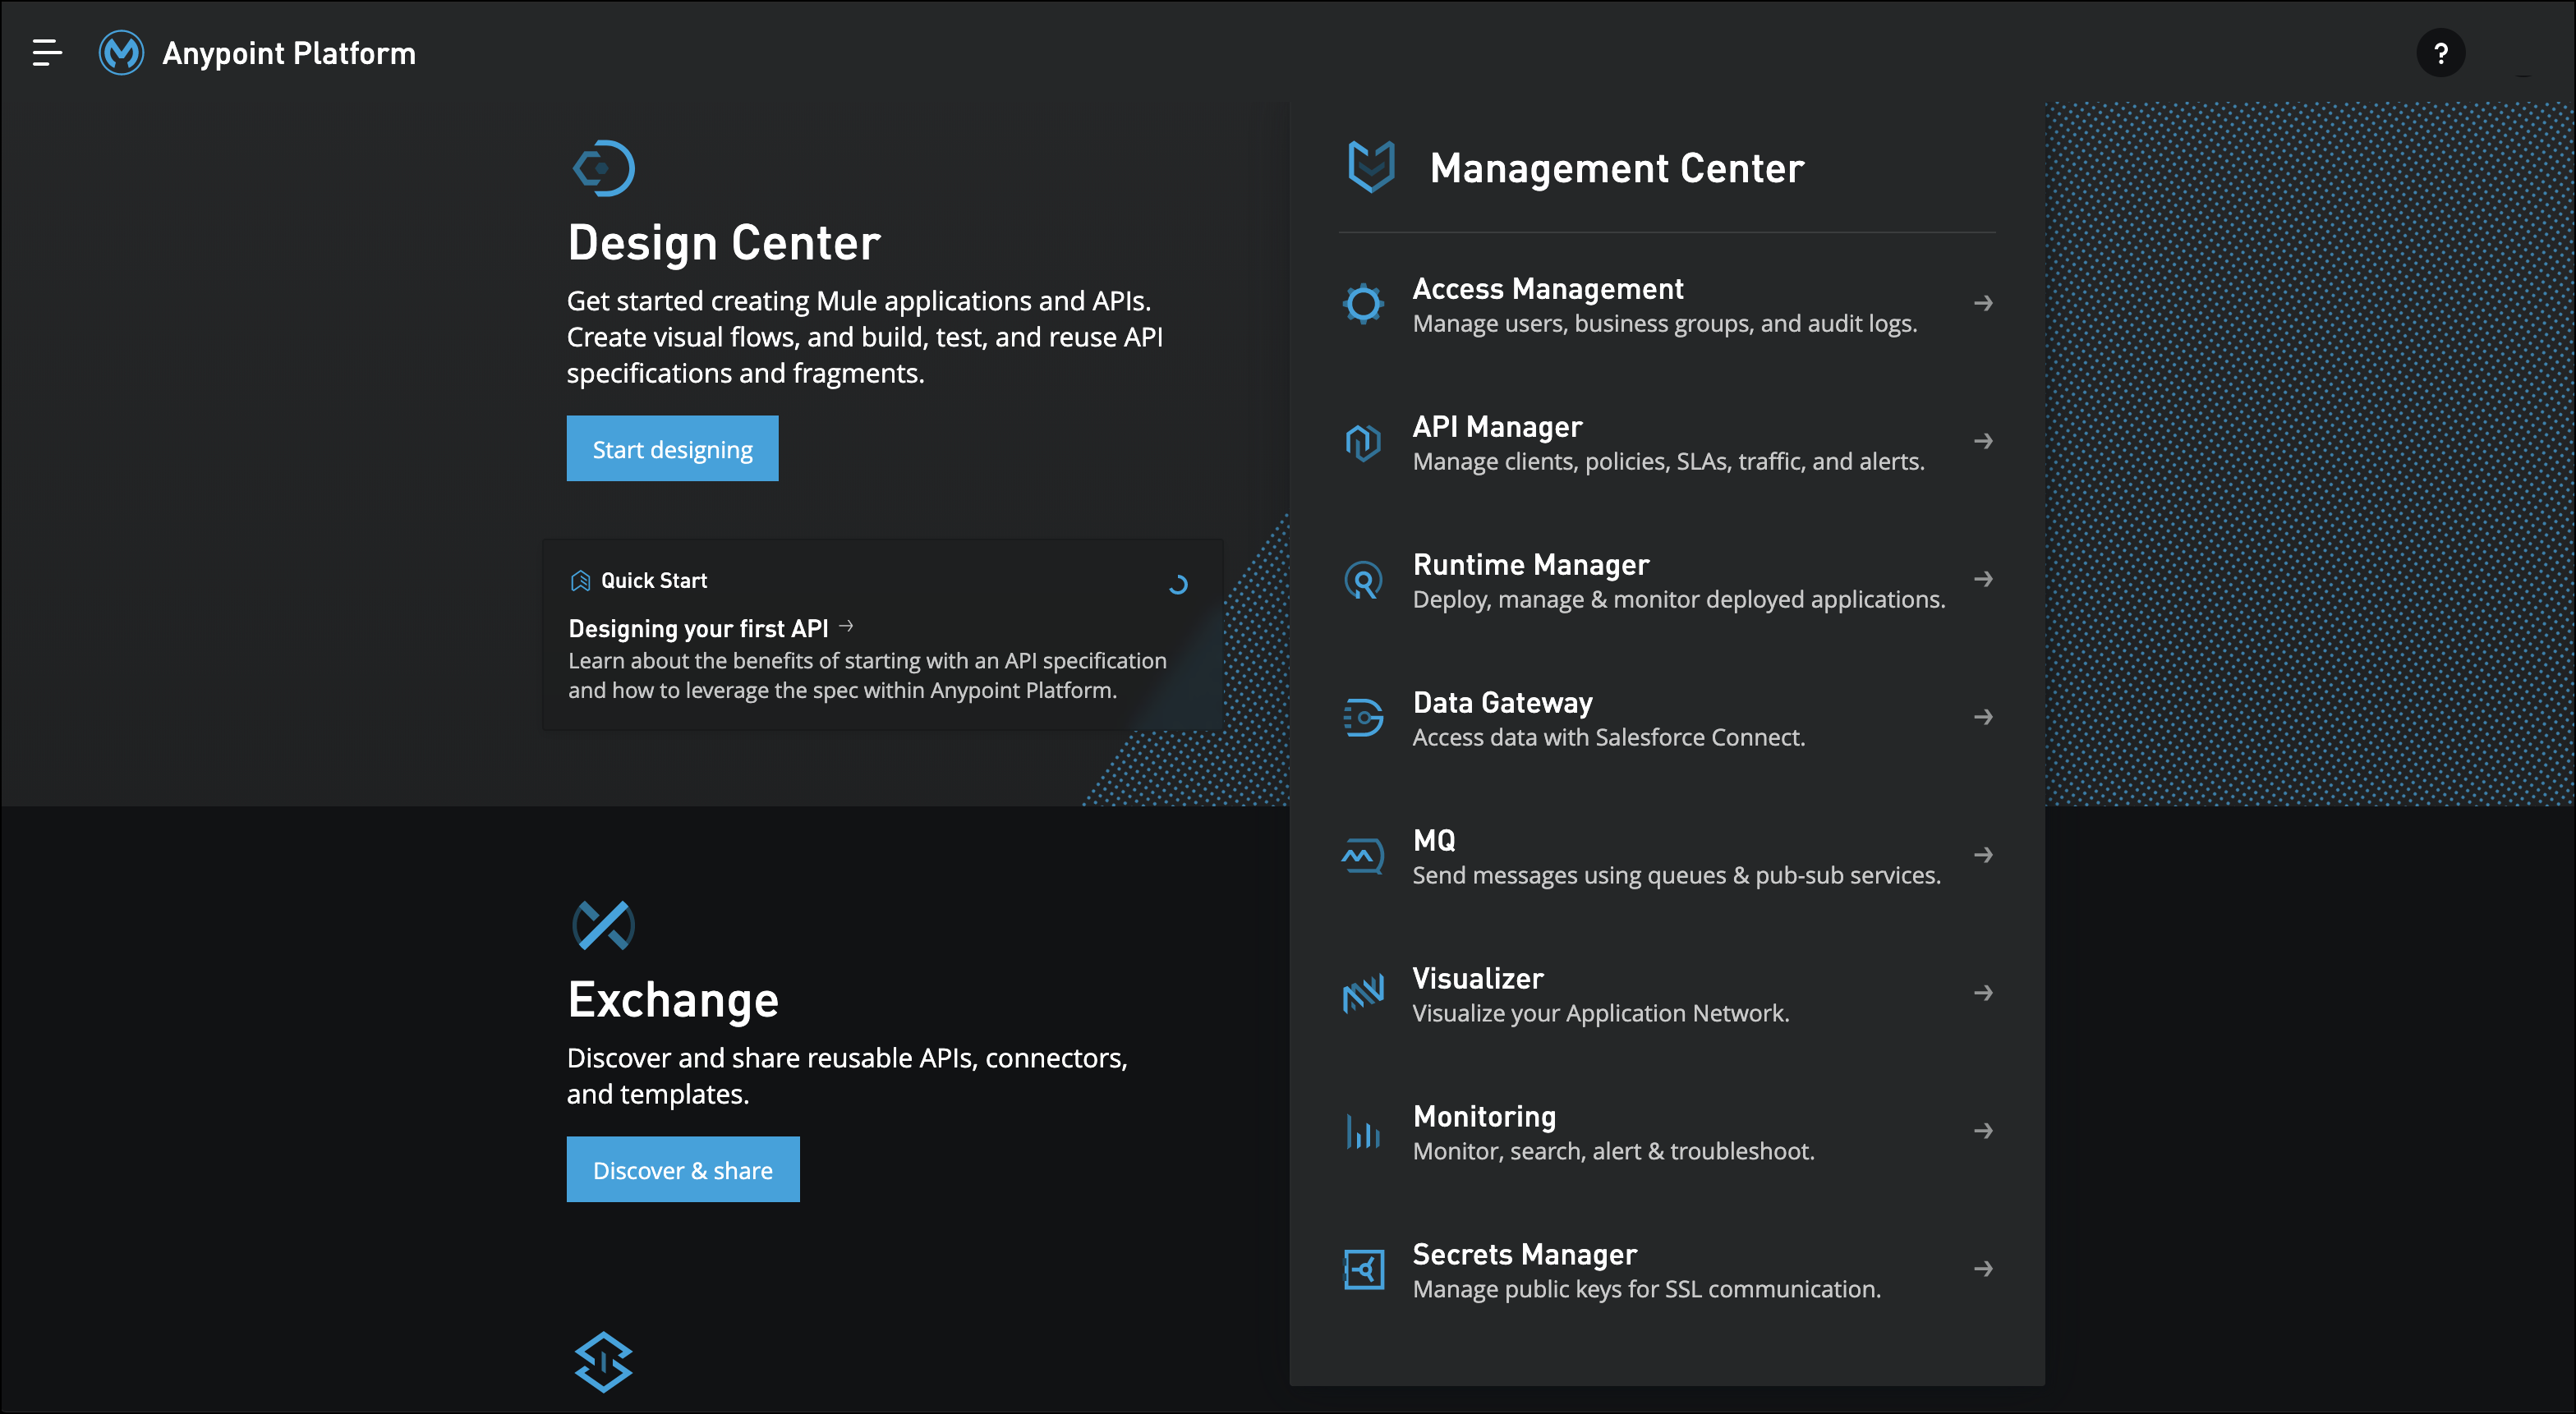
Step 2: Access Anypoint Design Center
-
Click on the button labeled Start designing, or click on the hamburger menu, and click on Design Center.

-
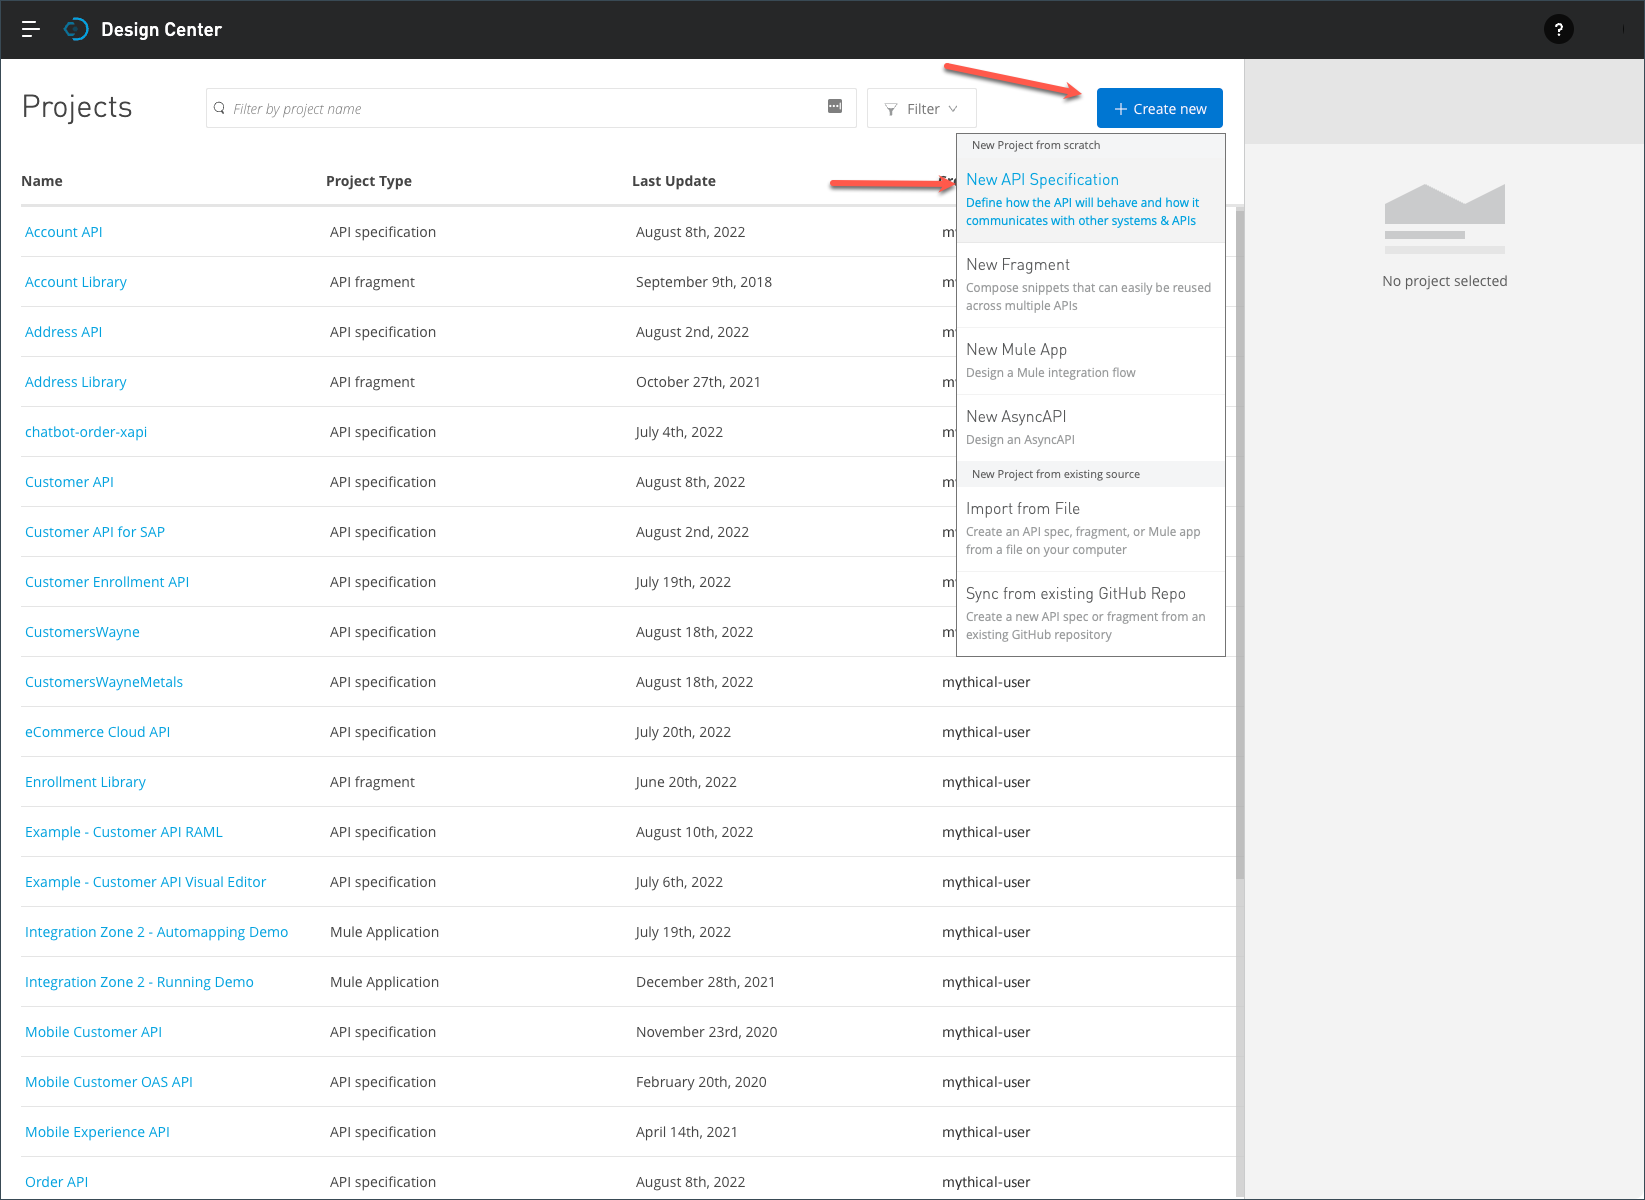
You should see the Design Center landing page, which lists all APIs someone within your organization or business group has already designed or is in the process of designing.
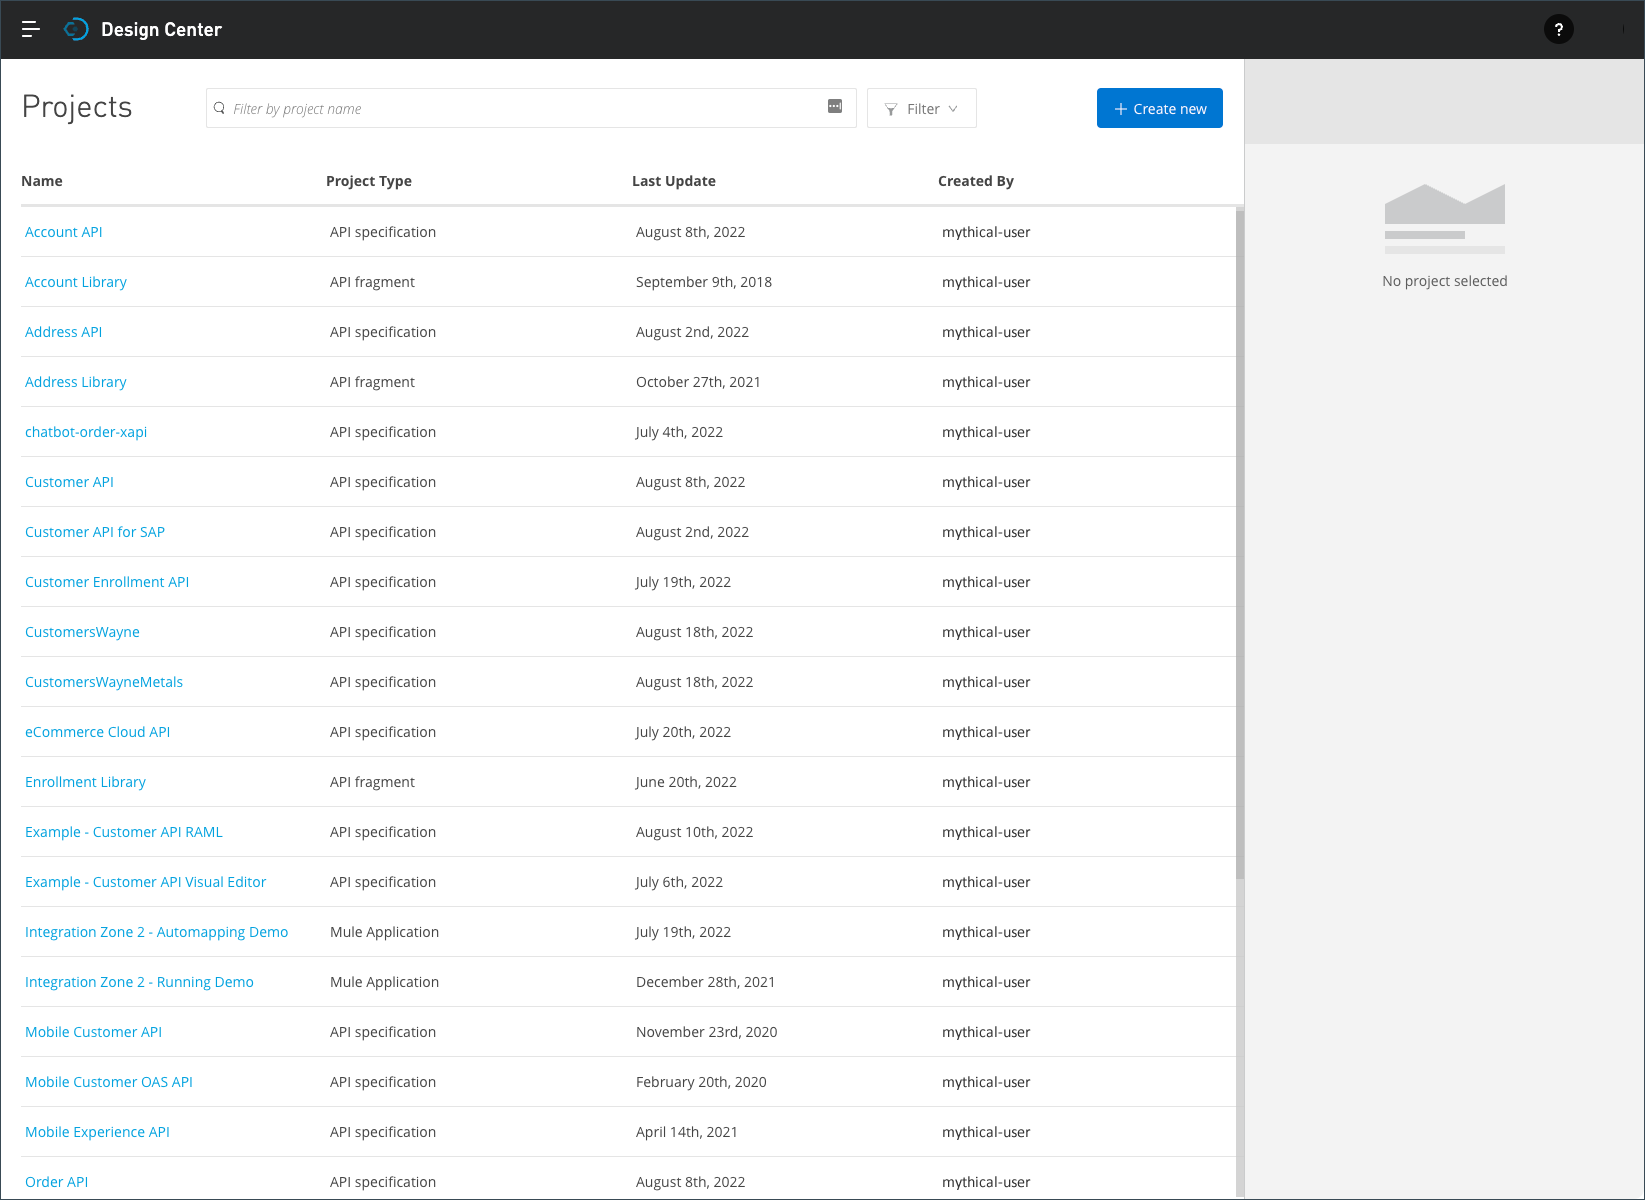
The screen capture above is for illustrative purposes and differs from the landing page seen in the workshop.
Step 3: Create a New API Specification Using the Visual Editor
In this step, we create our API specification using the API Designer visual editor, which promotes a low-code approach to designing API specifications.
-
Click on the + Create new button and select the New API Specification option.
-
In the New API Specification popup window:

-
Enter <unique prefix> - Order API as the Project Name, where <unique prefix>, as implied, is a prefix you add that will make the API name unique when we publish it to Anypoint Exchange. You could use your username as an example.
-
Select the Guide me through it radio button.
-
Finally, Click on the Create API button.
All workshop participants are members of the same Anypoint Platform organization and business group. As everyone designs the same API, using a unique project name is essential to avoid conflicts.
-
-
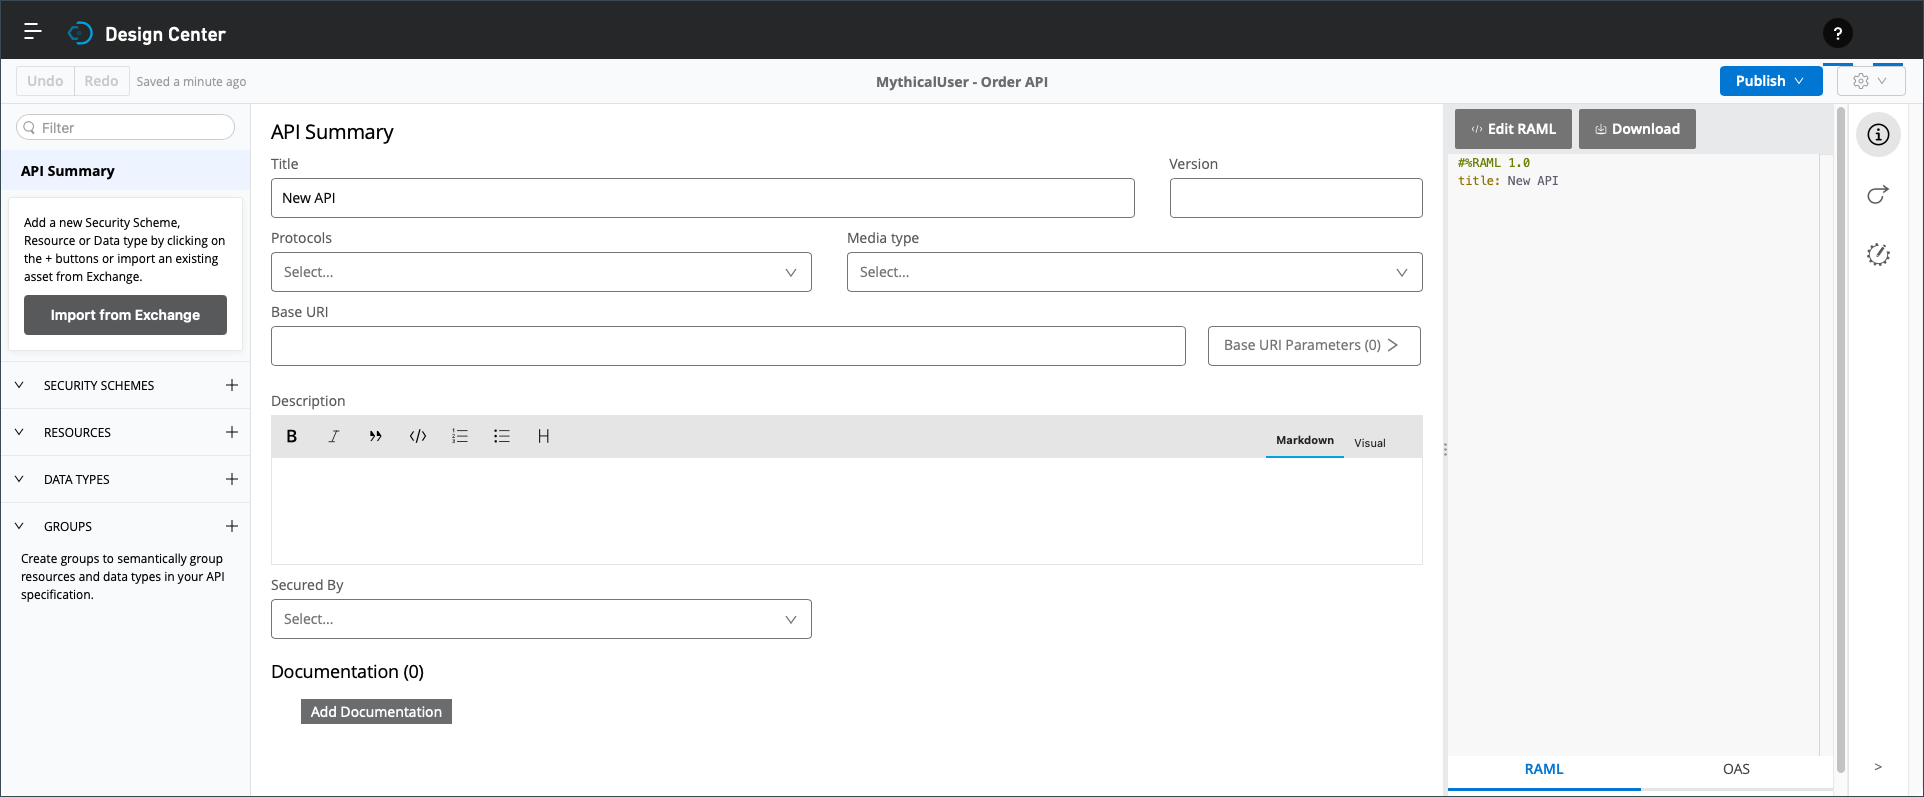
You should see the following API Summary page once the project is created.
-
On the API Summary page:
-
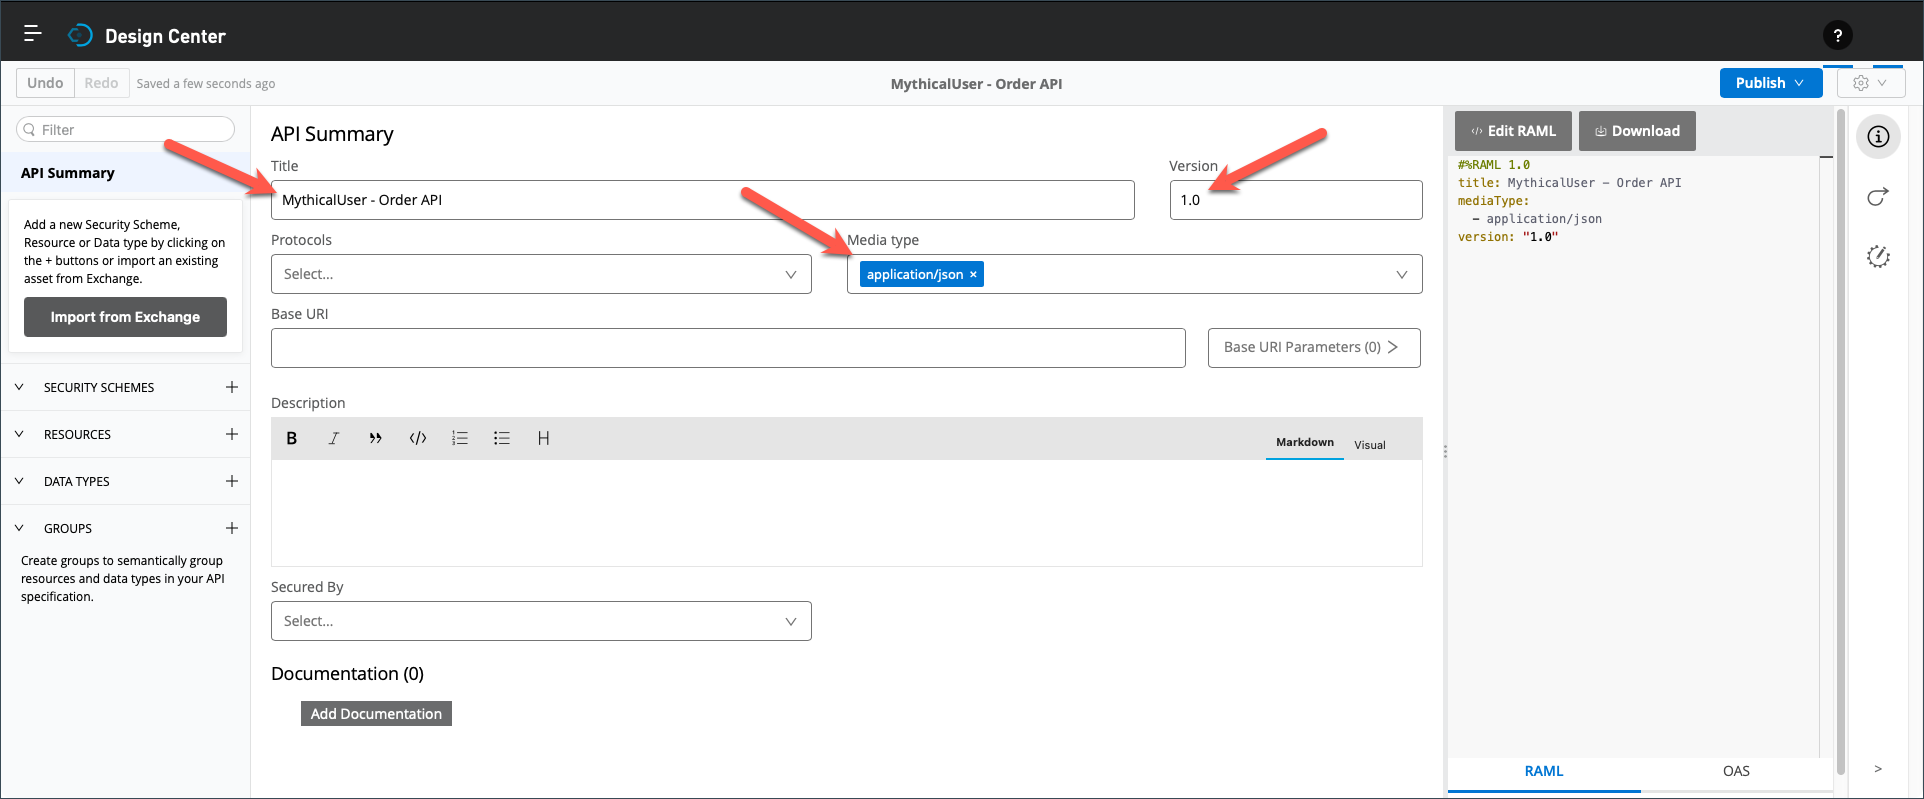
Enter <unique prefix> - Order API as the Title.
-
Set the version to 1.0 since you are working on the first iteration of your API.
-
Although optional here, set Media type to application/json to indicate explicitly that this API supports JSON payloads for both requests and responses.
When creating an API specification, the more information you include and the easier it will be for others to understand its purpose and the functionality it provides. For example, best practices recommend adding a meaningful description that explains the scope or purpose of the API. Arguably, other details on the API Summary page are optional, and we intentionally omit them for now.
-
-
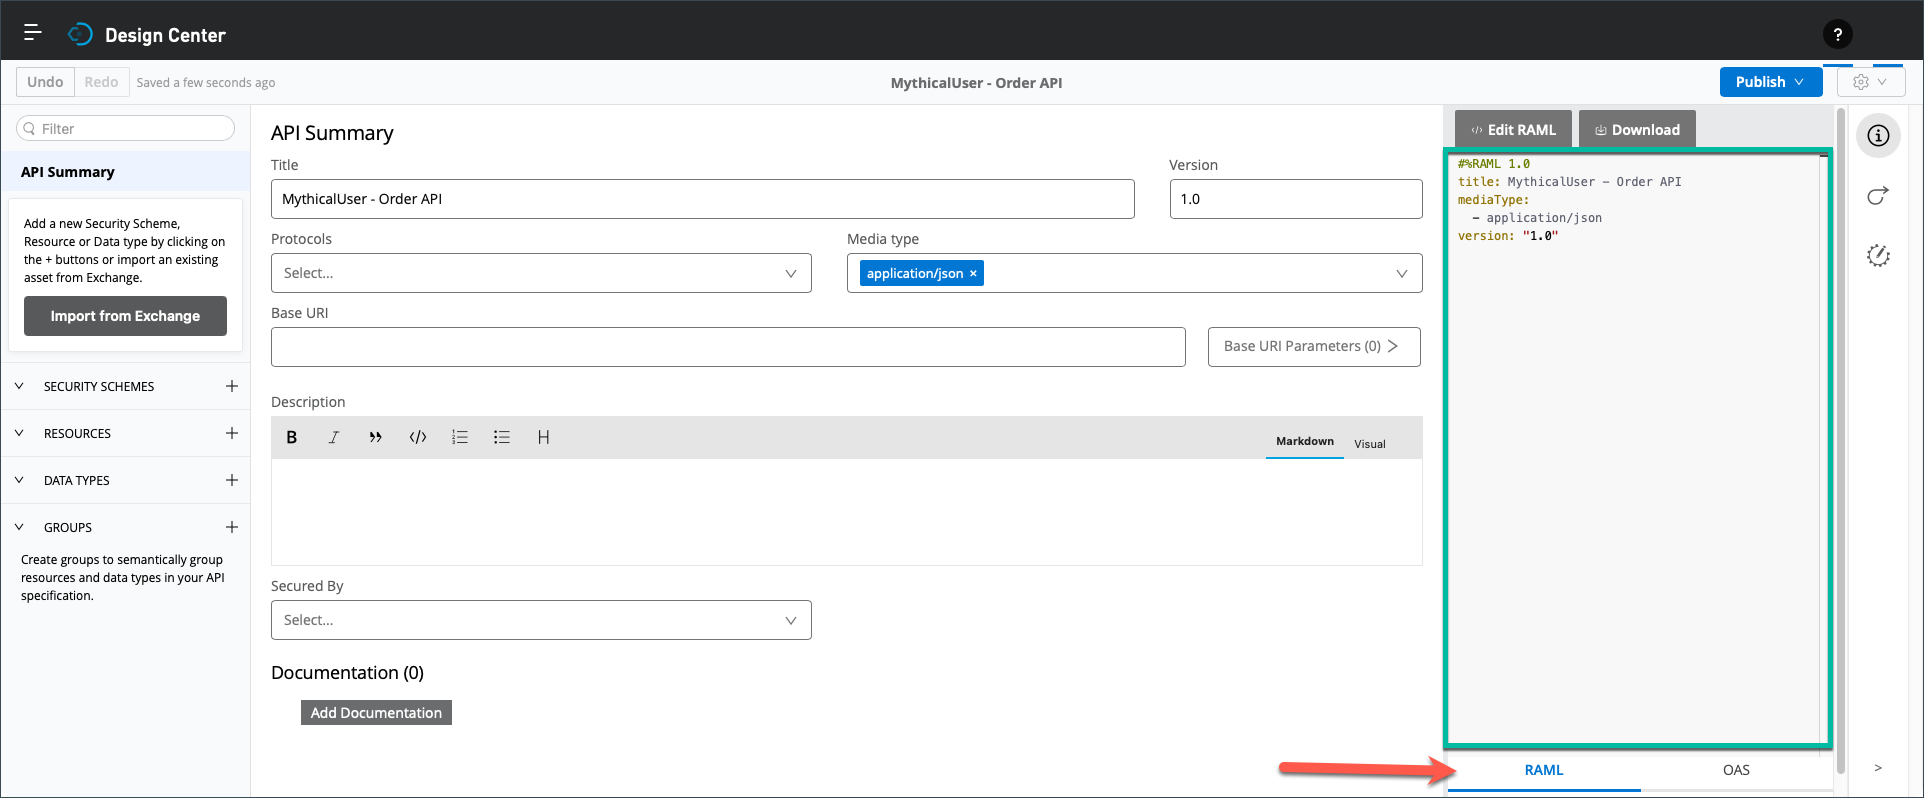
Review the right panel, and notice the RAML and OAS tabs. In fact, this panel renders the API specifications using RAML or OAS, depending on the tab you select at the bottom. You probably already noticed that API Designer updates it in real-time as you enter information.
-
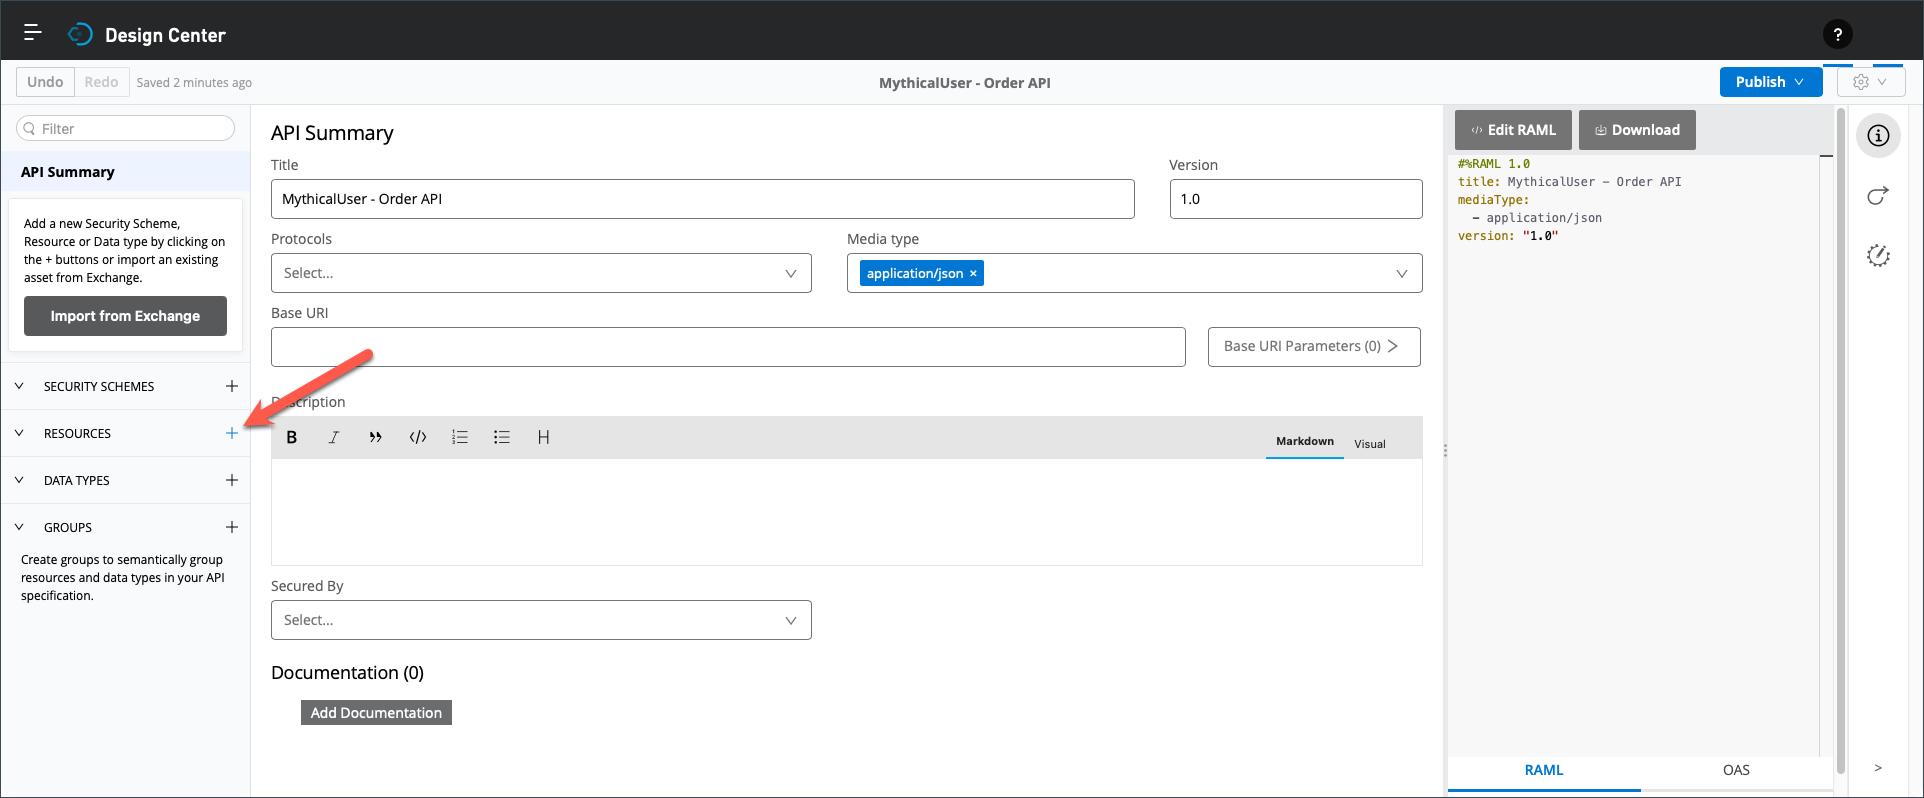
Next, click the + to the right of RESOURCES to add a new resource.
-
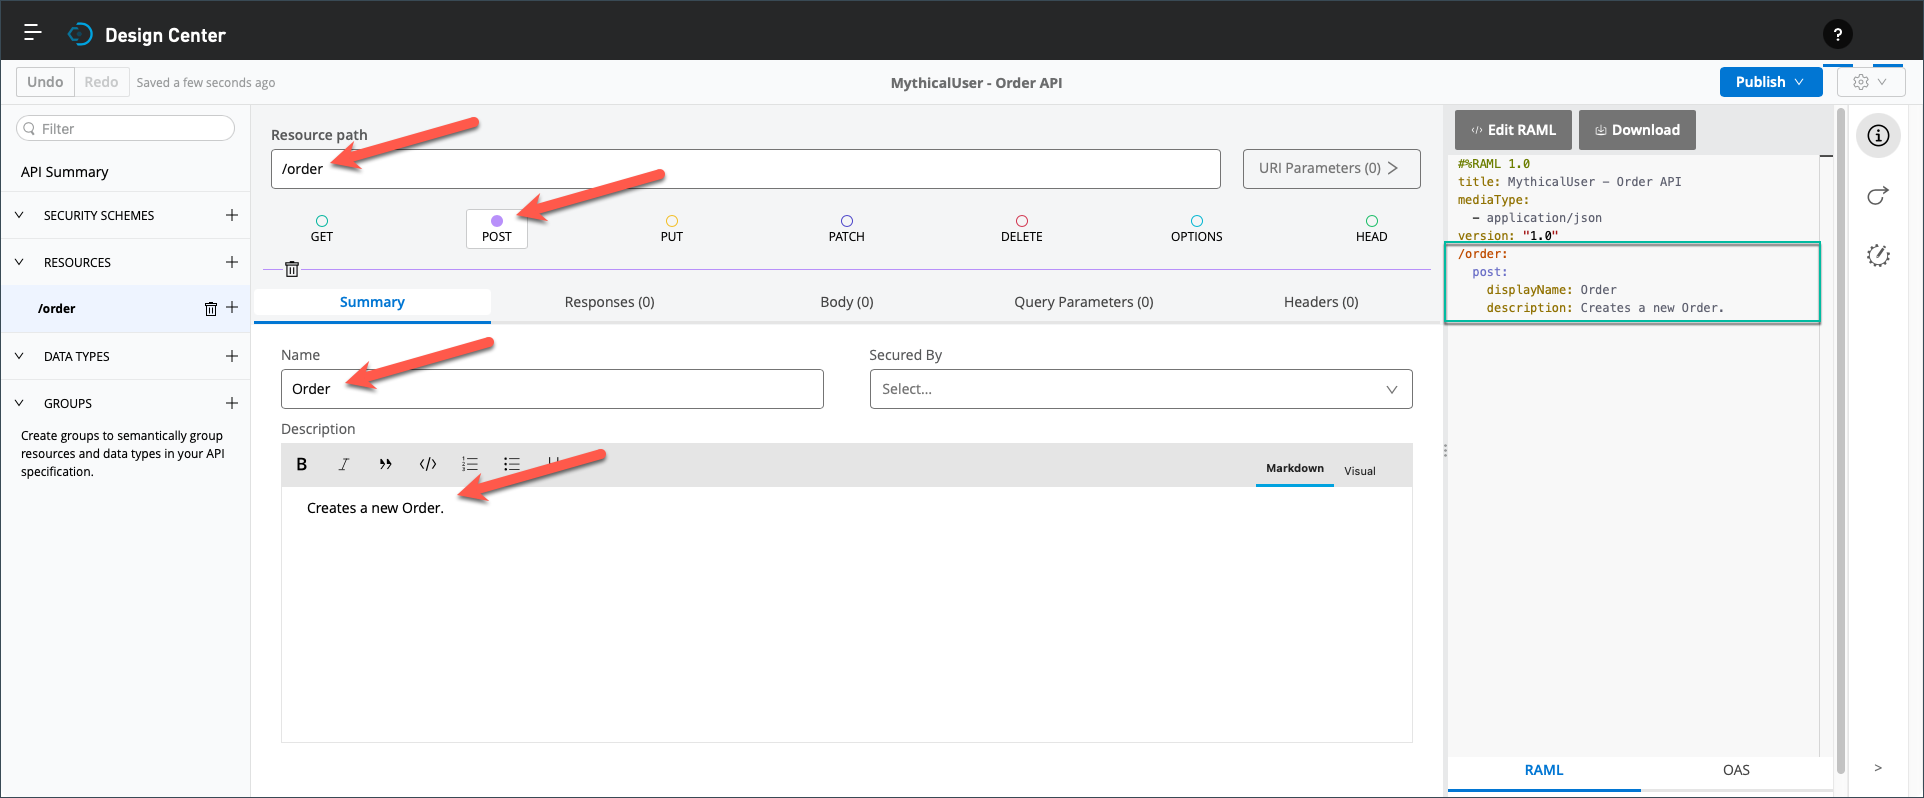
For this new resource:
-
Rename it from /new-resource to /order. Naturally, using singular for the resource name implies that this specific POST method supports creating a single order. However, real-life use cases might require supporting multiple resource instances, and best practices recommend using the plural in those cases.
-
Click on the POST radio button.
-
Although optional:
-
Enter Order for the Name.
-
Enter Creates a new Order for the Description. Naturally, we should be more explicit in real life. You are entering this basic description for illustrative purposes in an upcoming step.
-
-
Review the RAML (or OAS) rendition and notice the four new lines.
-
-
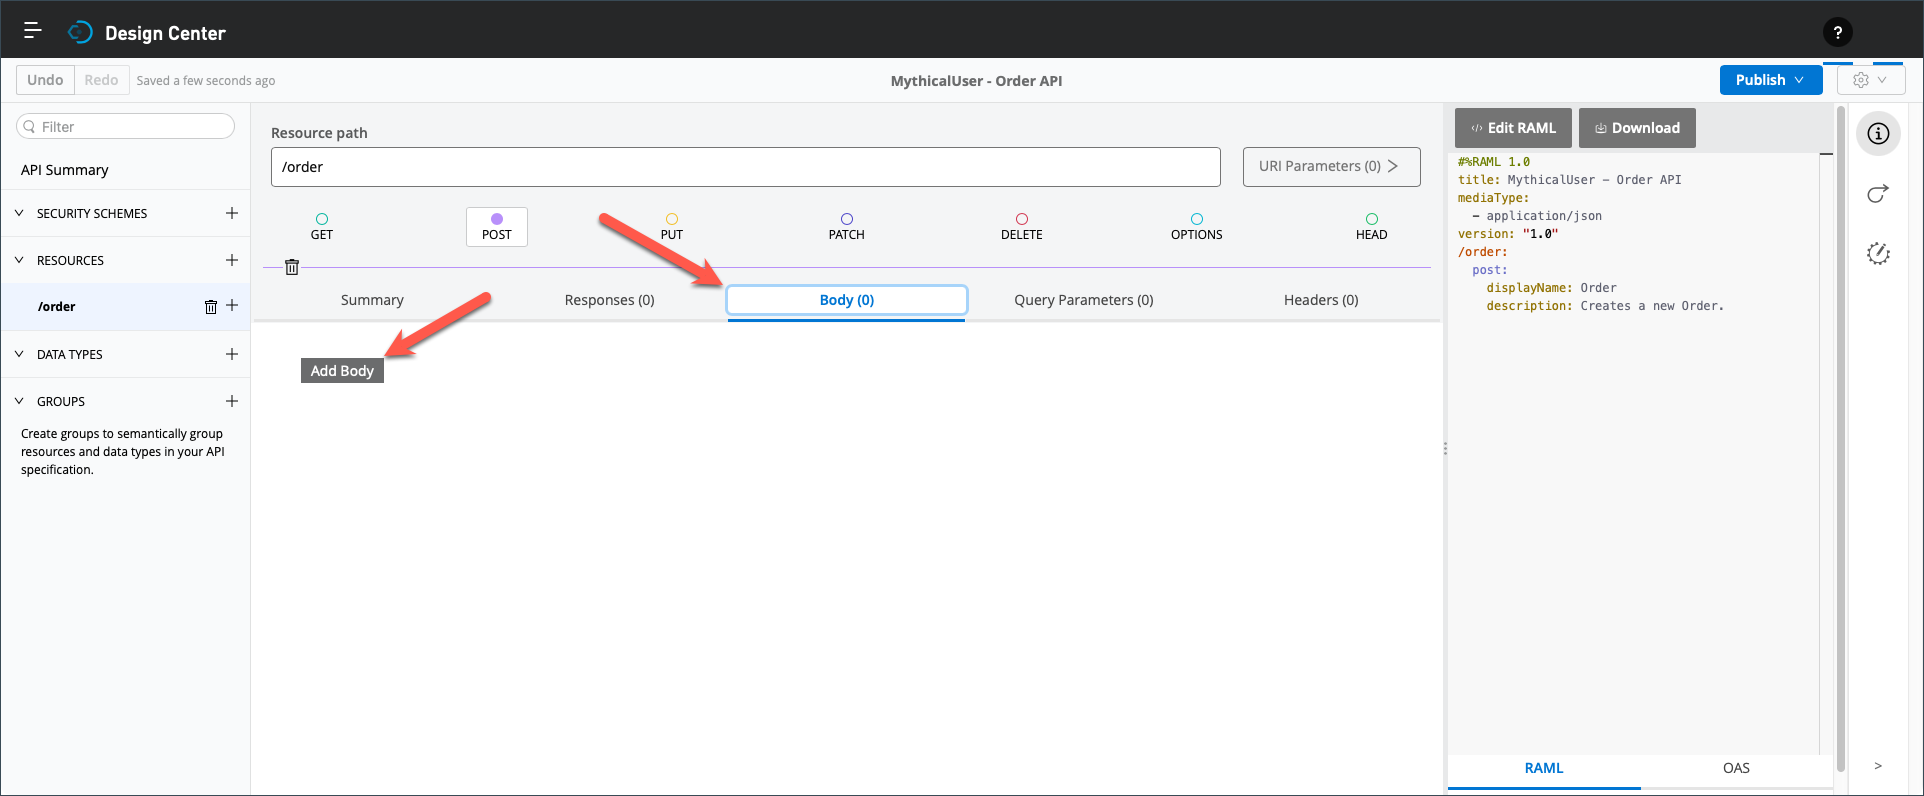
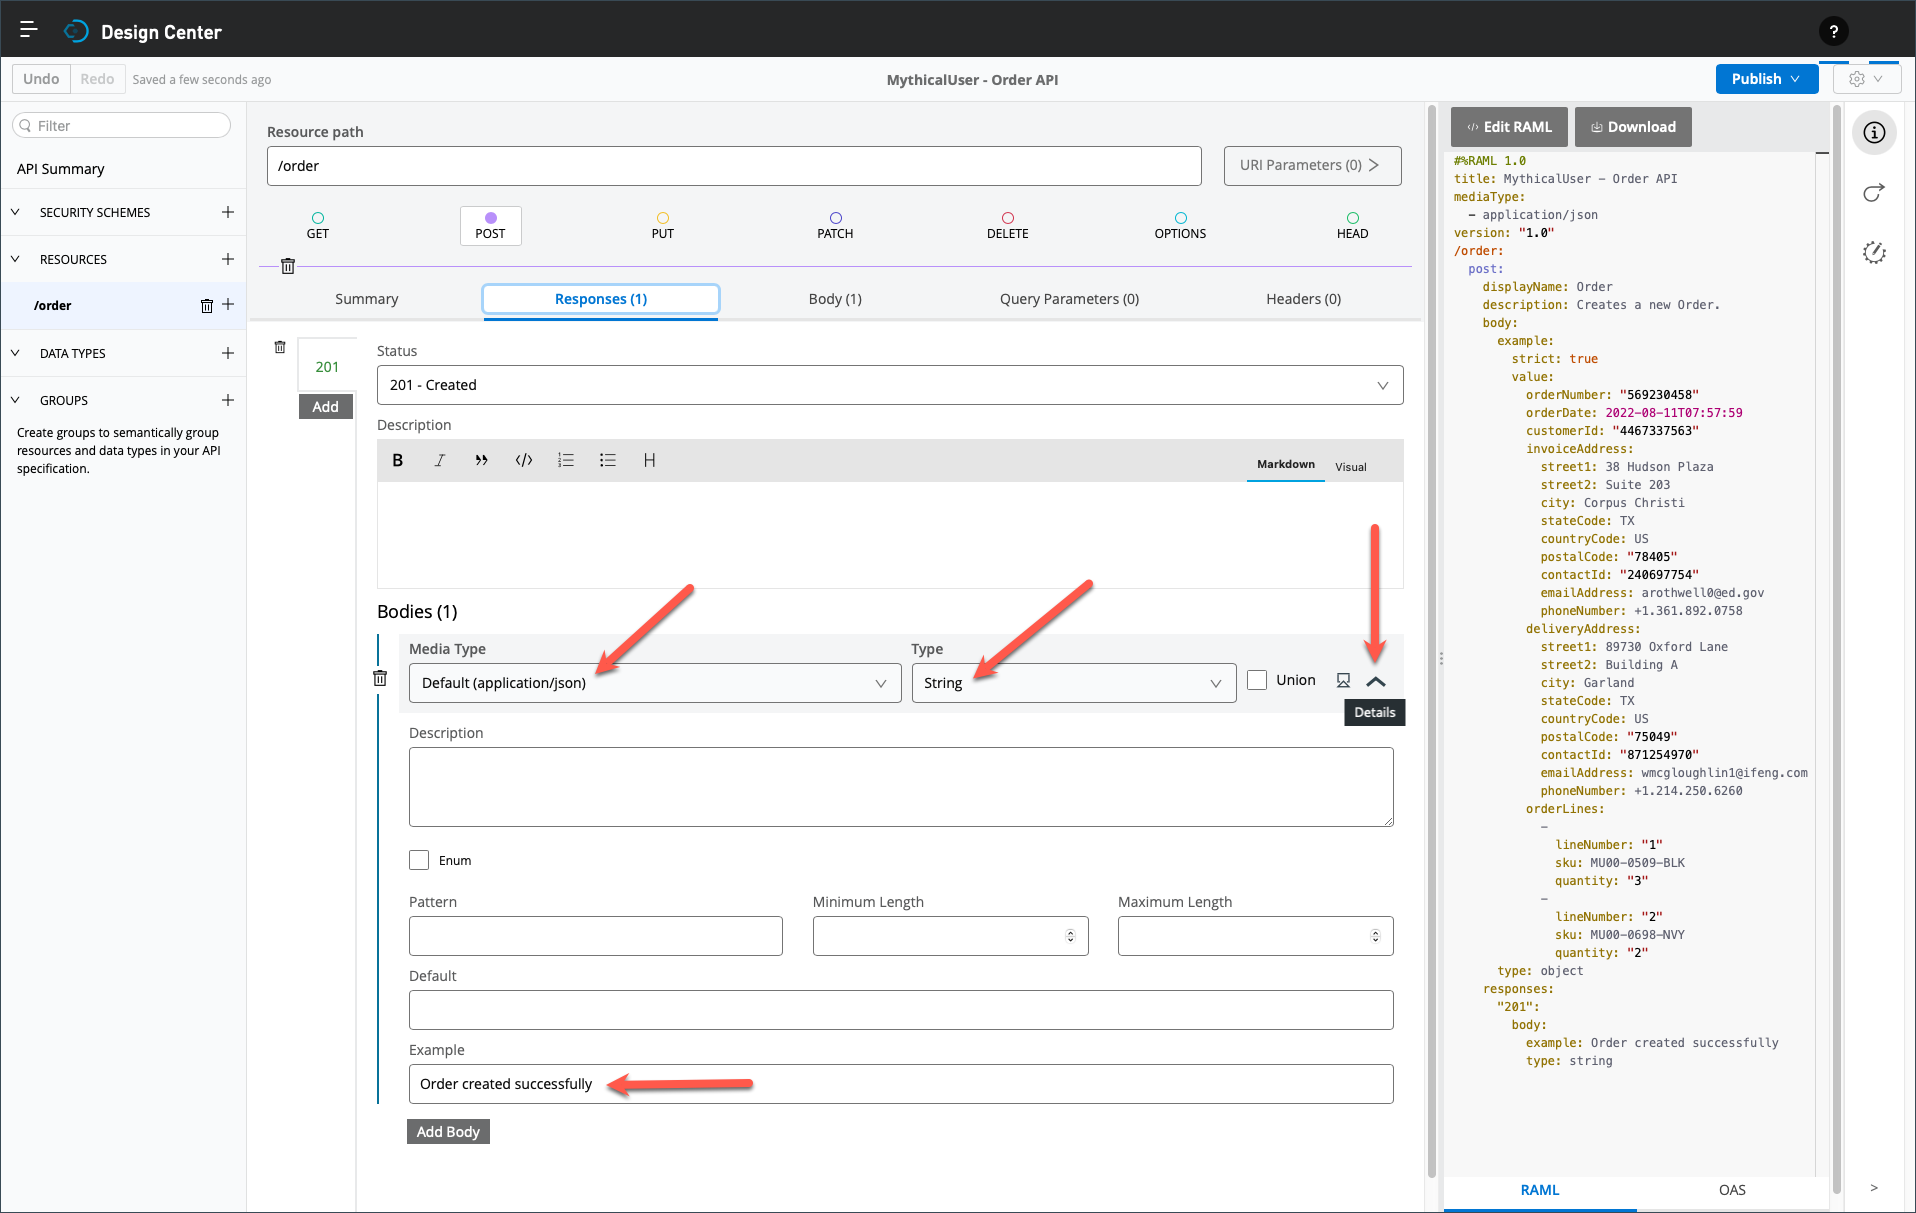
Now, click on the Body tab, and then the Add Body button. Naturally, the body represents the request message expected by the Post method.
-
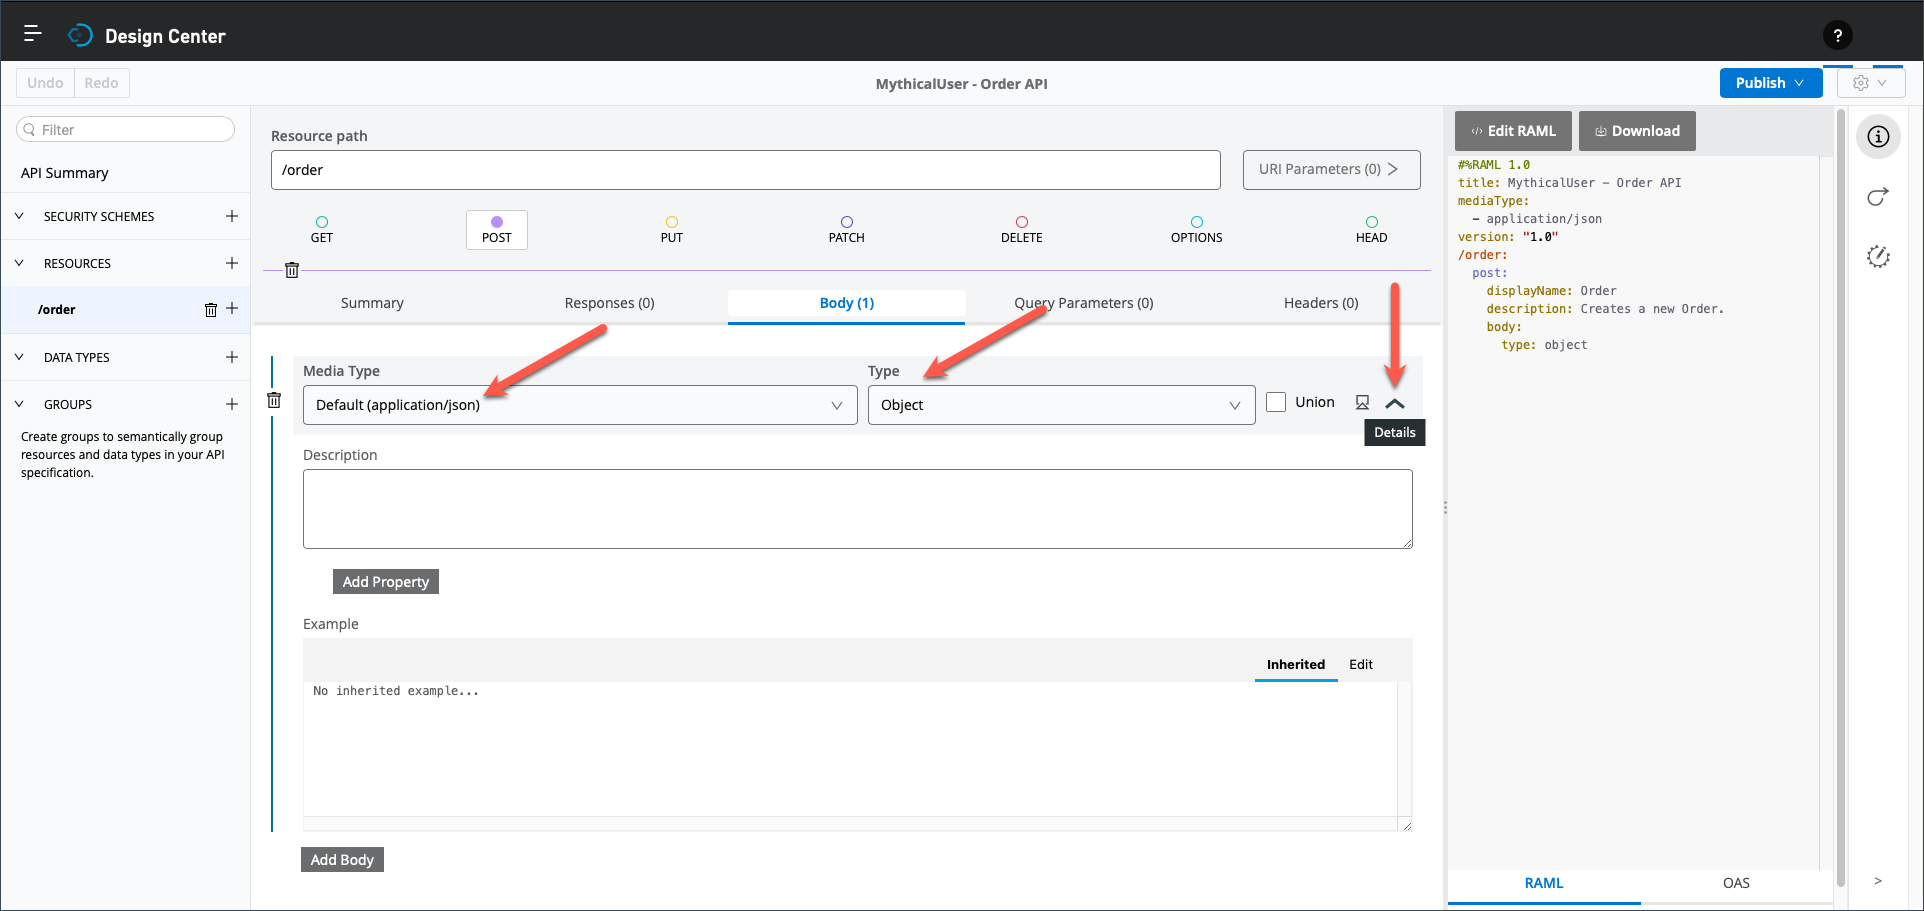
Accept the default value for Media Type, select Object for Type, and click on the details icon.
-
Click on the Edit tab right of the Example text box, and paste the following JSON example into the Example text box.
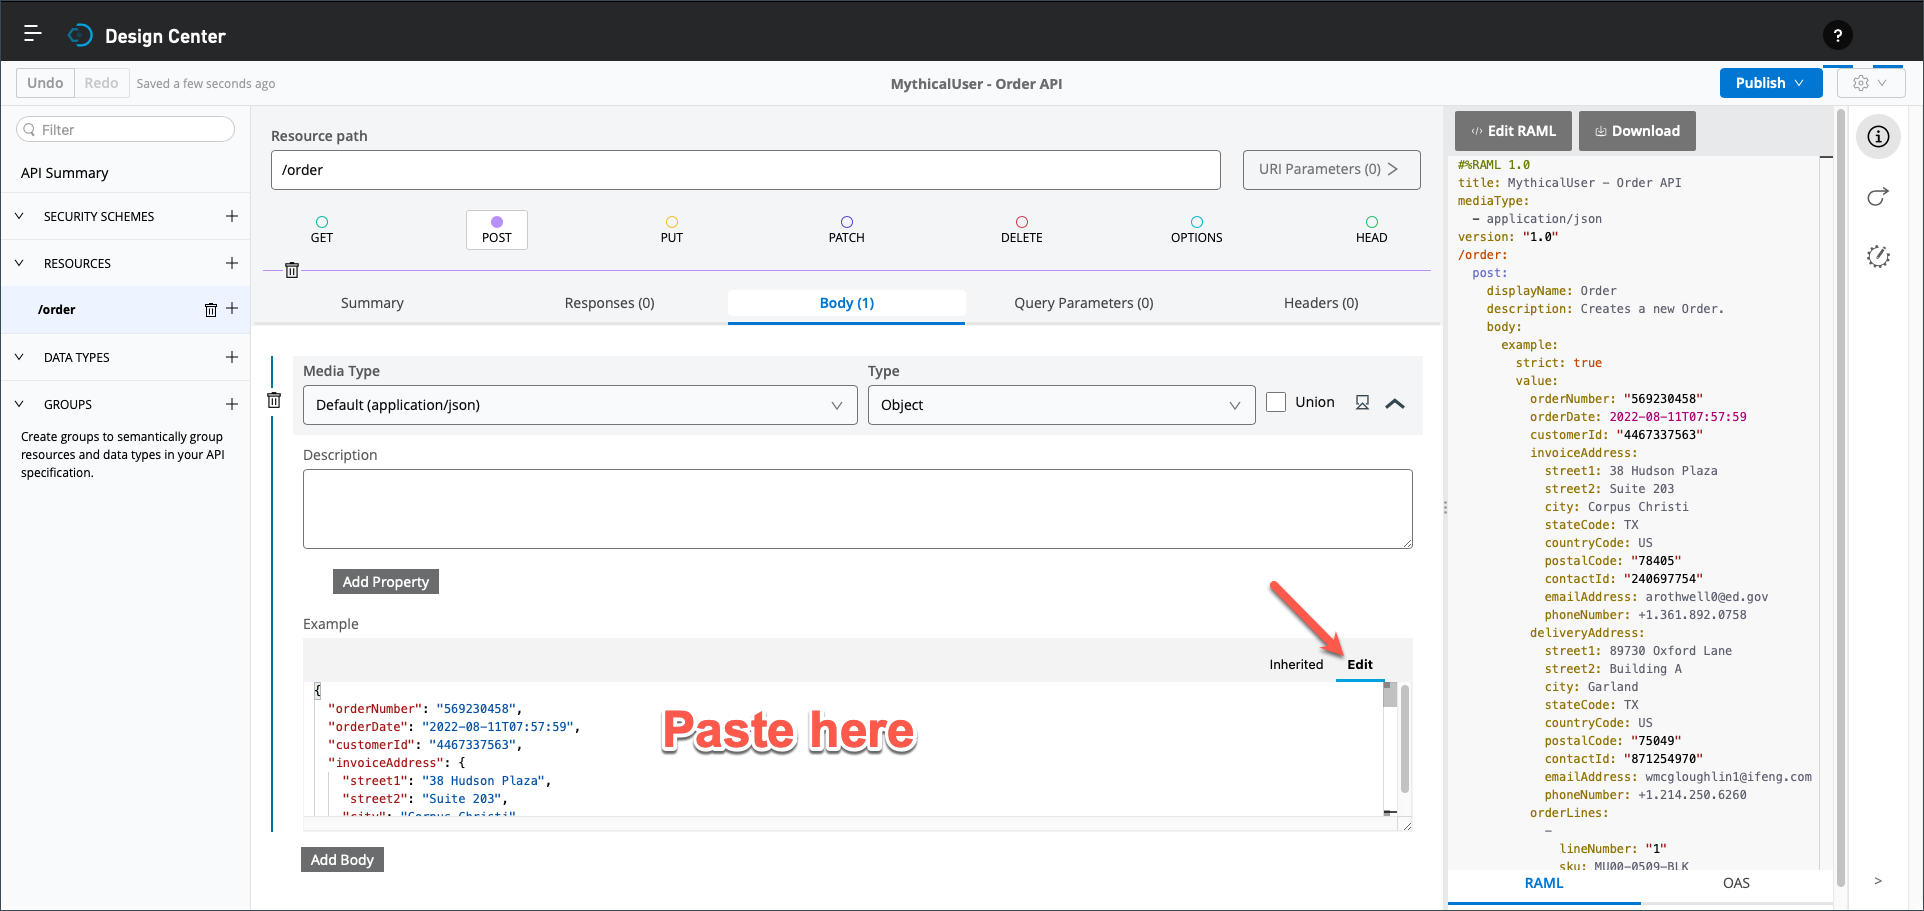
{ "orderNumber": "569230458", "orderDate": "2022-08-11T07:57:59", "customerId": "4467337563", "invoiceAddress": { "street1": "38 Hudson Plaza", "street2": "Suite 203", "city": "Corpus Christi", "stateCode": "TX", "countryCode": "US", "postalCode": "78405", "contactId": "240697754", "emailAddress": "arothwell0@ed.gov", "phoneNumber": "+1.361.892.0758" }, "deliveryAddress": { "street1": "89730 Oxford Lane", "street2": "Building A", "city": "Garland", "stateCode": "TX", "countryCode": "US", "postalCode": "75049", "contactId": "871254970", "emailAddress": "wmcgloughlin1@ifeng.com", "phoneNumber": "+1.214.250.6260" }, "orderLines": [ { "lineNumber": "1", "sku": "MU00-0509-BLK", "quantity": "3" }, { "lineNumber": "2", "sku": "MU00-0698-NVY", "quantity": "2" } ] } -
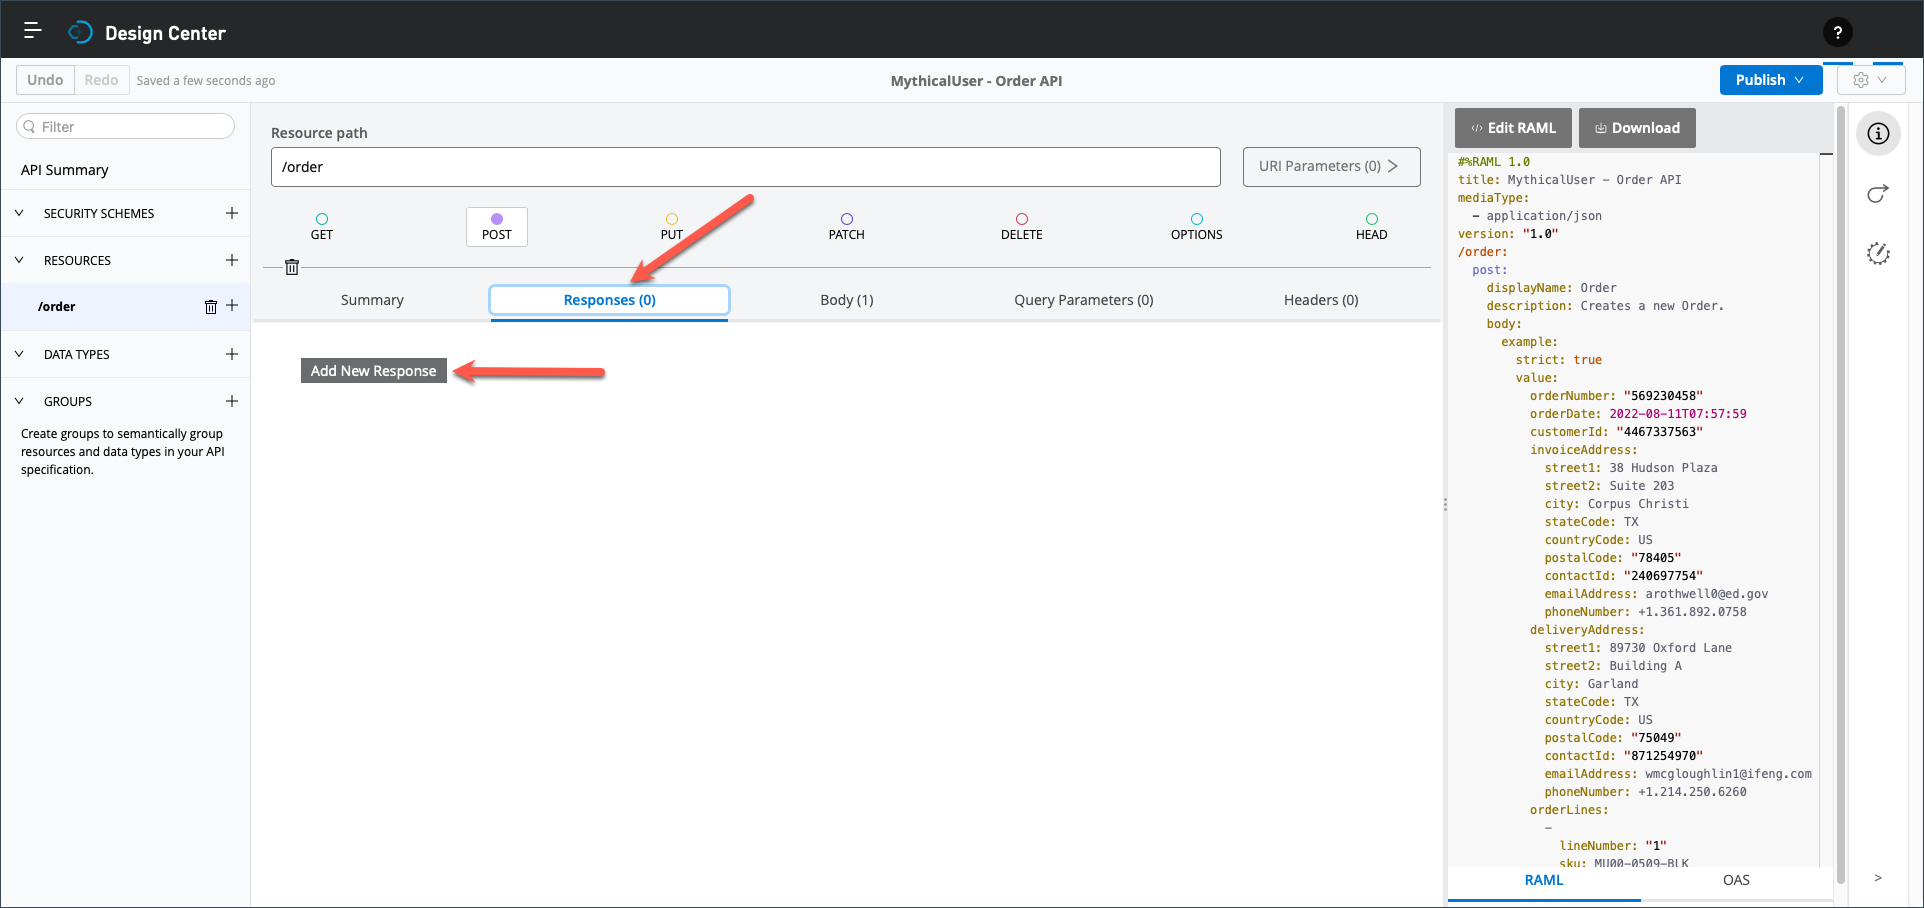
Next, click on the Responses tab, and then the Add New Response button.
-
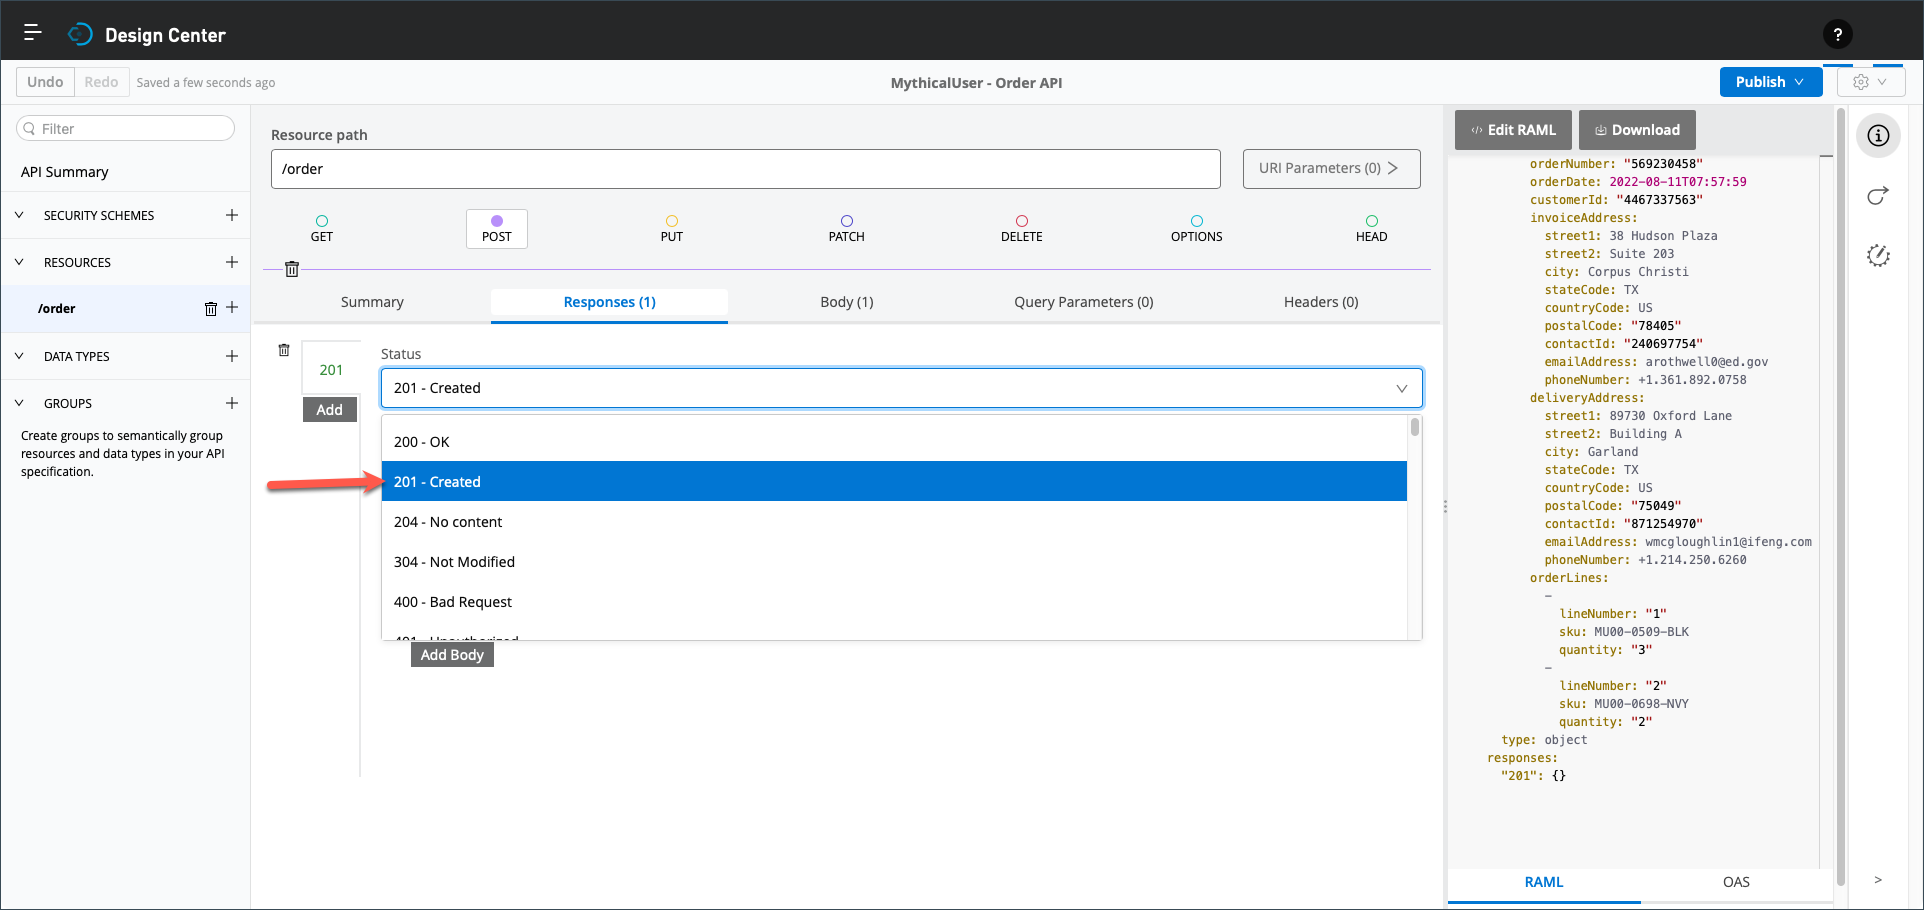
Select 201 - Created tab from the Status drop down list.
-
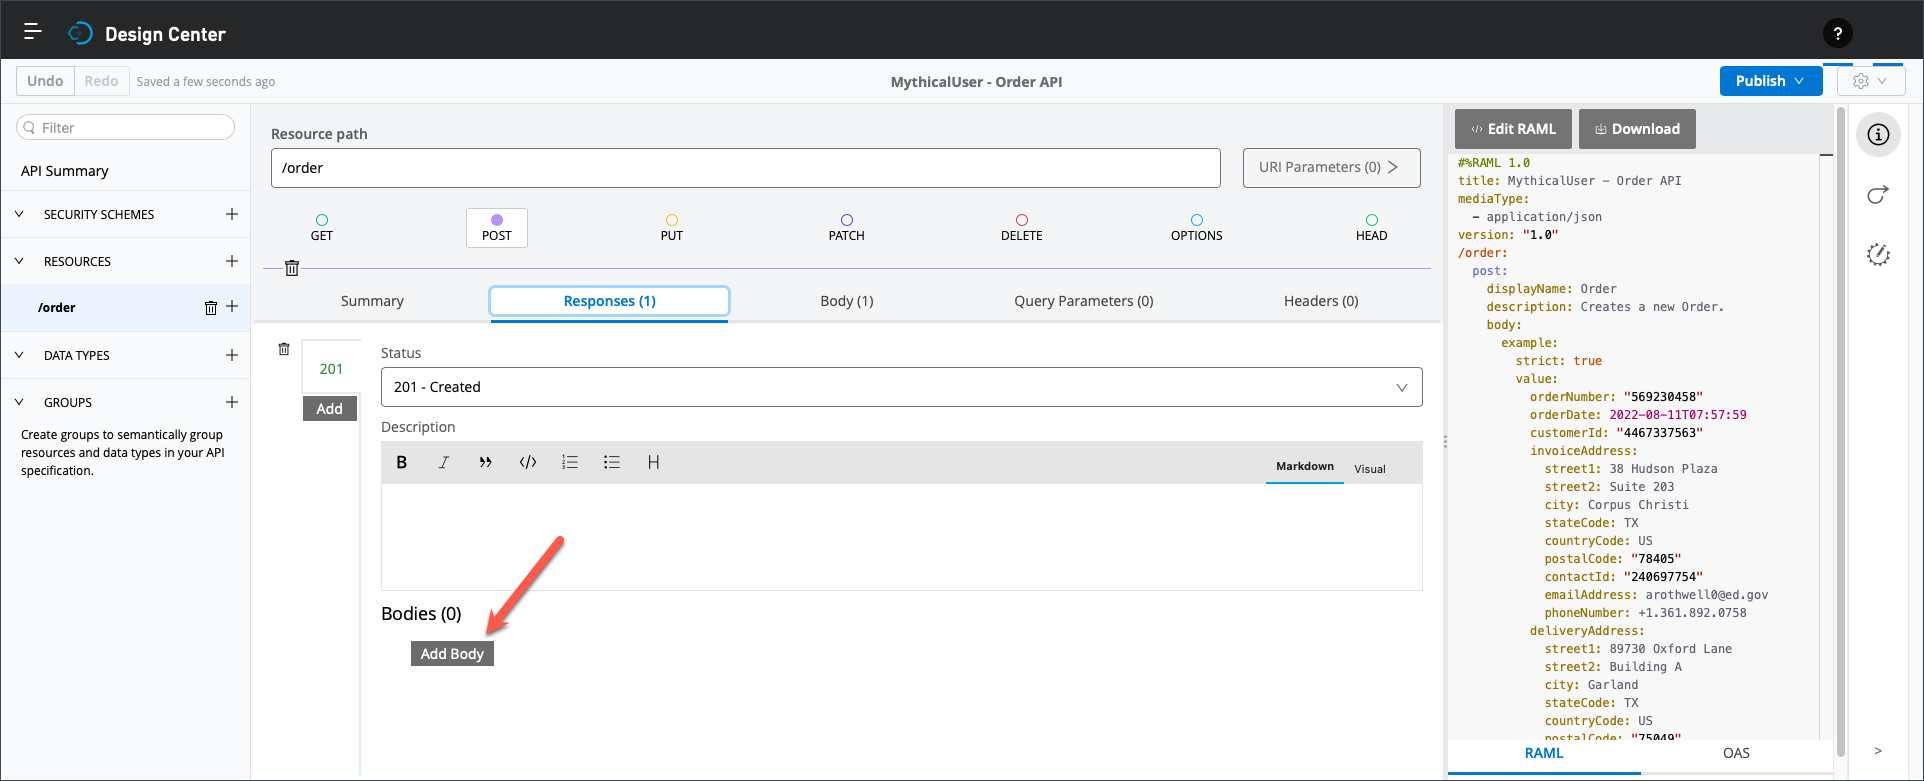
Click on the Add Body button. Naturally, the body, in this case, represents the response message returned by the Post method when the status is 201 (i.e., resource created successfully).
-
Now:
-
Accept the default value for Media Type,
-
Select String for Type,
-
Click on the details icon, and
-
Enter Order created successfully for the Example.
-
Step 4: Switch to the API Designer Text Editor
At this stage, we created our API specification using a low code approach made possible by the visual editor. Now, we will switch to the text editor and briefly explore some of its features and capabilities.
-
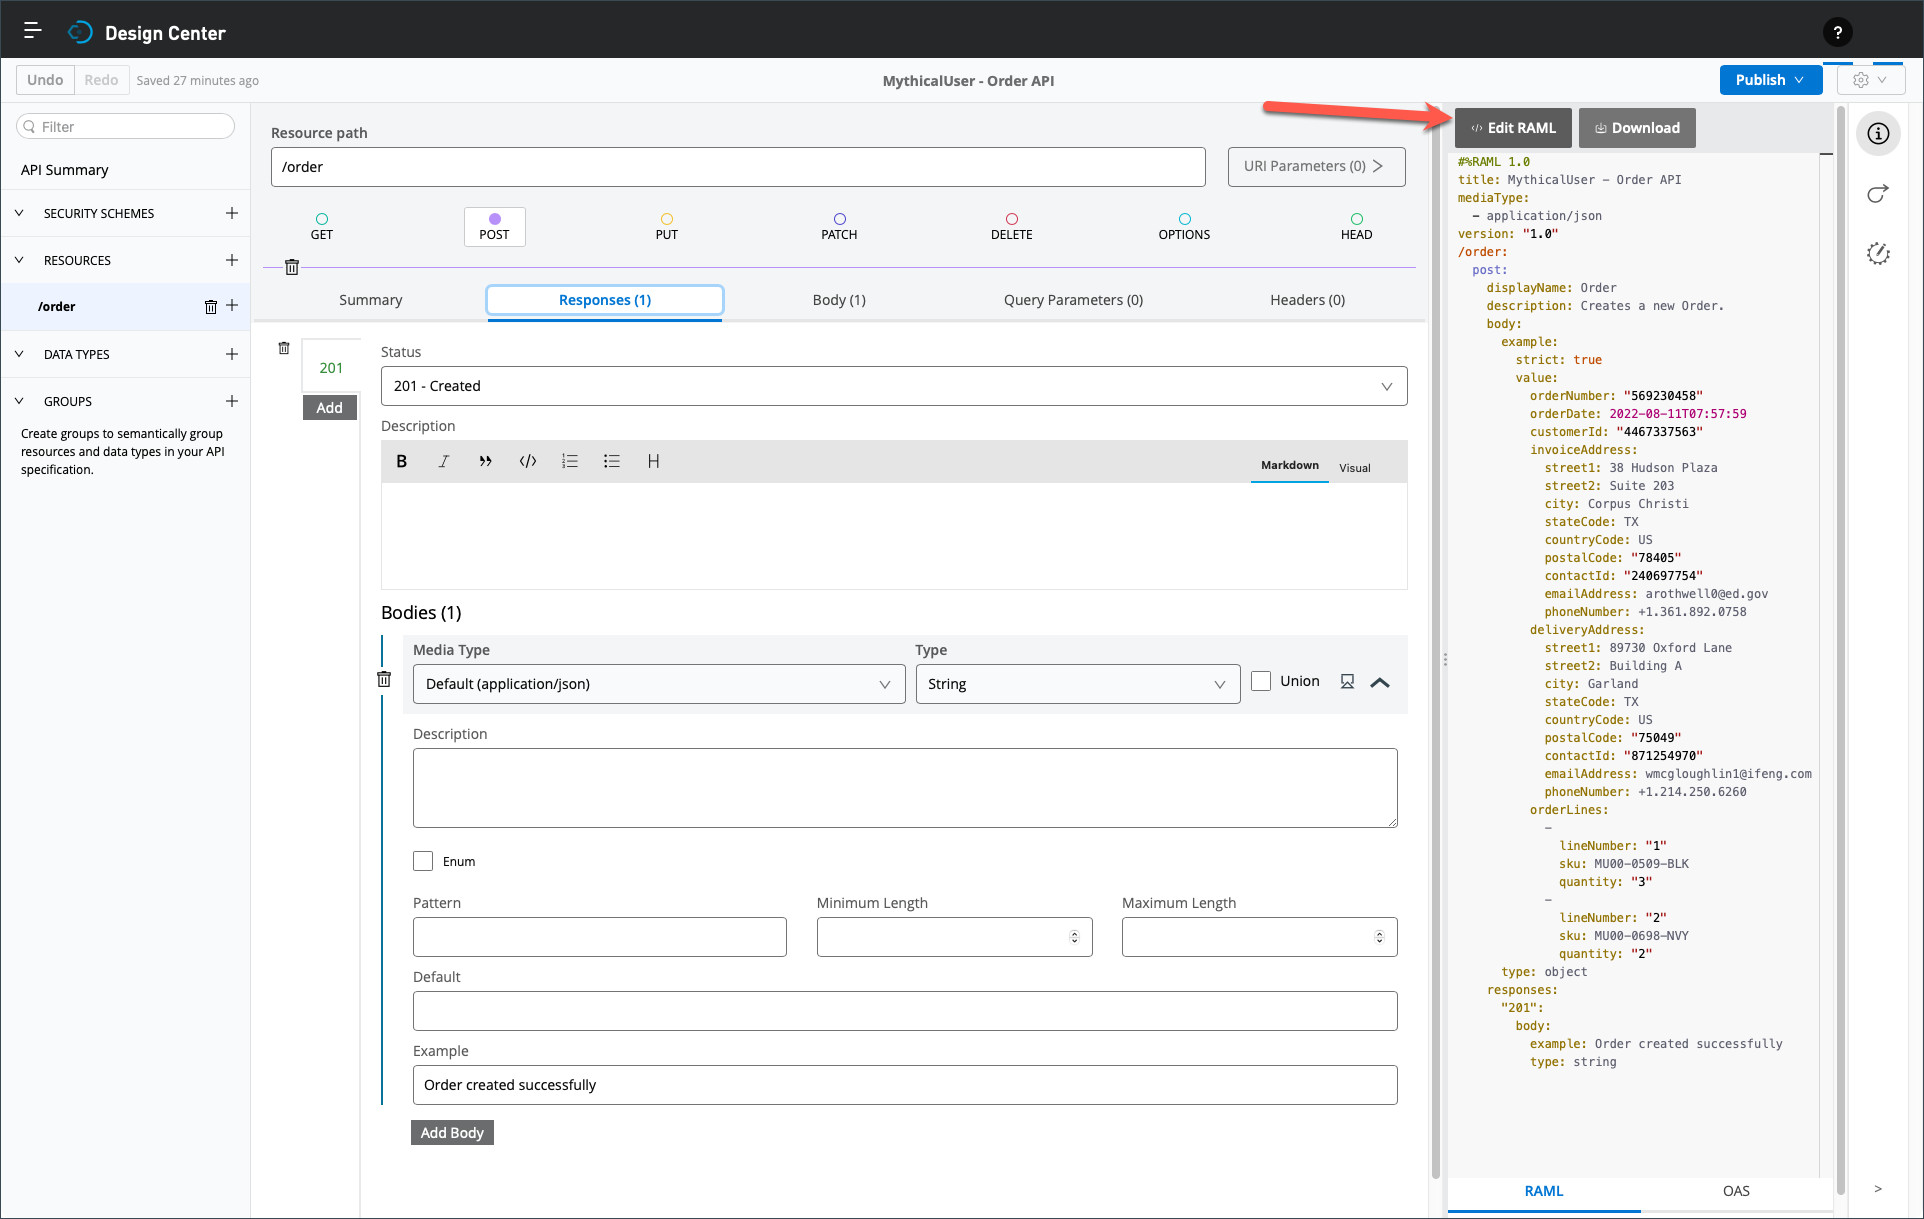
Now, switch to the text editor by clicking on the Edit RAML button.
|
Select the RAML tab in the lower right if the button is labeled Edit OAS. The text editor supports authoring API specifications using both RAML and OAS. However, we are using RAML for this lab exercise. |
-
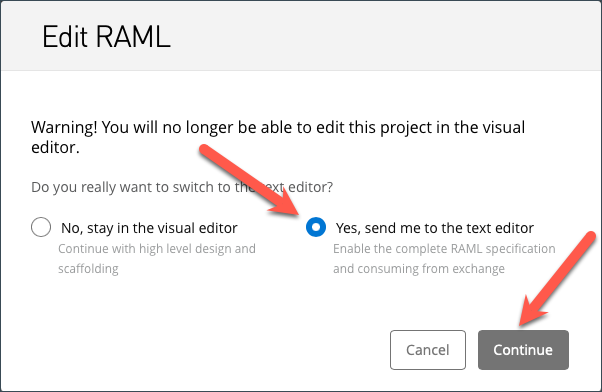
On the popup window:
-
First, notice the warning which states that you will no longer be able to use the visual editor once you switch.
-
Then, select the Yes, send me to the text editor radio button, and finally, click on the Continue button.
-
-
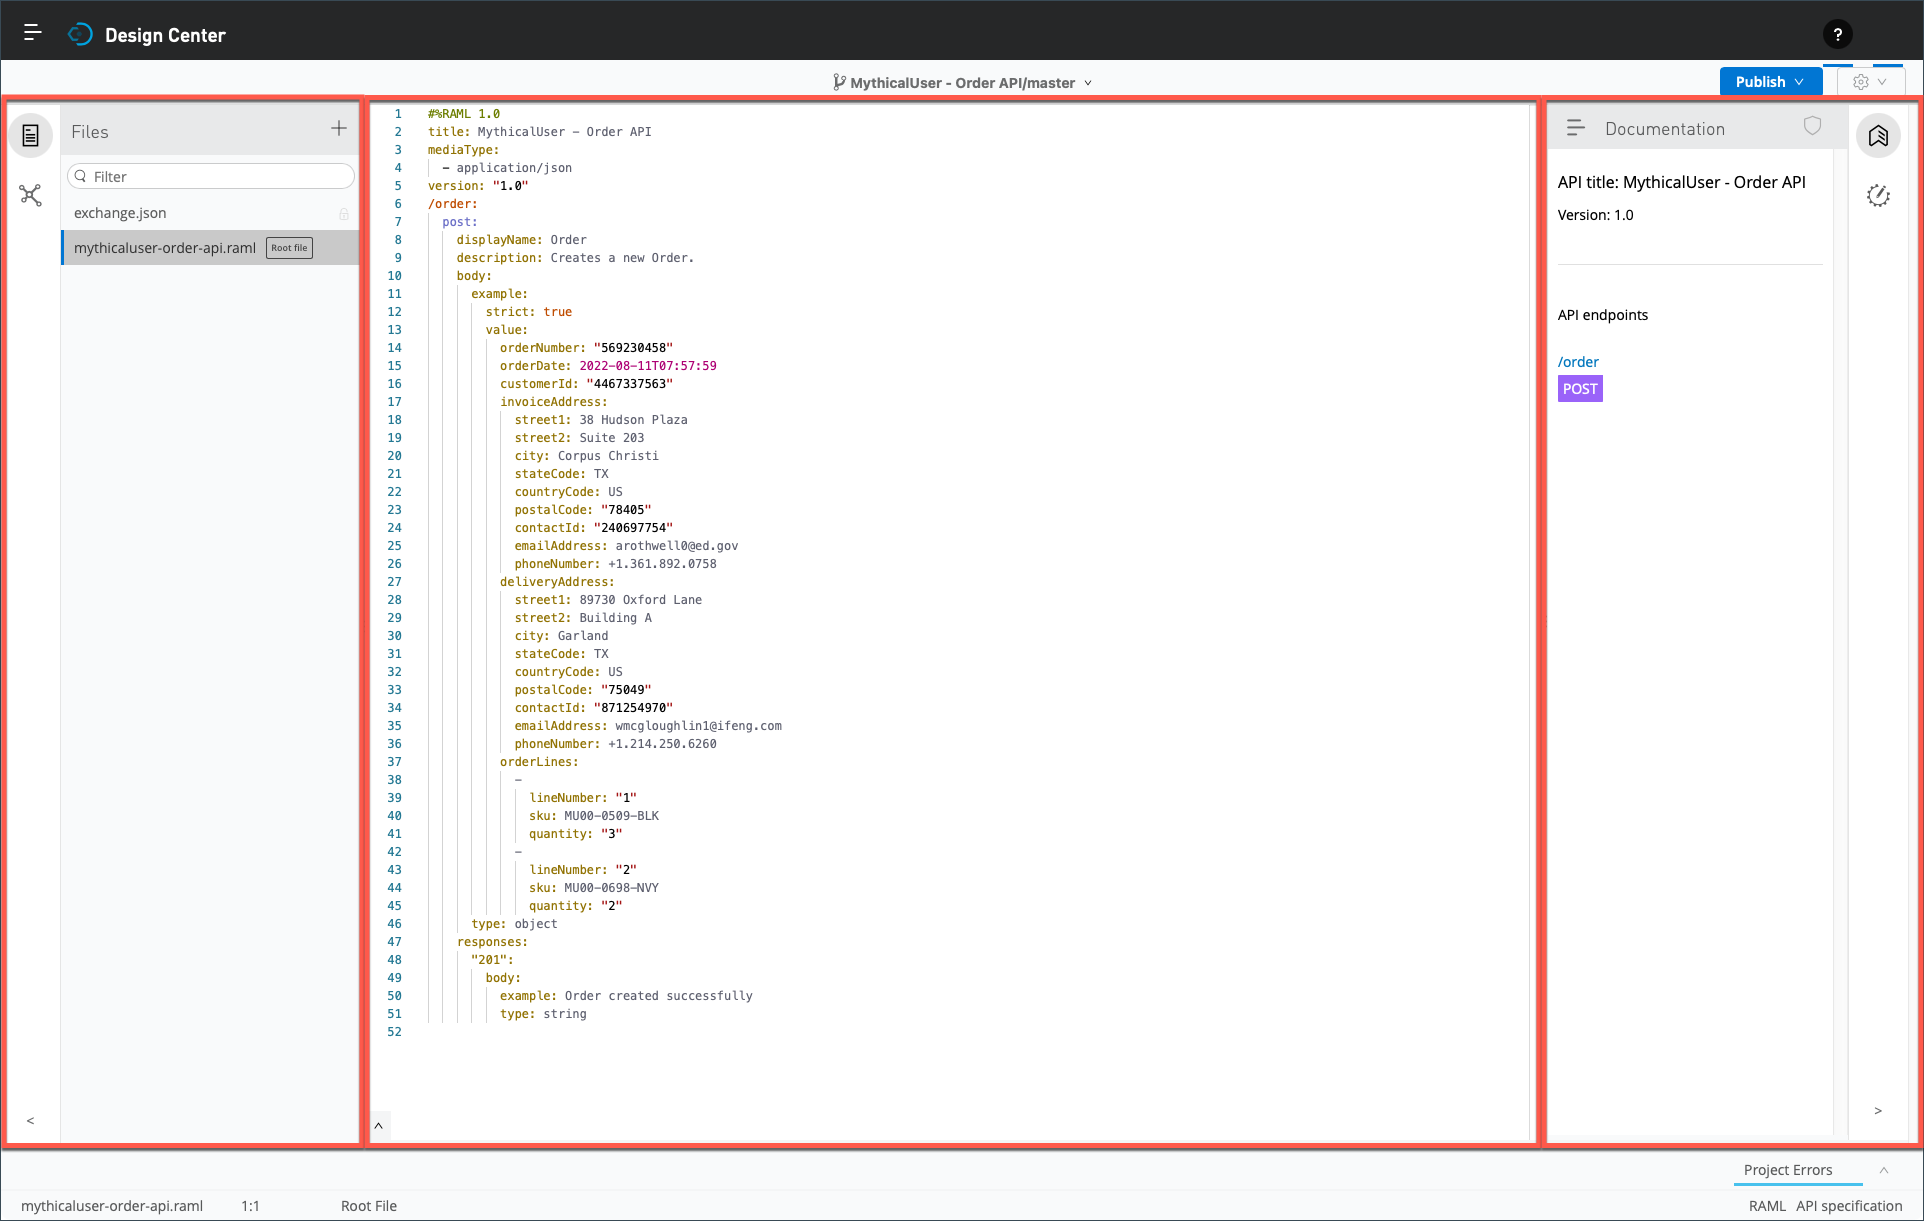
The text editor is divided into three primary panels.
-
By default, the left panel lists the files in your project. The text editor updates this information in real-time as you update your API specification. In fact, it parses the API specification, even leveraging titles, display names, descriptions, documentation, etc., to generate this preview. Ultimately, this preview accurately represents the information displayed in Anypoint Exchange when you publish your API.
-
The middle panel is the editor where you create and update your API specification using either RAML or OAS.
-
The right panel, by default, shows a preview of the generated API documentation, structured by resources and methods supported.
-
-
Now, notice the four collapse and expand buttons.
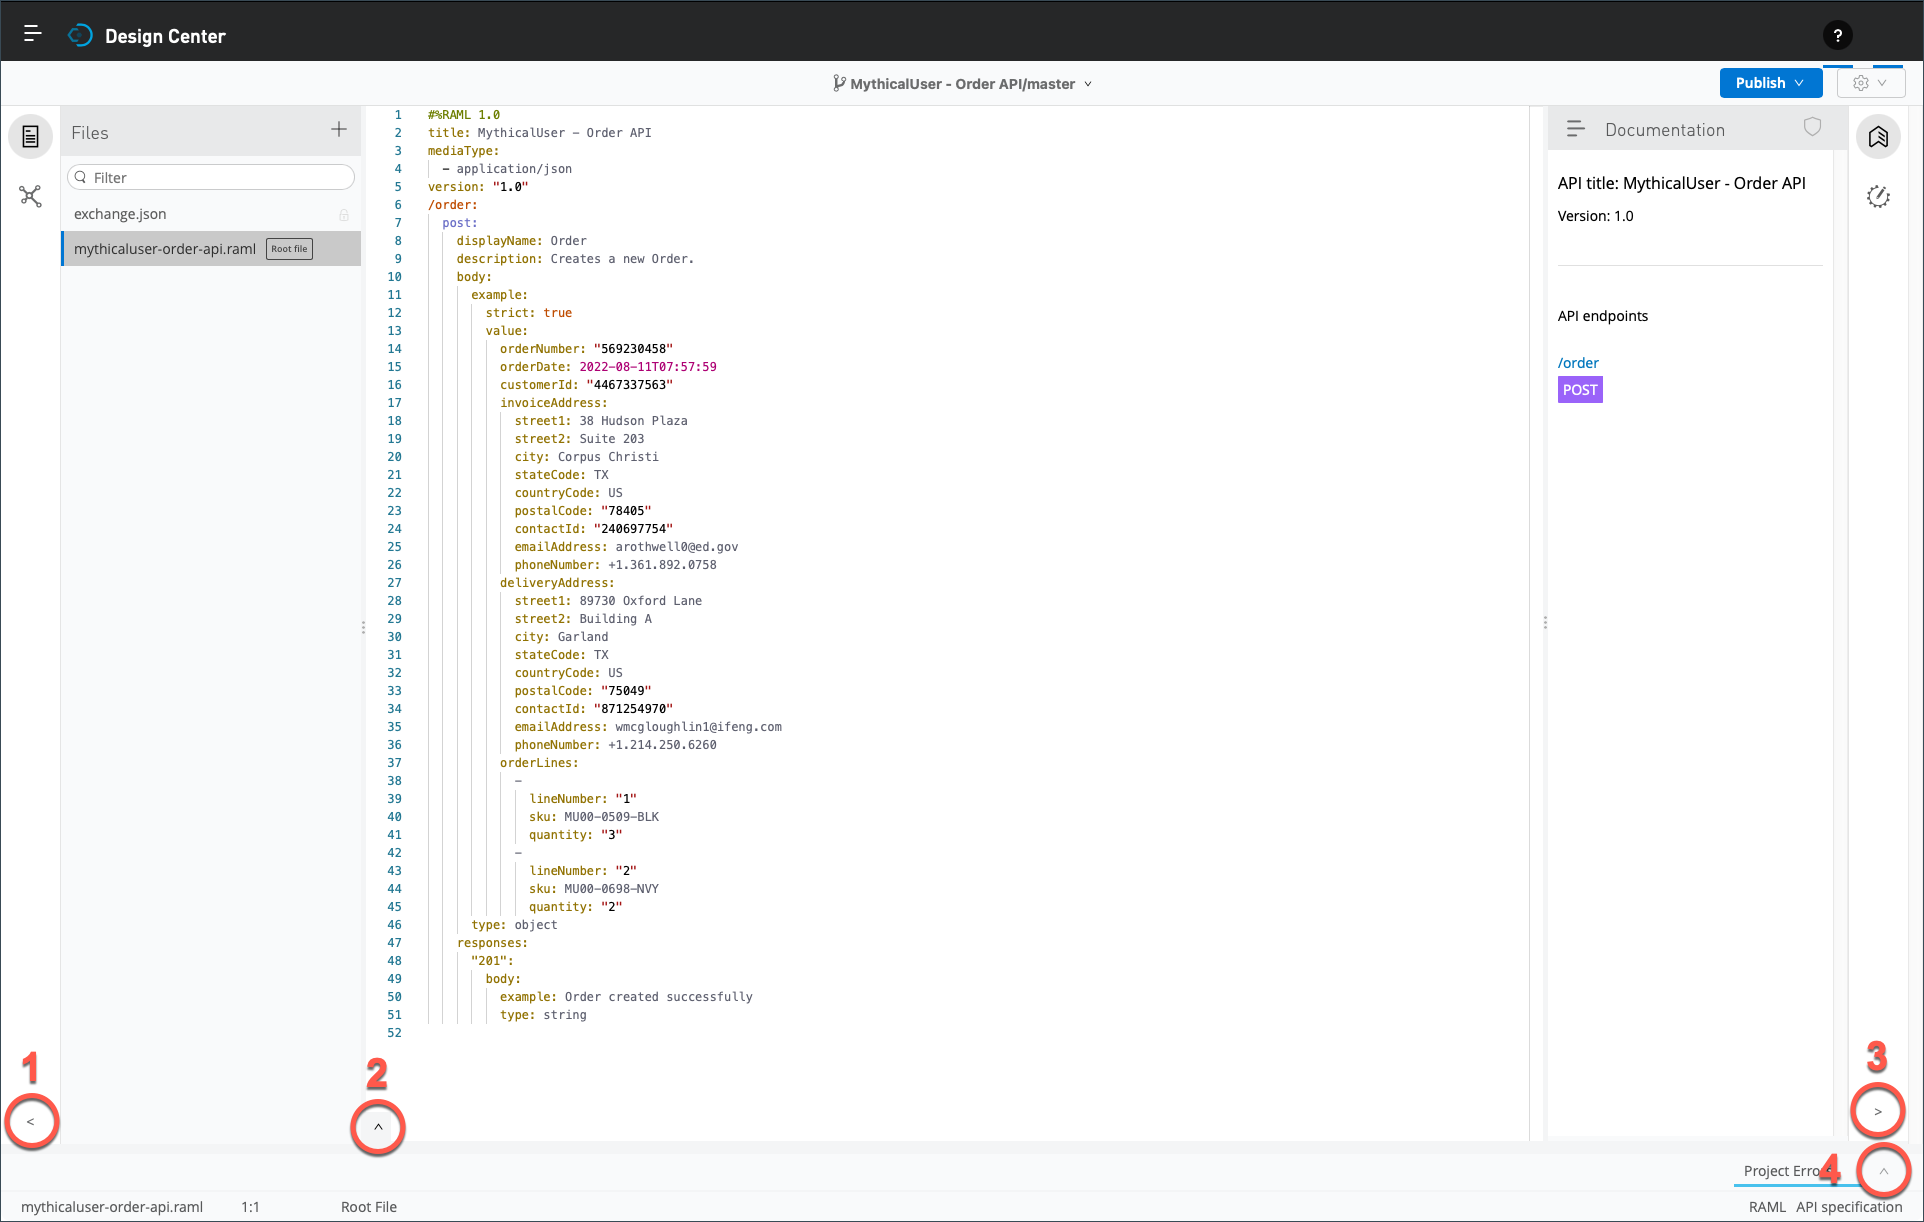
-
Button numbered 1 on the screen capture collapses and expends the left panel.
-
Button #2 expends the editor shelf, which provides autocompletion based on the cursor’s position in the editor window. The API Designer text editor shows the editor shelf by default. However, the screen captures showed it collapsed for illustrative purposes.
-
Button #3 collapses and expends the right panel.
-
Button #4 collapses and expends another panel that shows any project errors.
-
-
Next, notice the second button from the top left.
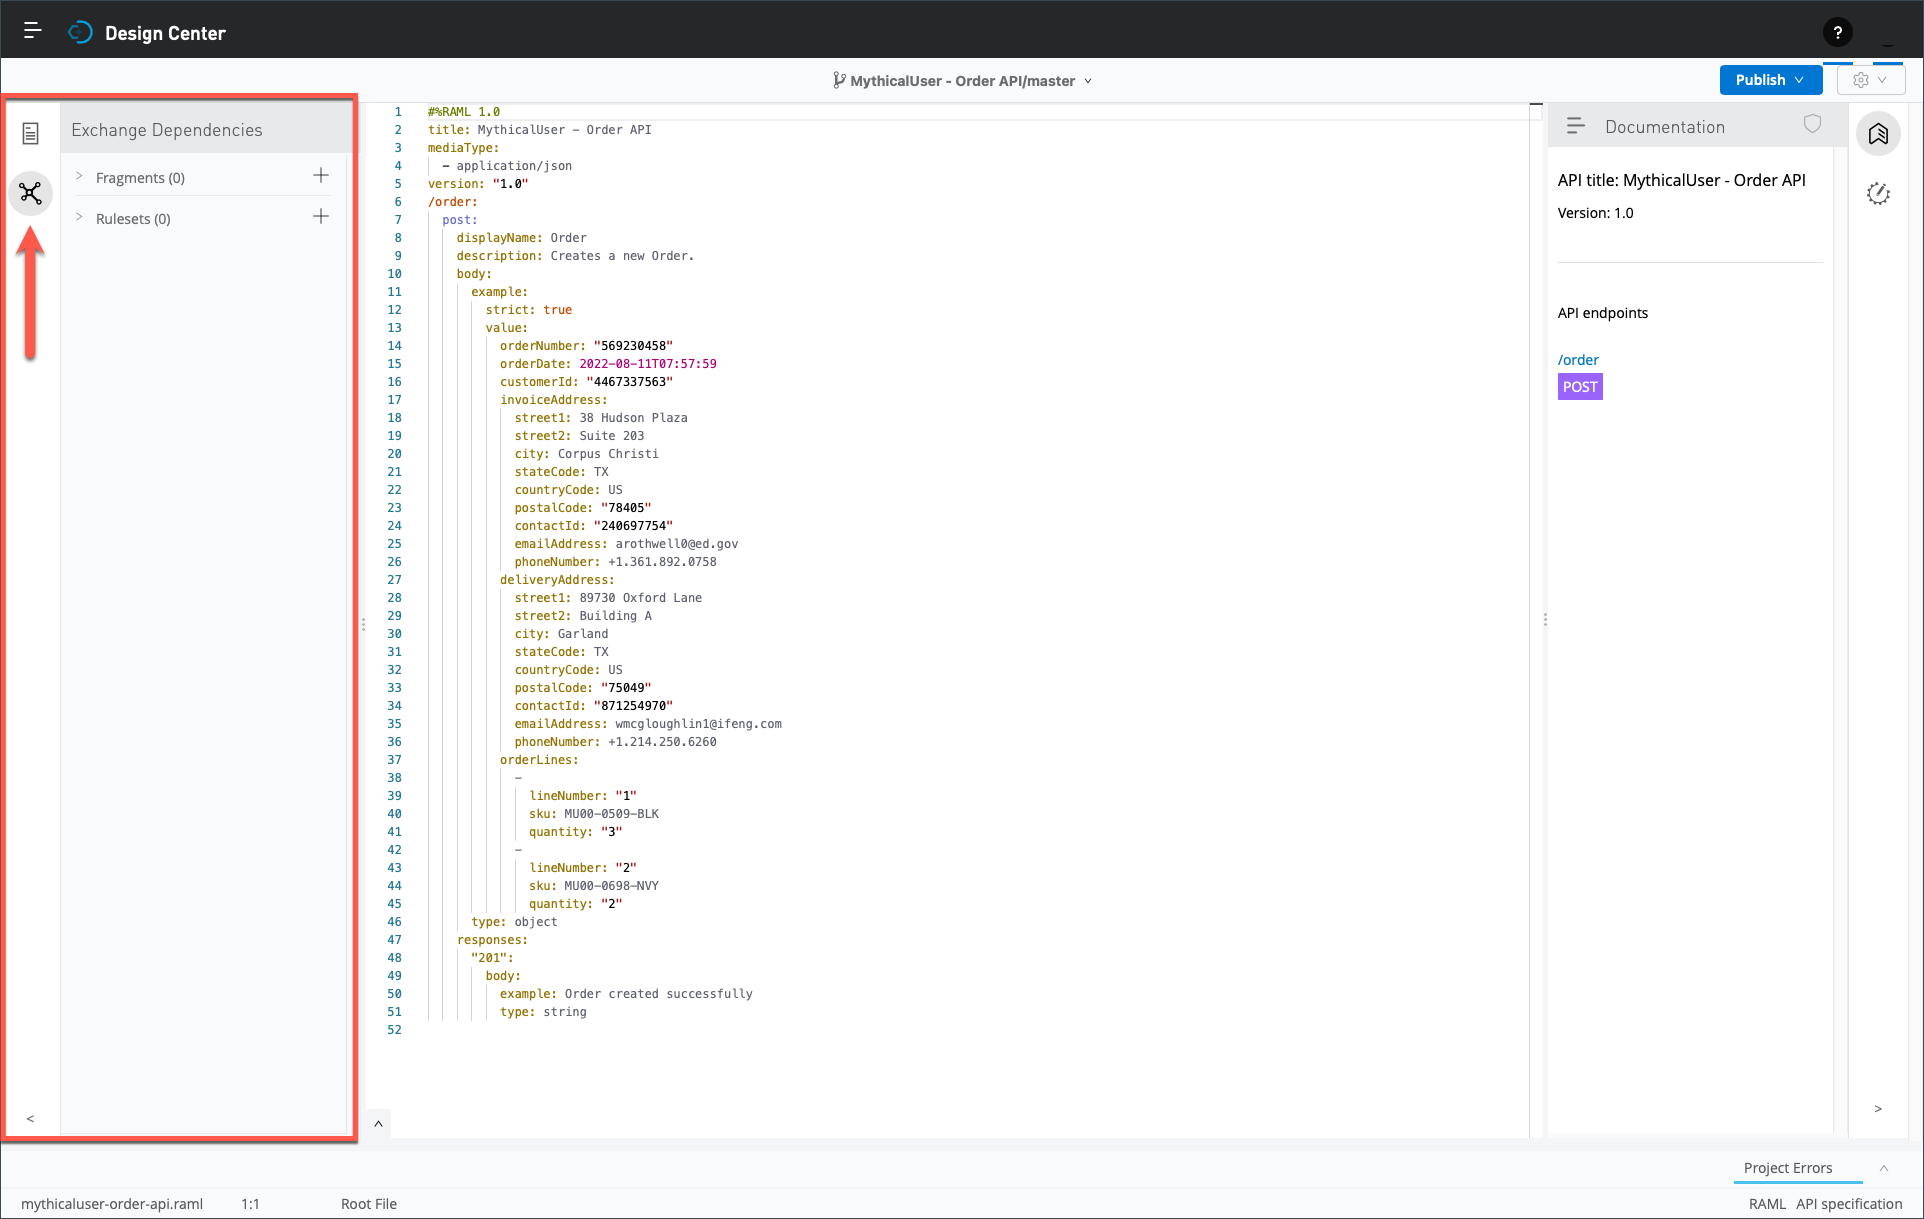
When selected, the left panel displays any dependencies you imported from Anypoint Exchange. You will explore this concept momentarily.
-
Finally, notice the second button from the top right.
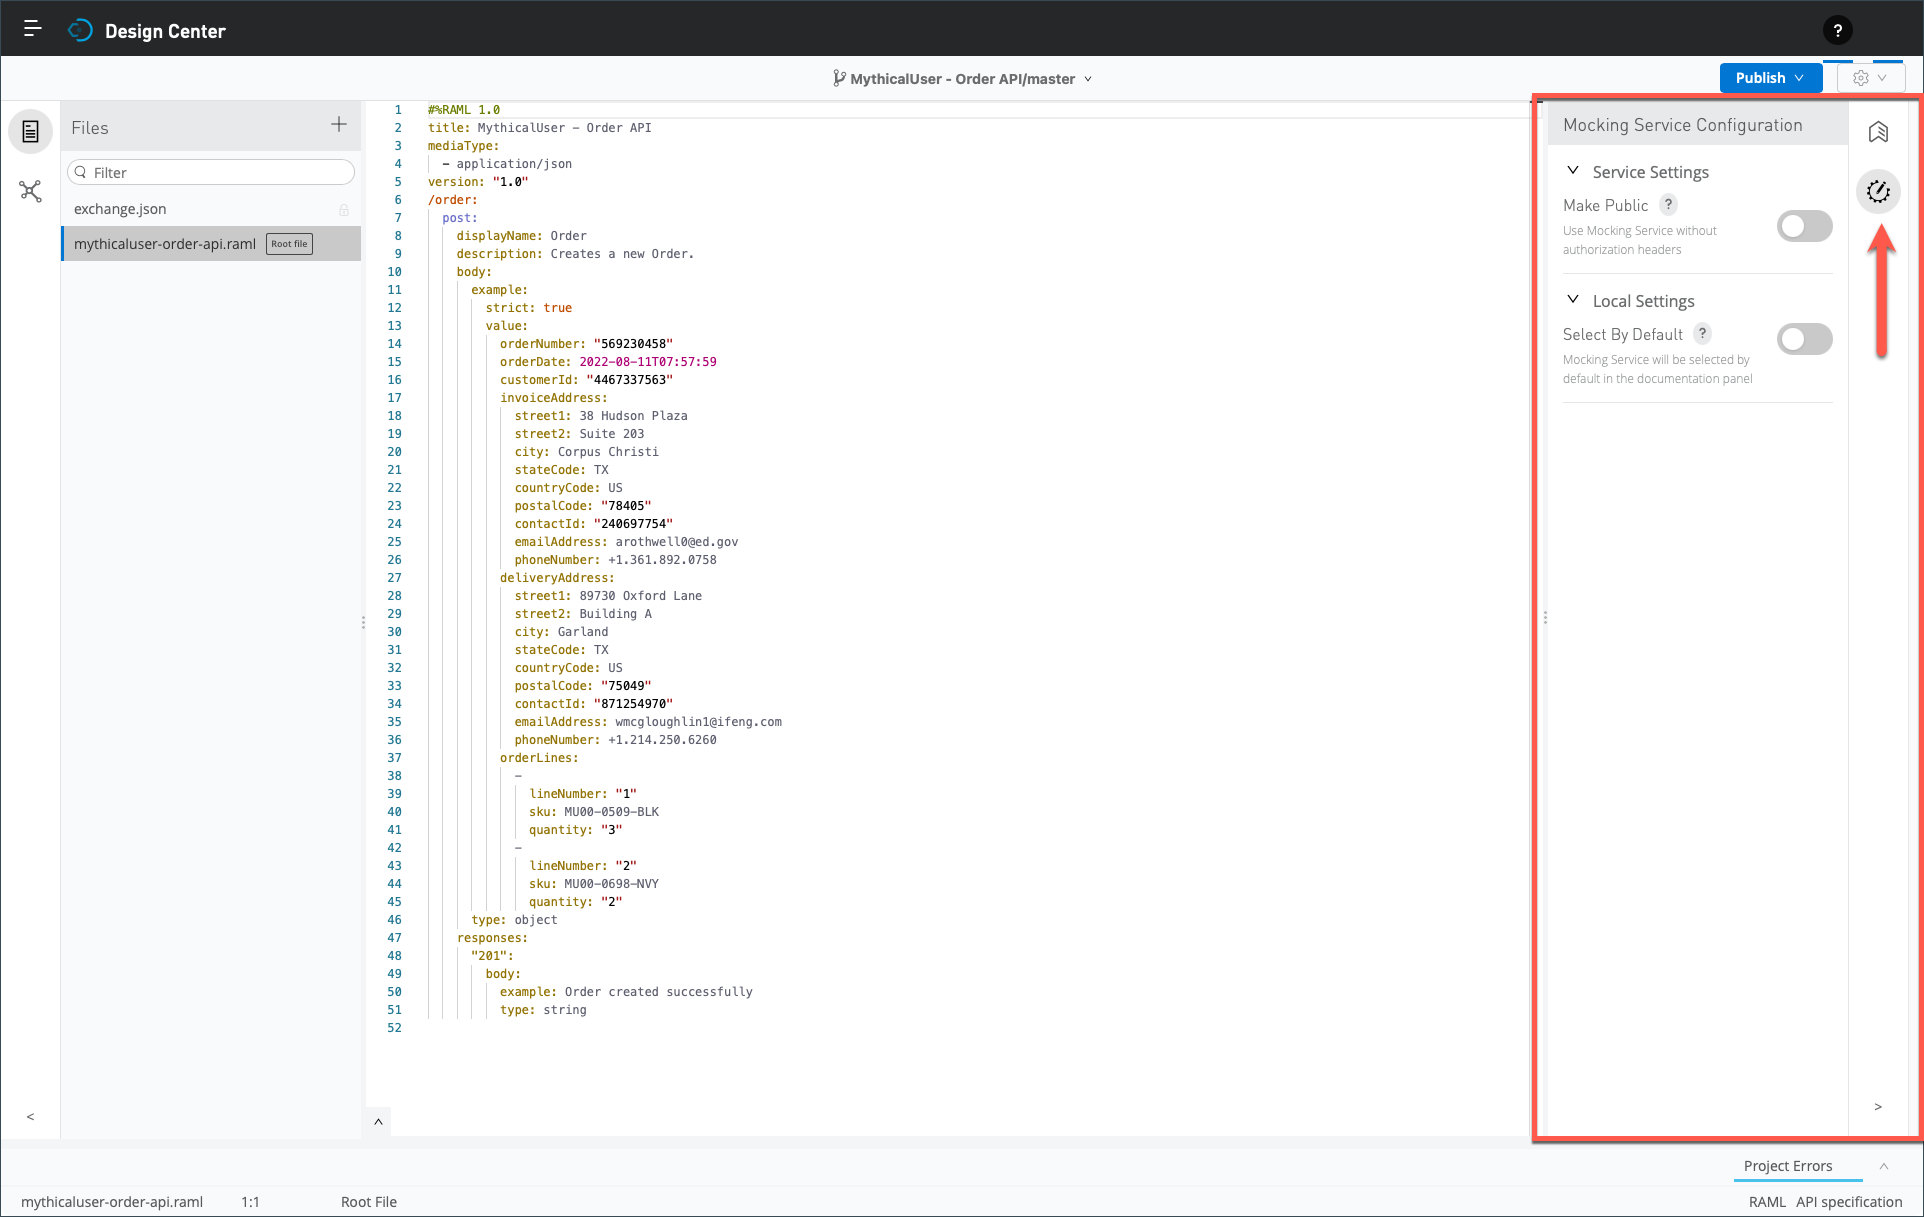
When selected, the right panel displays the mocking service, which is shown disabled on the screen capture. You will use the mocking service shortly.
Step 5: Update the API Specification Using the Text Editor
|
It is not uncommon for experienced API designers and developers to start with the visual editor to flesh out most, if not all of an API specification. Then, they will switch to the text editor to leverage more advanced techniques if needed. |
-
Expends the editor shelf if it is collapsed.
-
Enter a new line below the Title element, and make sure your cursor is in column 1.
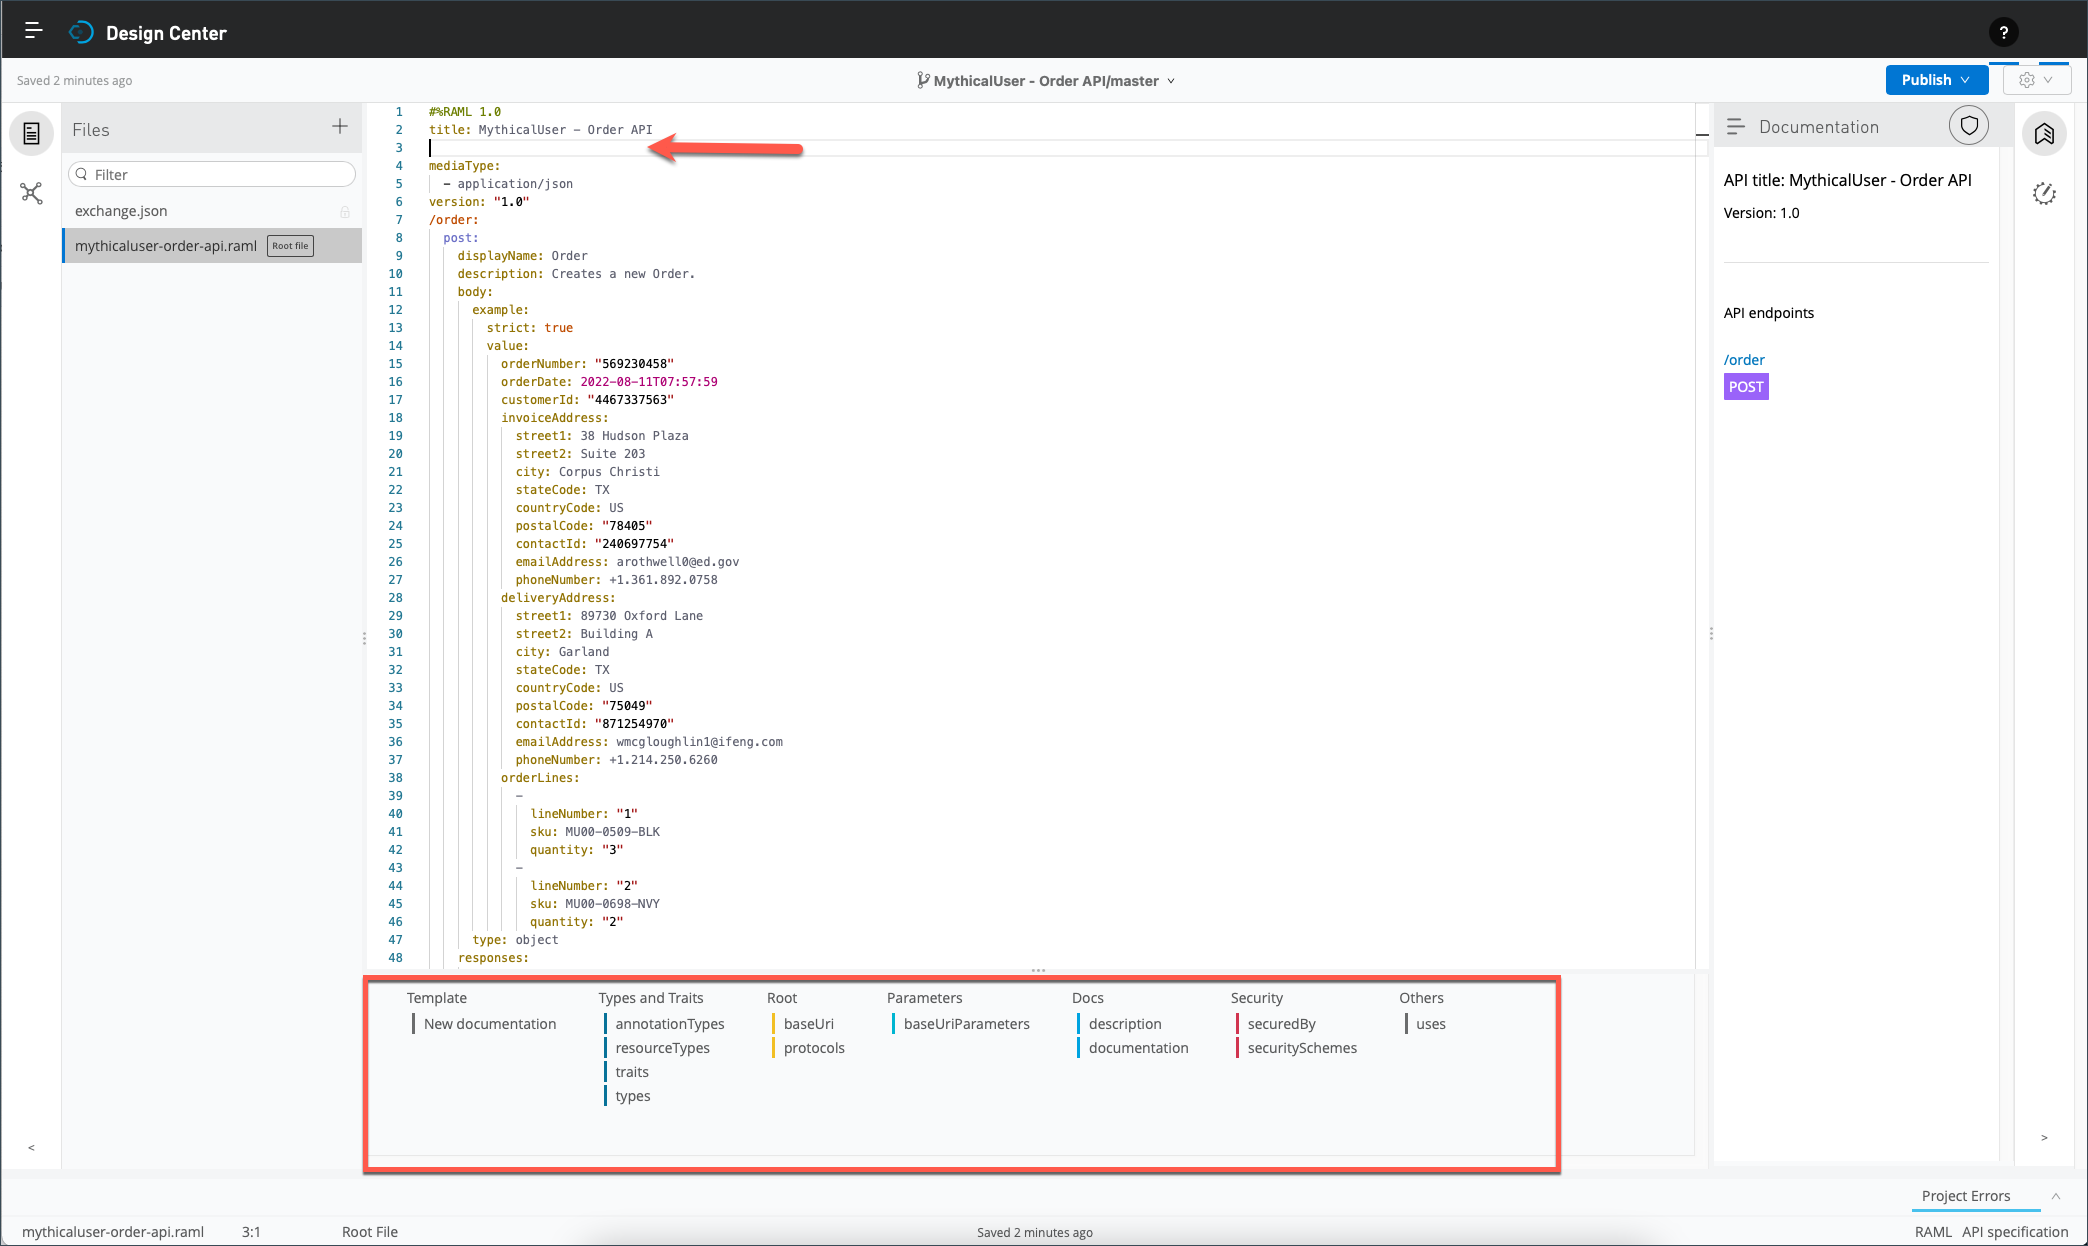
As stated above, the editor shelf suggests RAML elements based on the cursor’s position in the editor window.
-
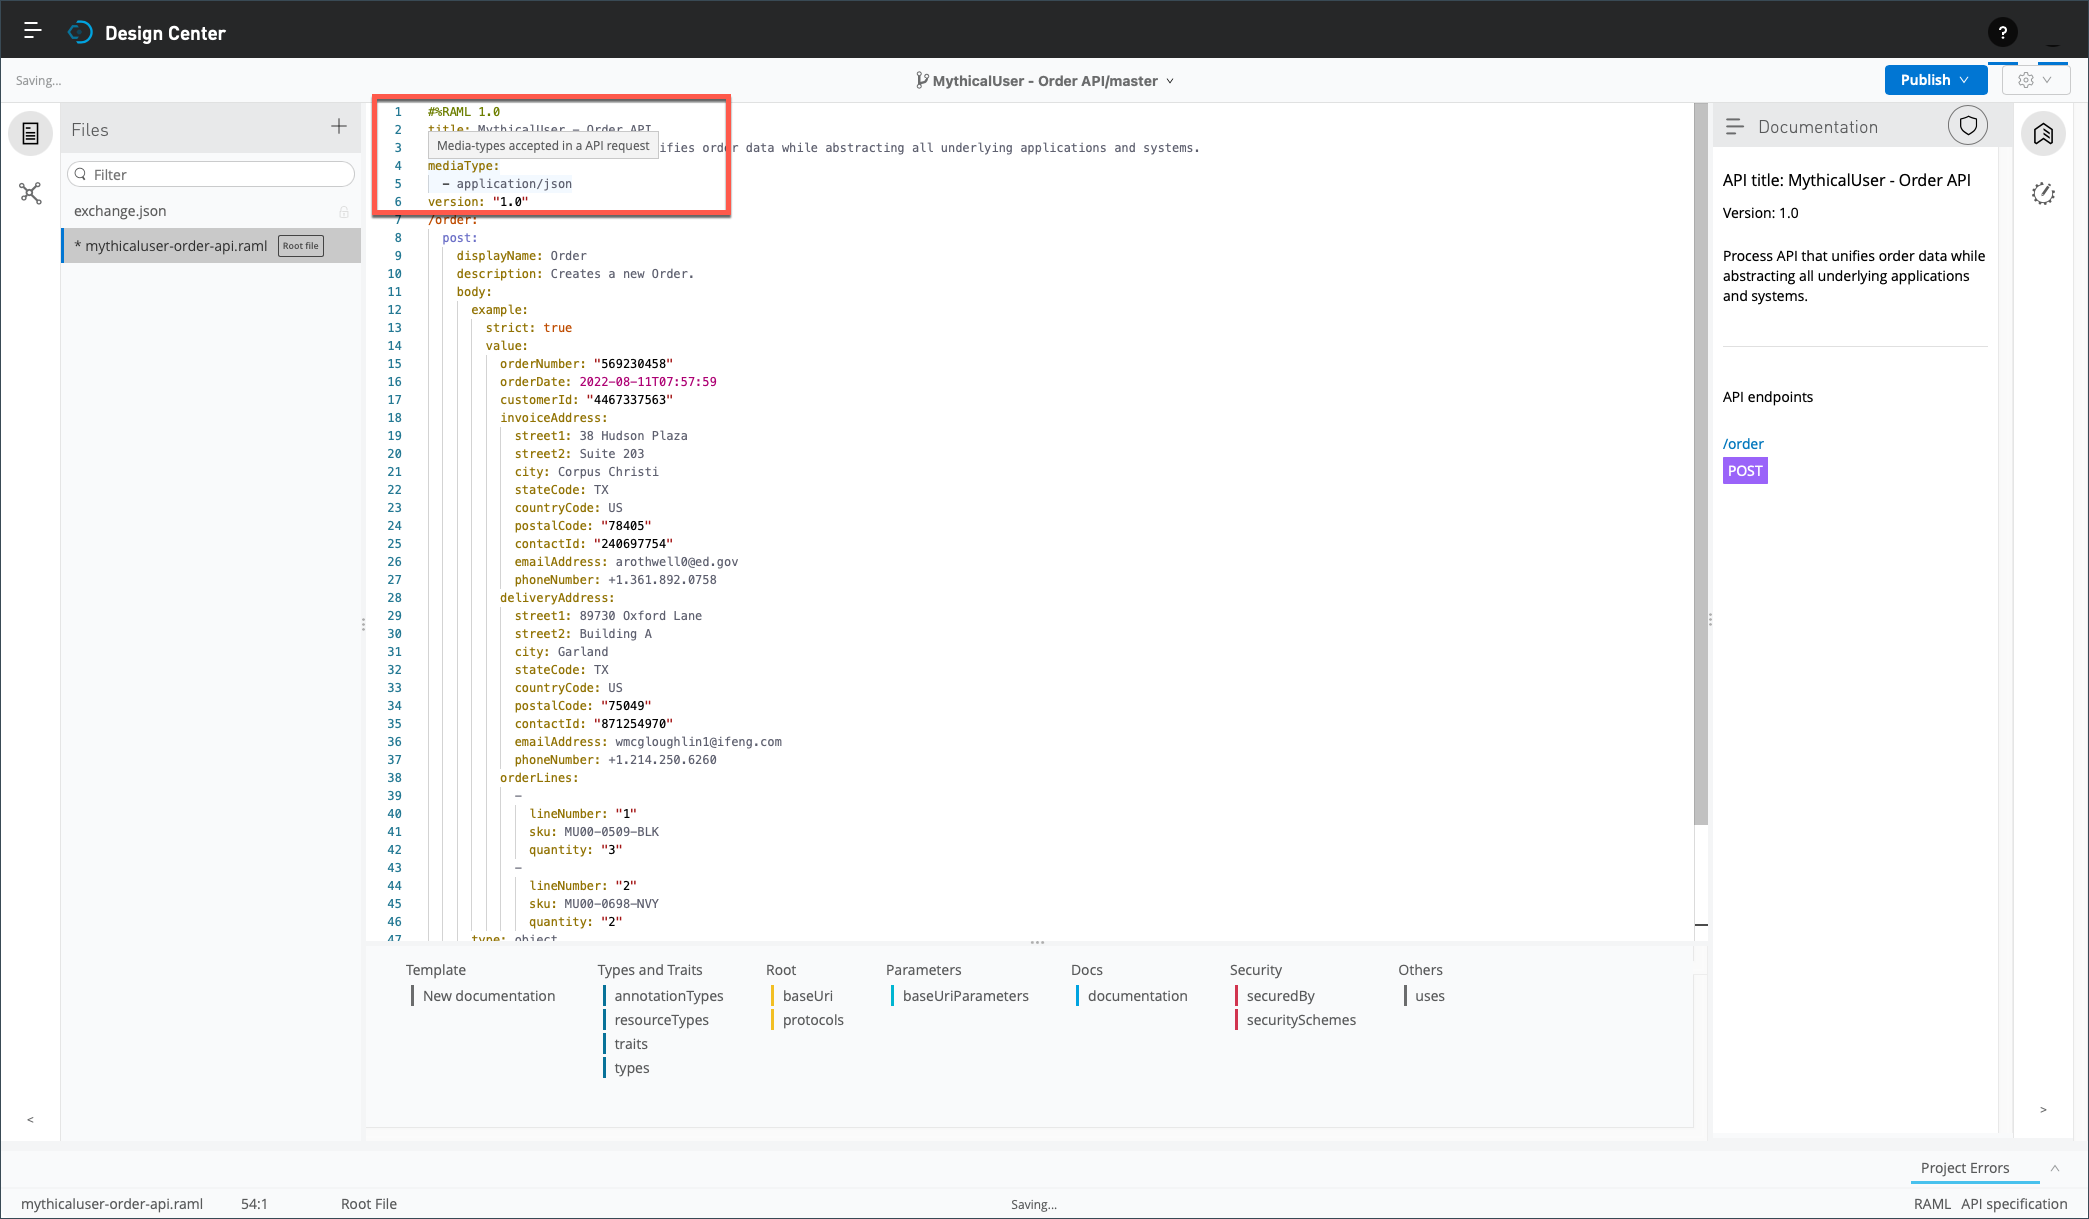
Click on the description element in the editor shelf and enter any description for this API.

Feel free to move your cursor into other sections of the API specification and observe the suggested RAML elements based on the context and position of the cursor.
-
Hover your mouse pointer over any RAML element, mediaType in the following screen capture, and notice the tooltip, which describes the element.
Step 6: Reusing an Asset from Anypoint Exchange
Best practices suggest breaking up complex API specifications into reusable assets whenever practical. Both OAS and RAML support creating API specifications from multiple files. In RAML, for example, we commonly leverage RAML fragments to promote the reuse and maintainability of data types, examples, resource types, traits, and much more.
In this step, you will remove the example you copied and pasted. Instead, you will reuse a prebuilt asset available in Anypoint Exchange.
-
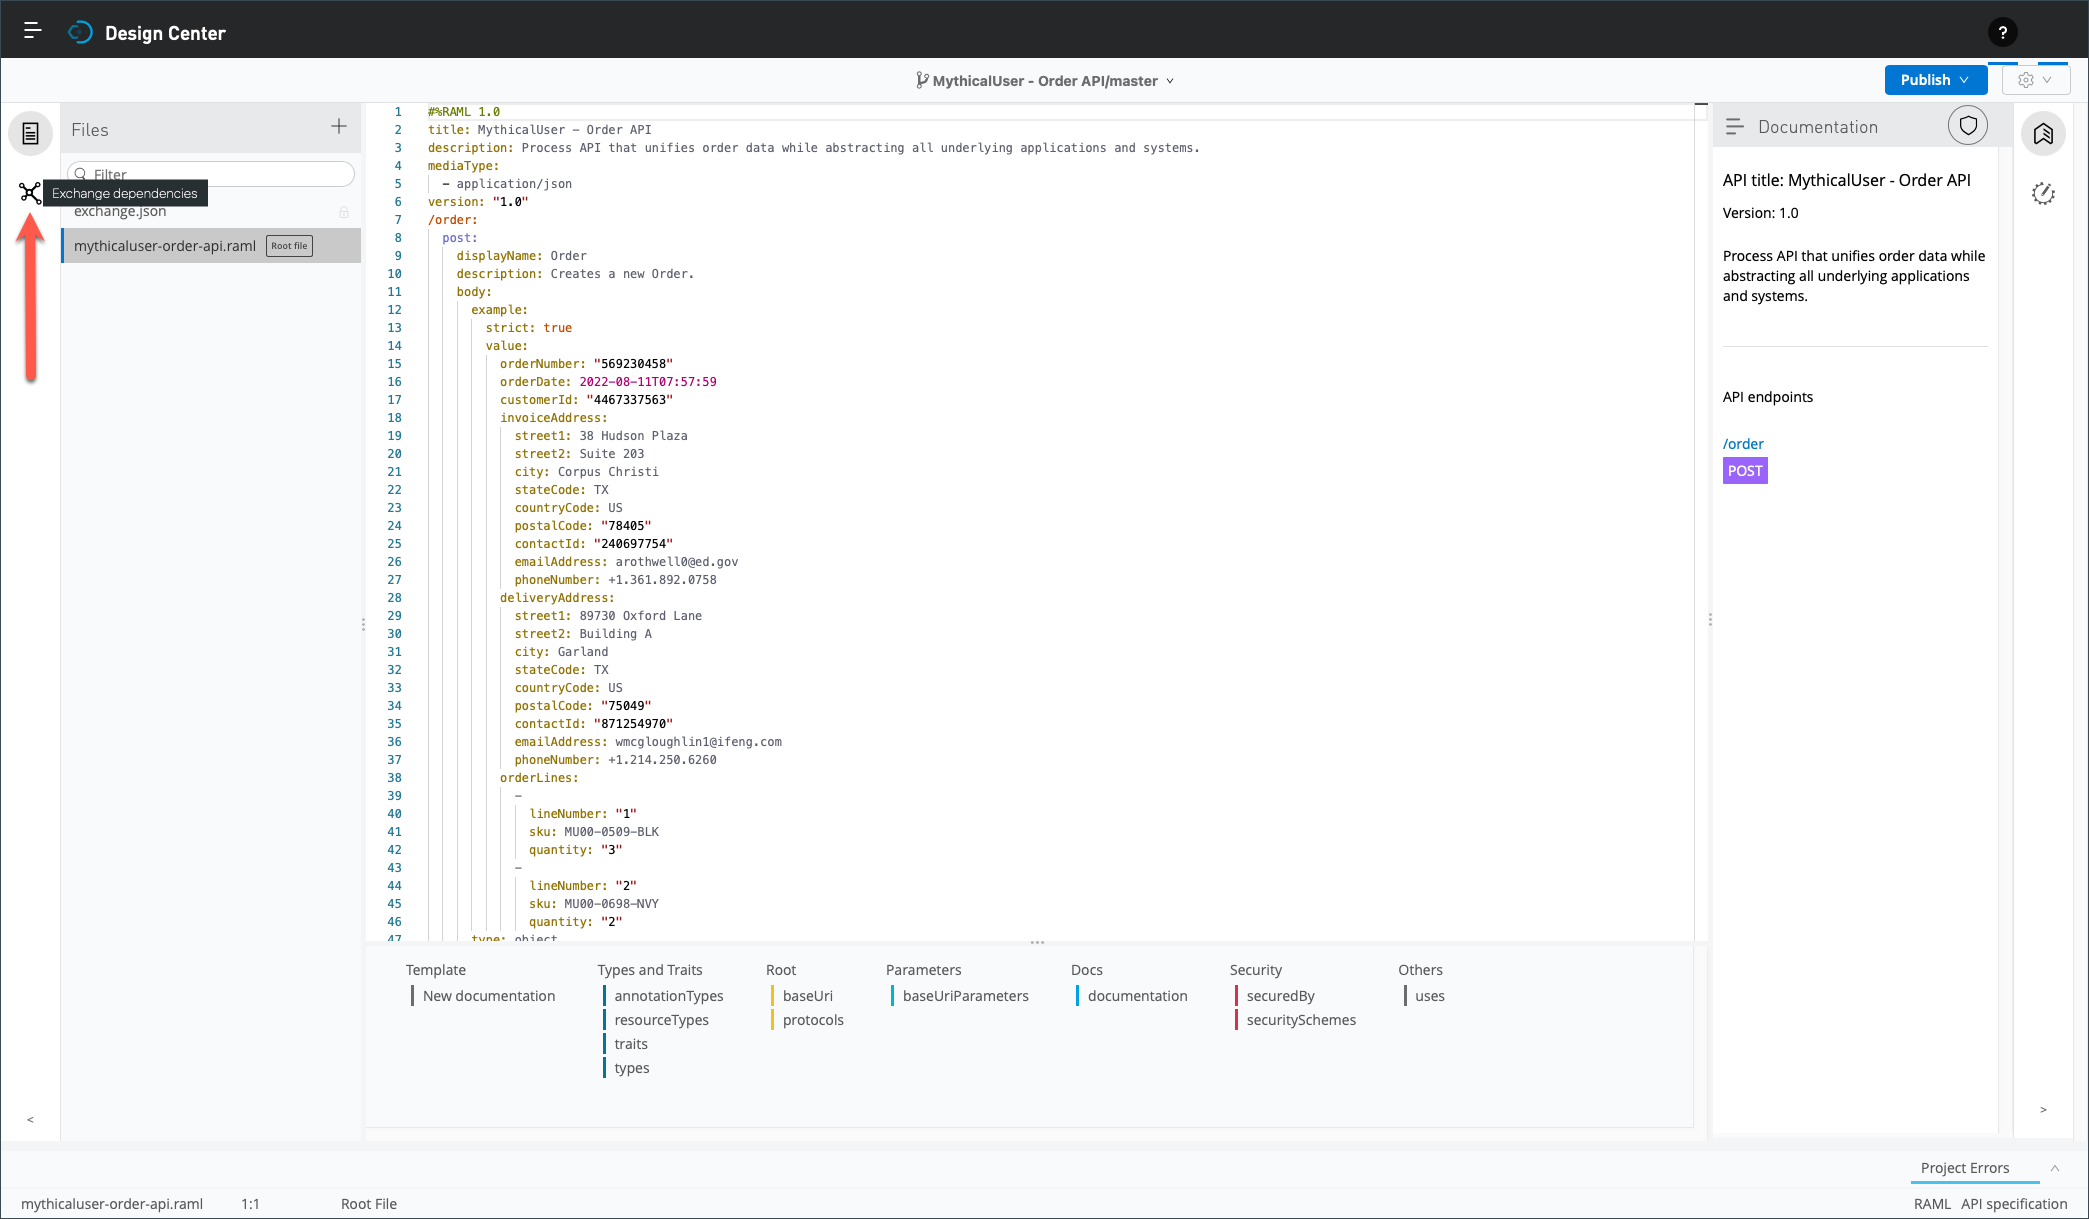
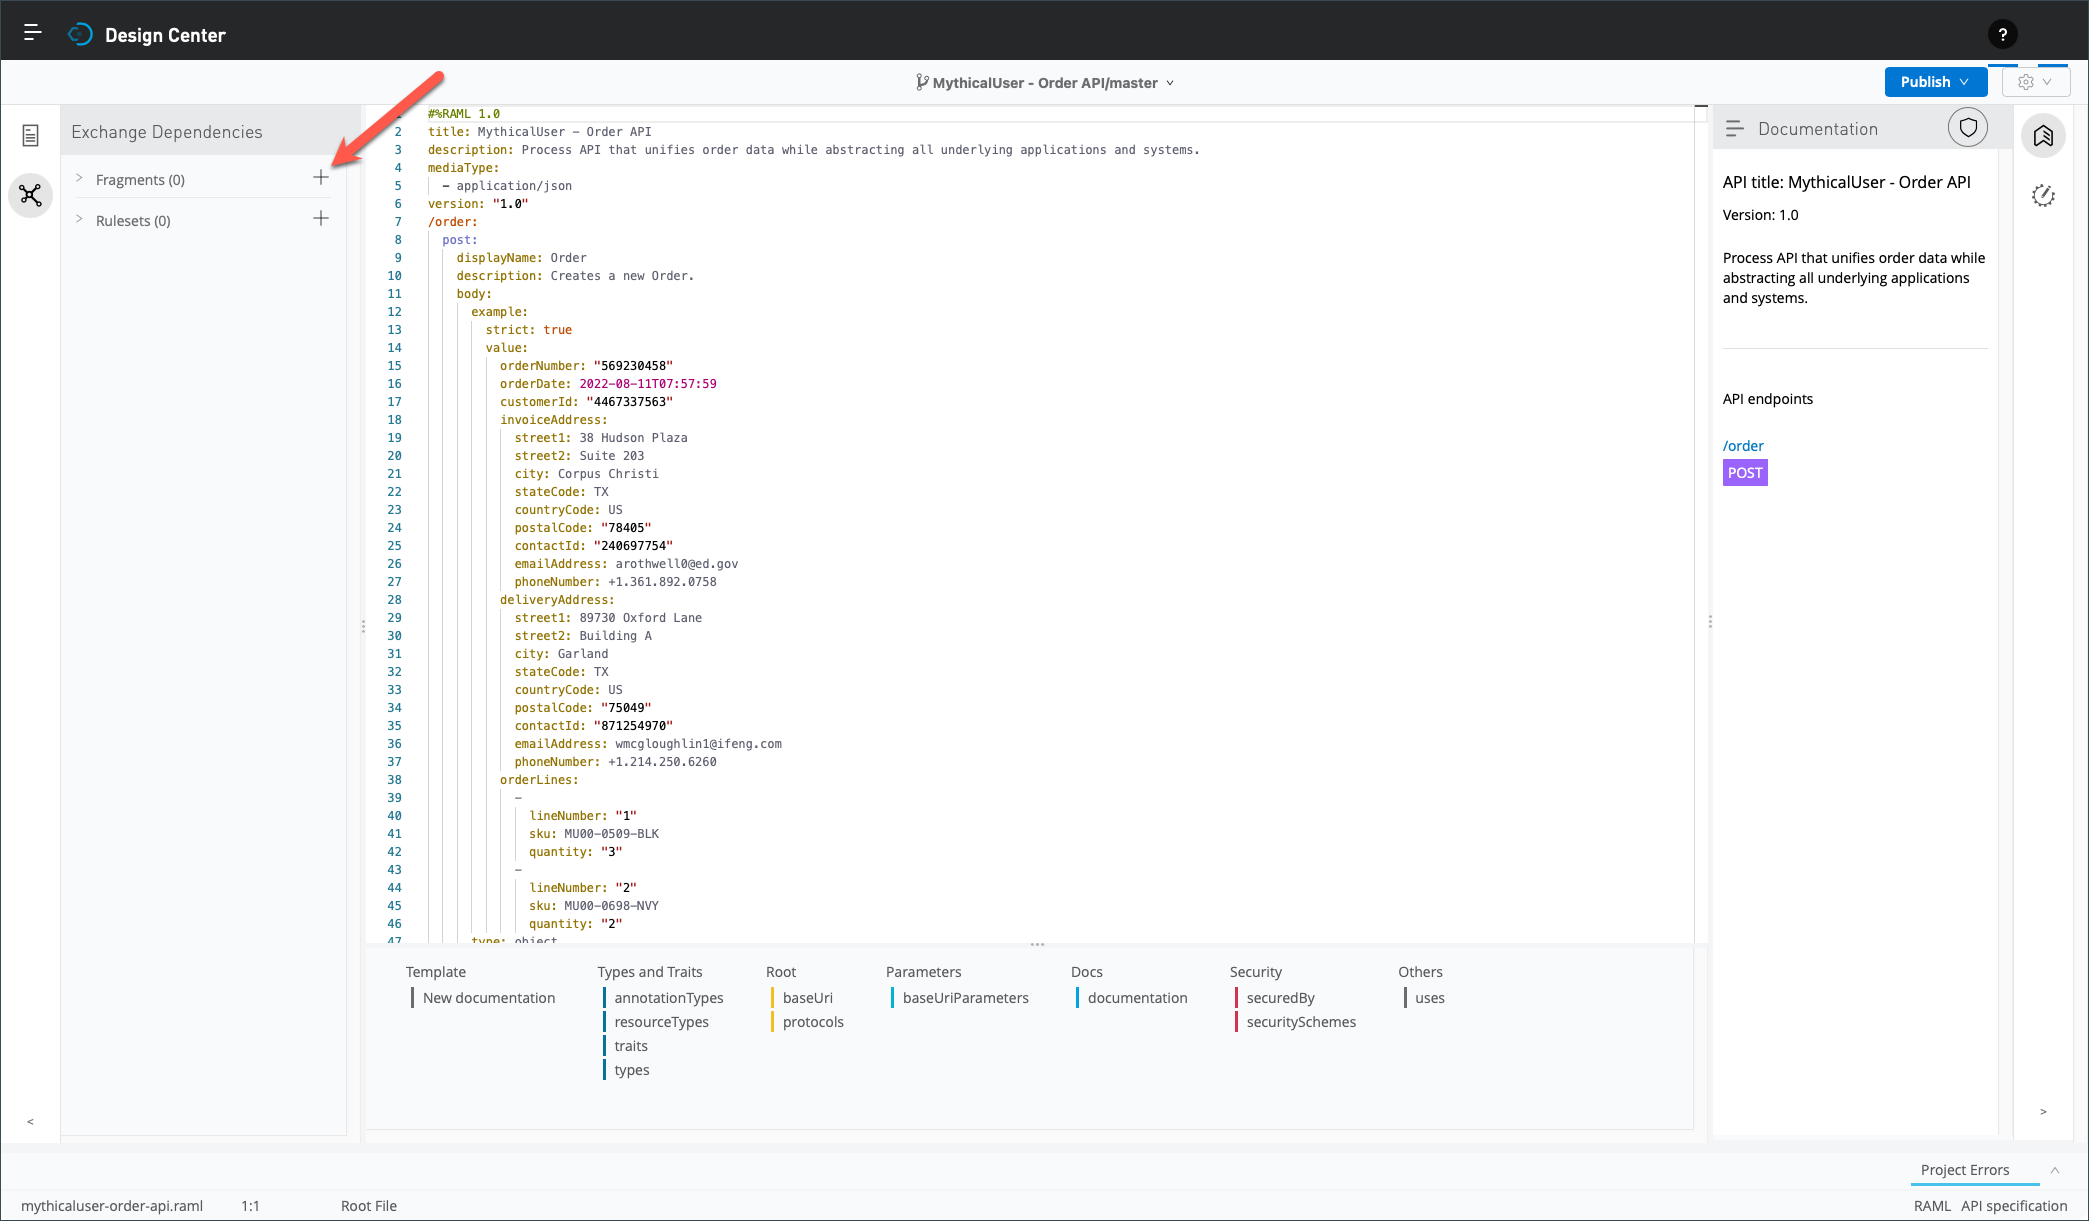
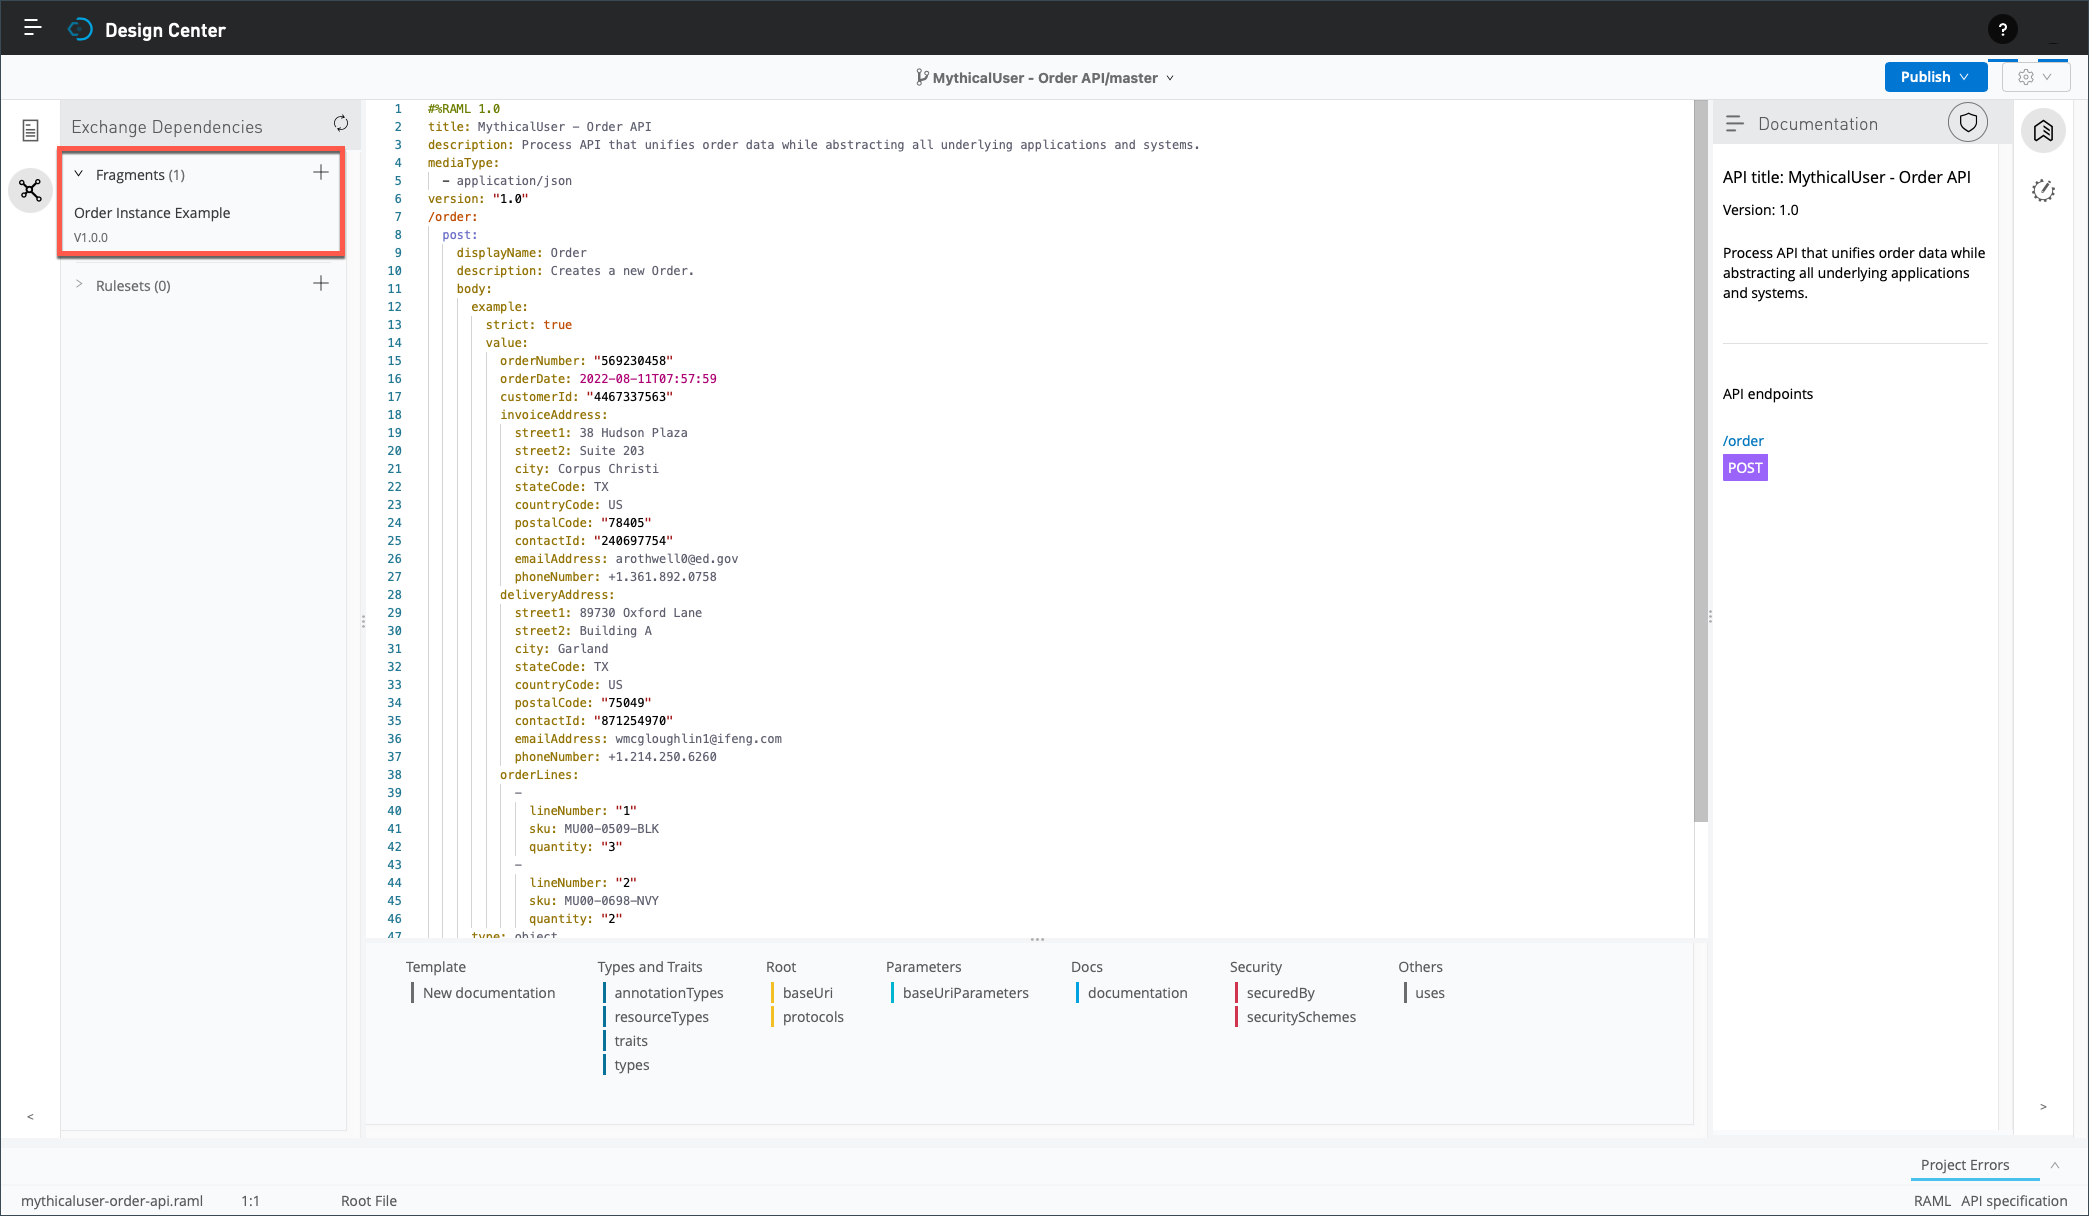
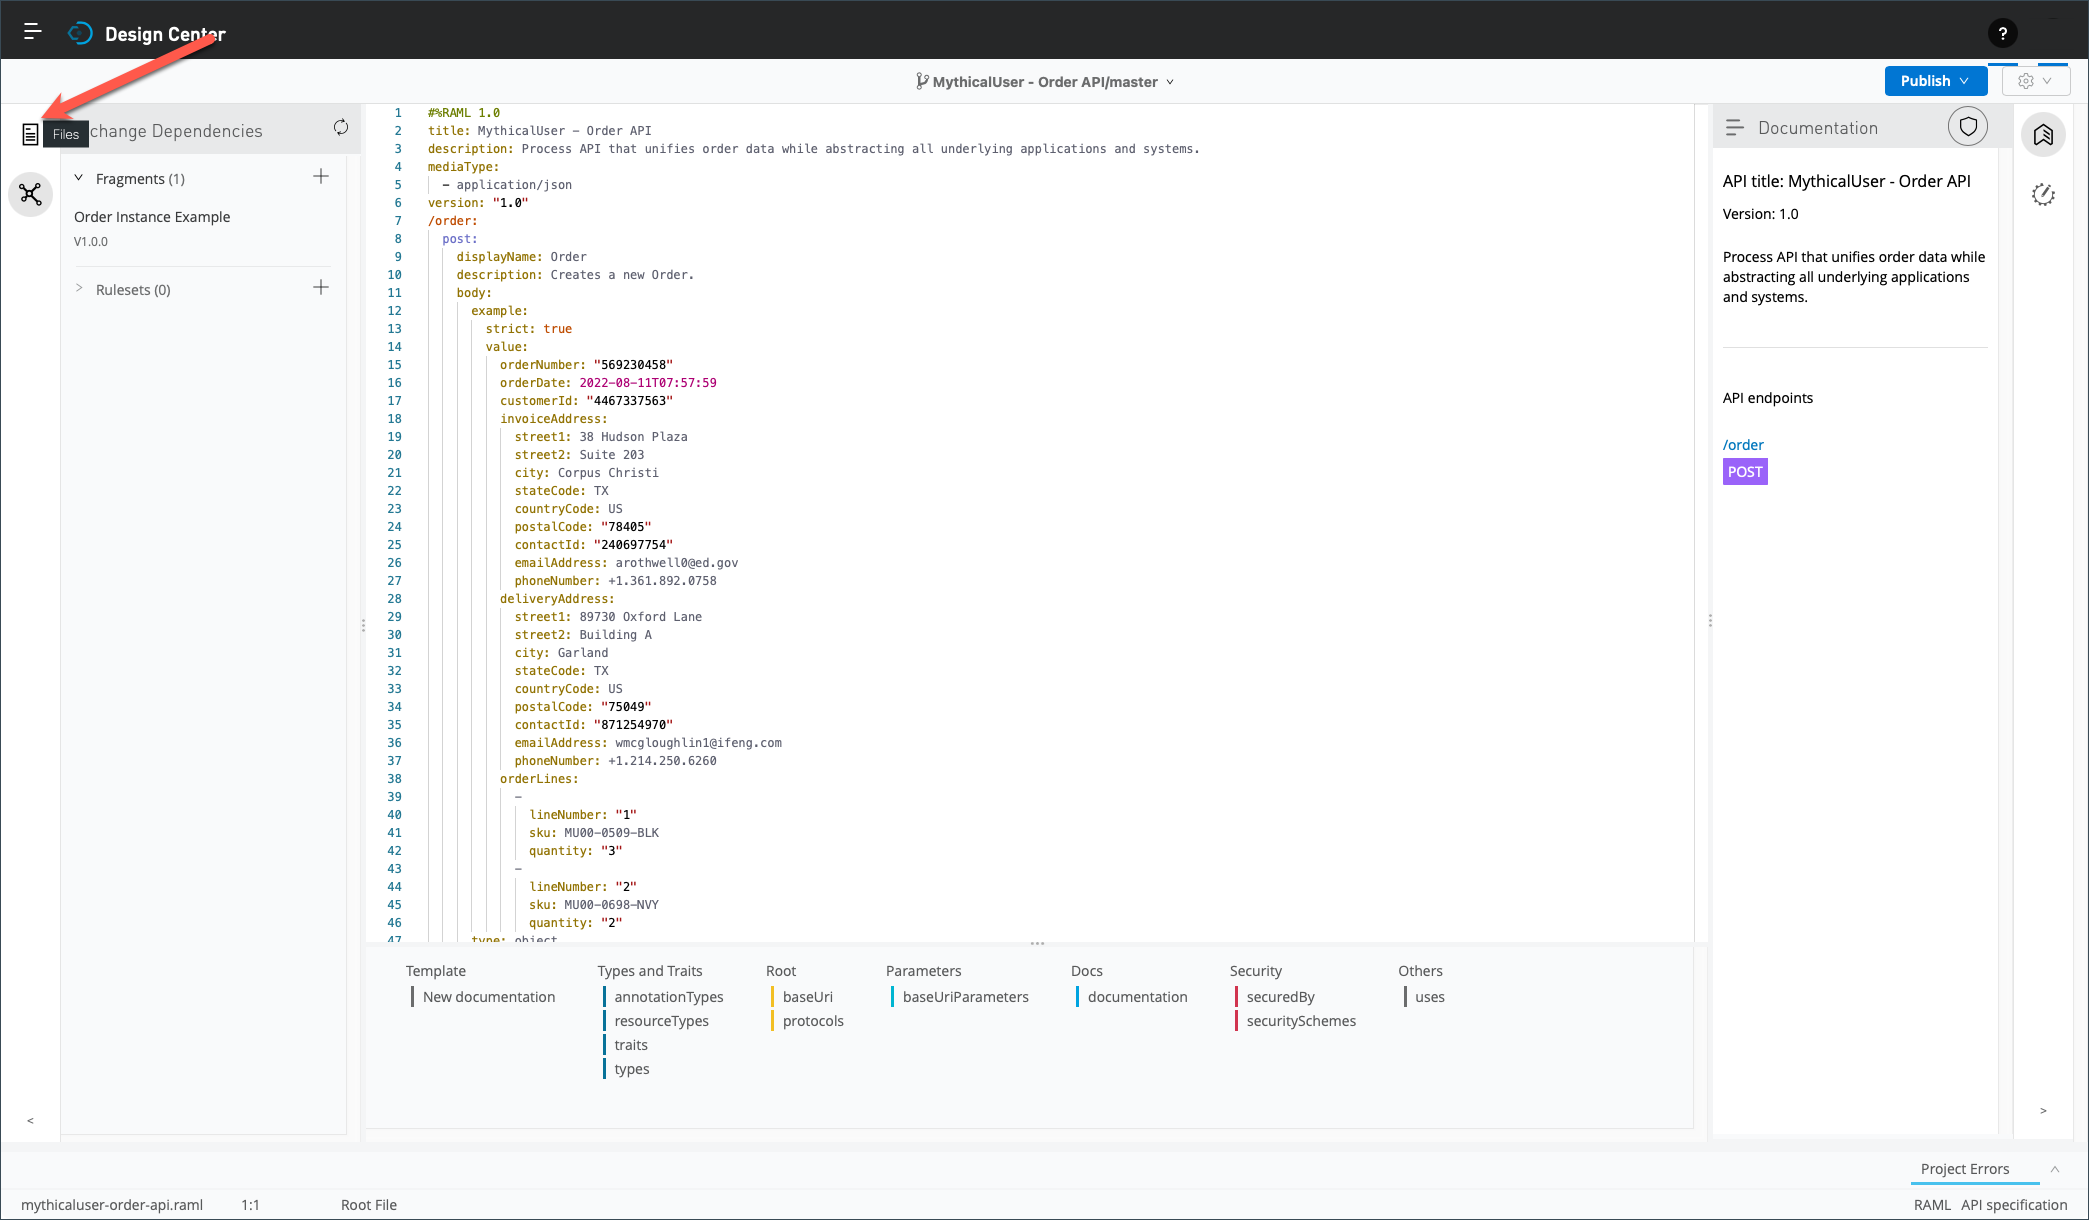
Click on the Exchange Dependencies button in the left pannel.
-
Next, click the + to the right of Fragments to include an existing fragment in your project.
-
You should see a list of all RAML fragments available in Anypoint Exchange. This list is filtered based on your privileges, organization, and business group.
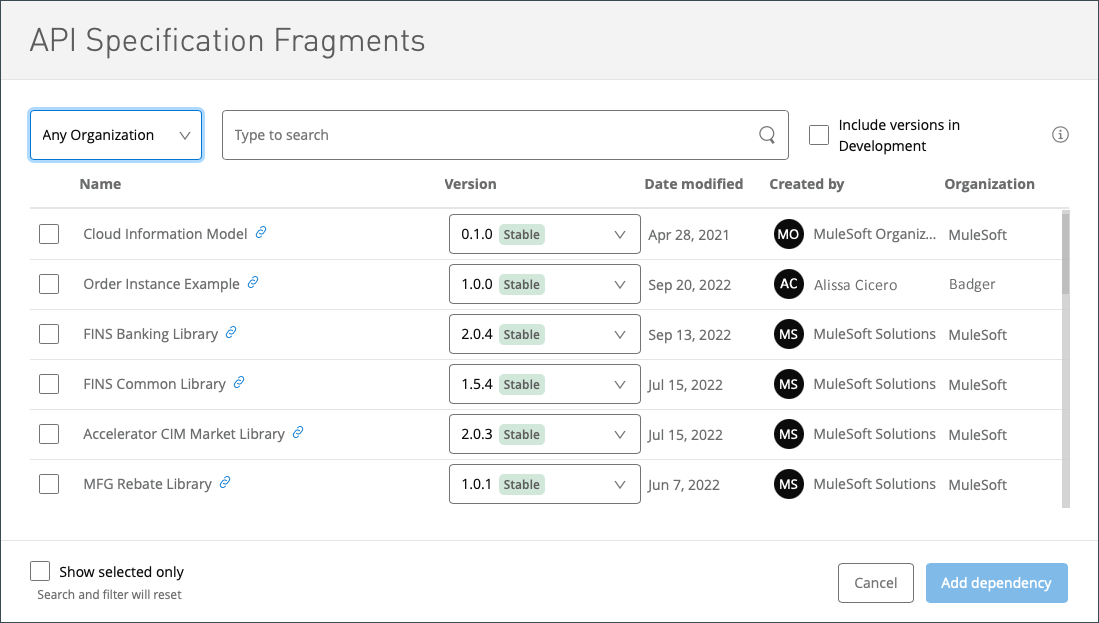
-
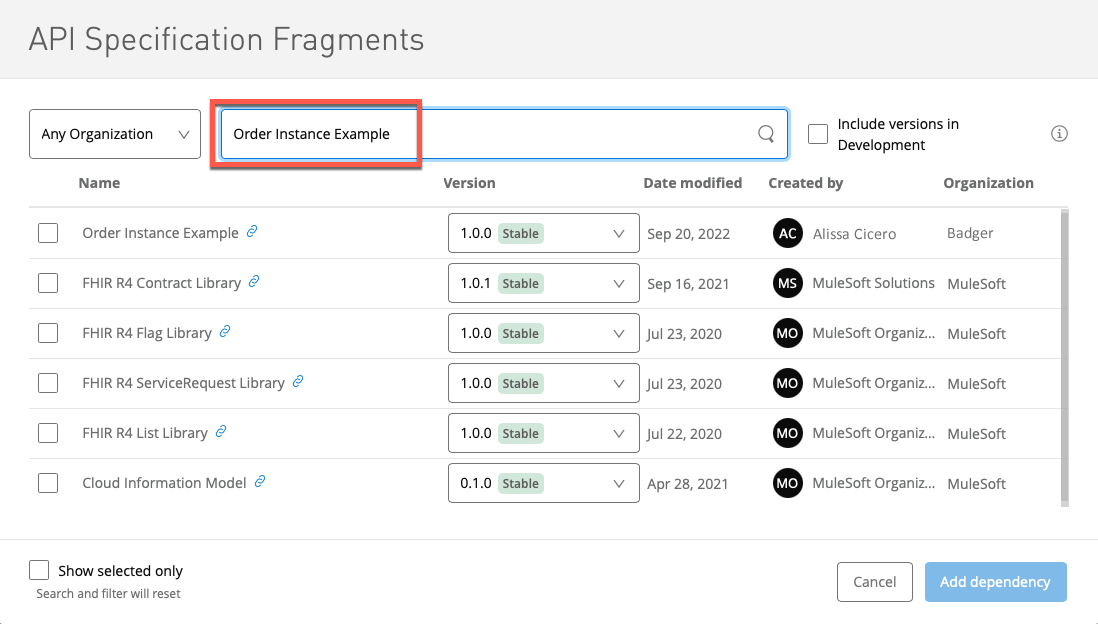
Enter Order Instance Example in the search bar.
-
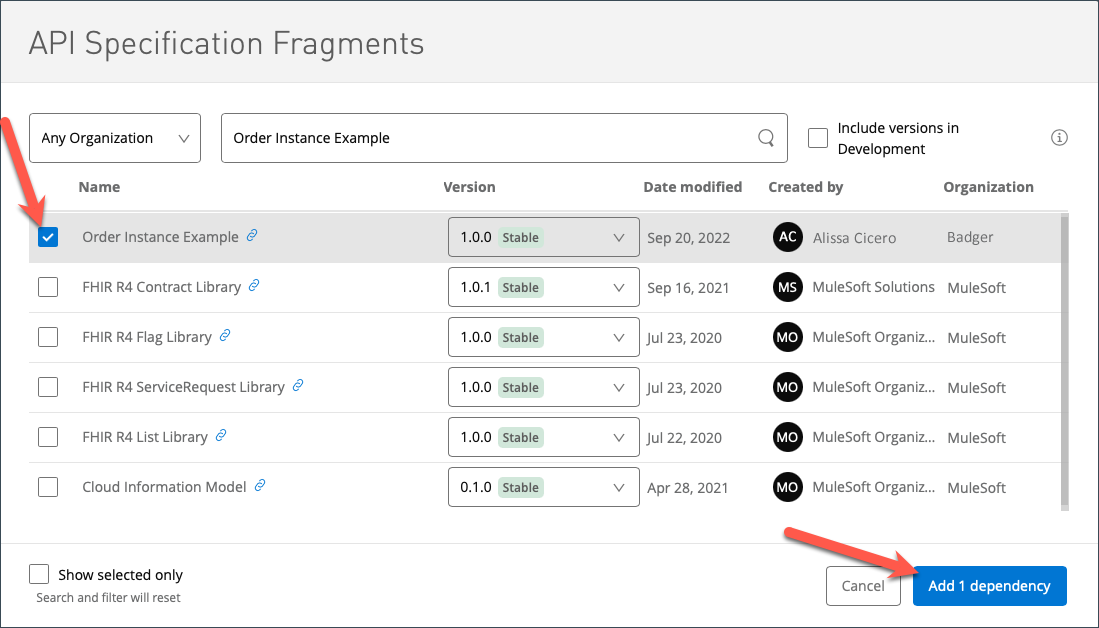
Check the box left of the Order Instance Example fragment, and click on the Add 1 dependency button.
-
Your project now includes the current version of this RAML fragment as a dependency.
-
Click on the Files button in the left pannel.
-
Now, you will replace the example you copied in a previous step with this RAML fragment. First, select the block per the following screen capture - i.e., from the strict element to the type element, but excluding it.
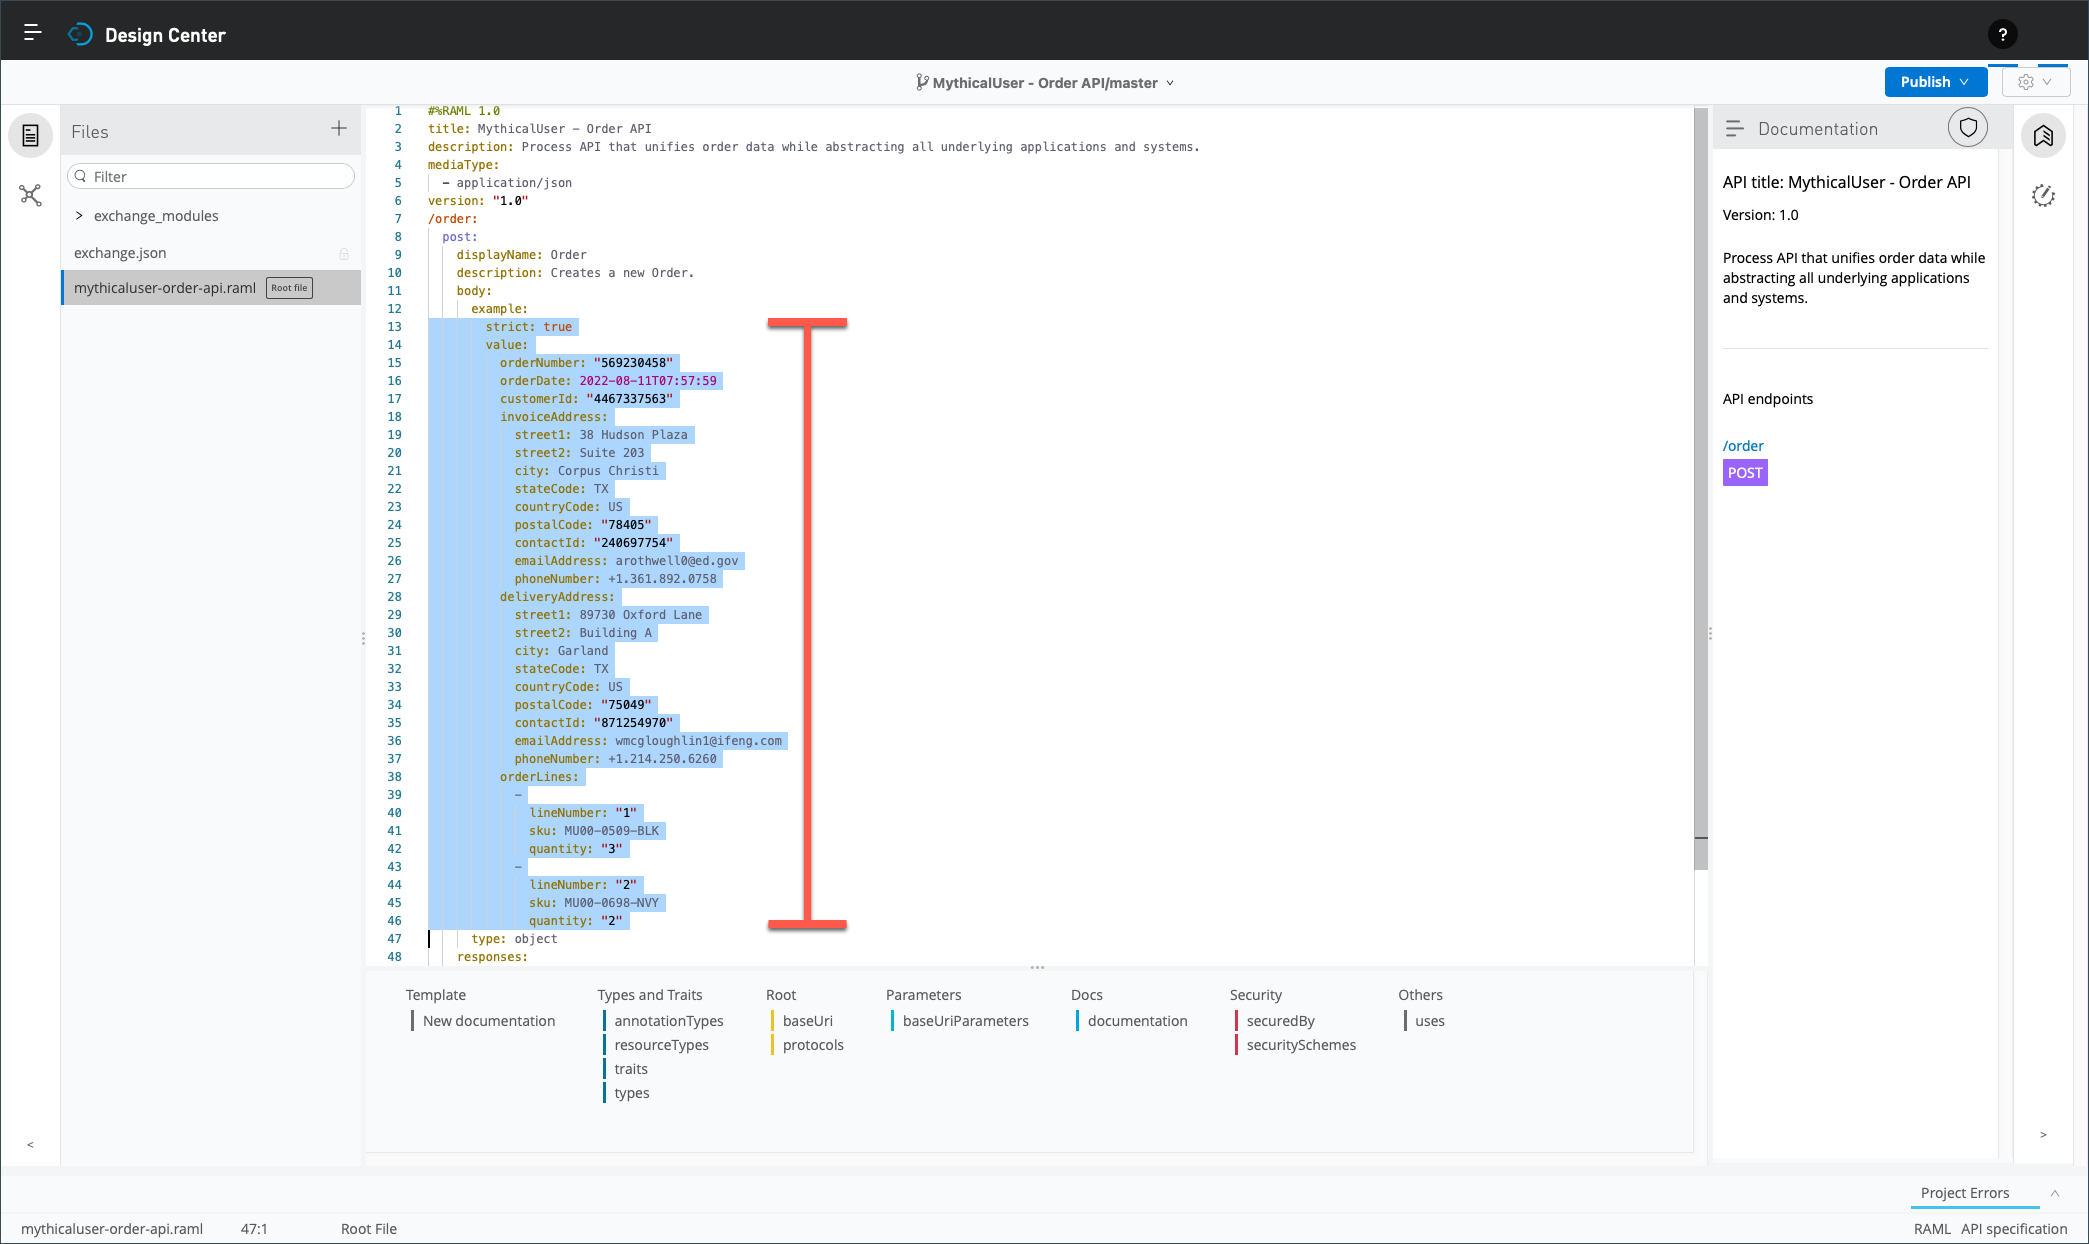
-
Then, delete the block.

-
Now position your cursor one space to the right of the example: element and type an exclamation mark (!).
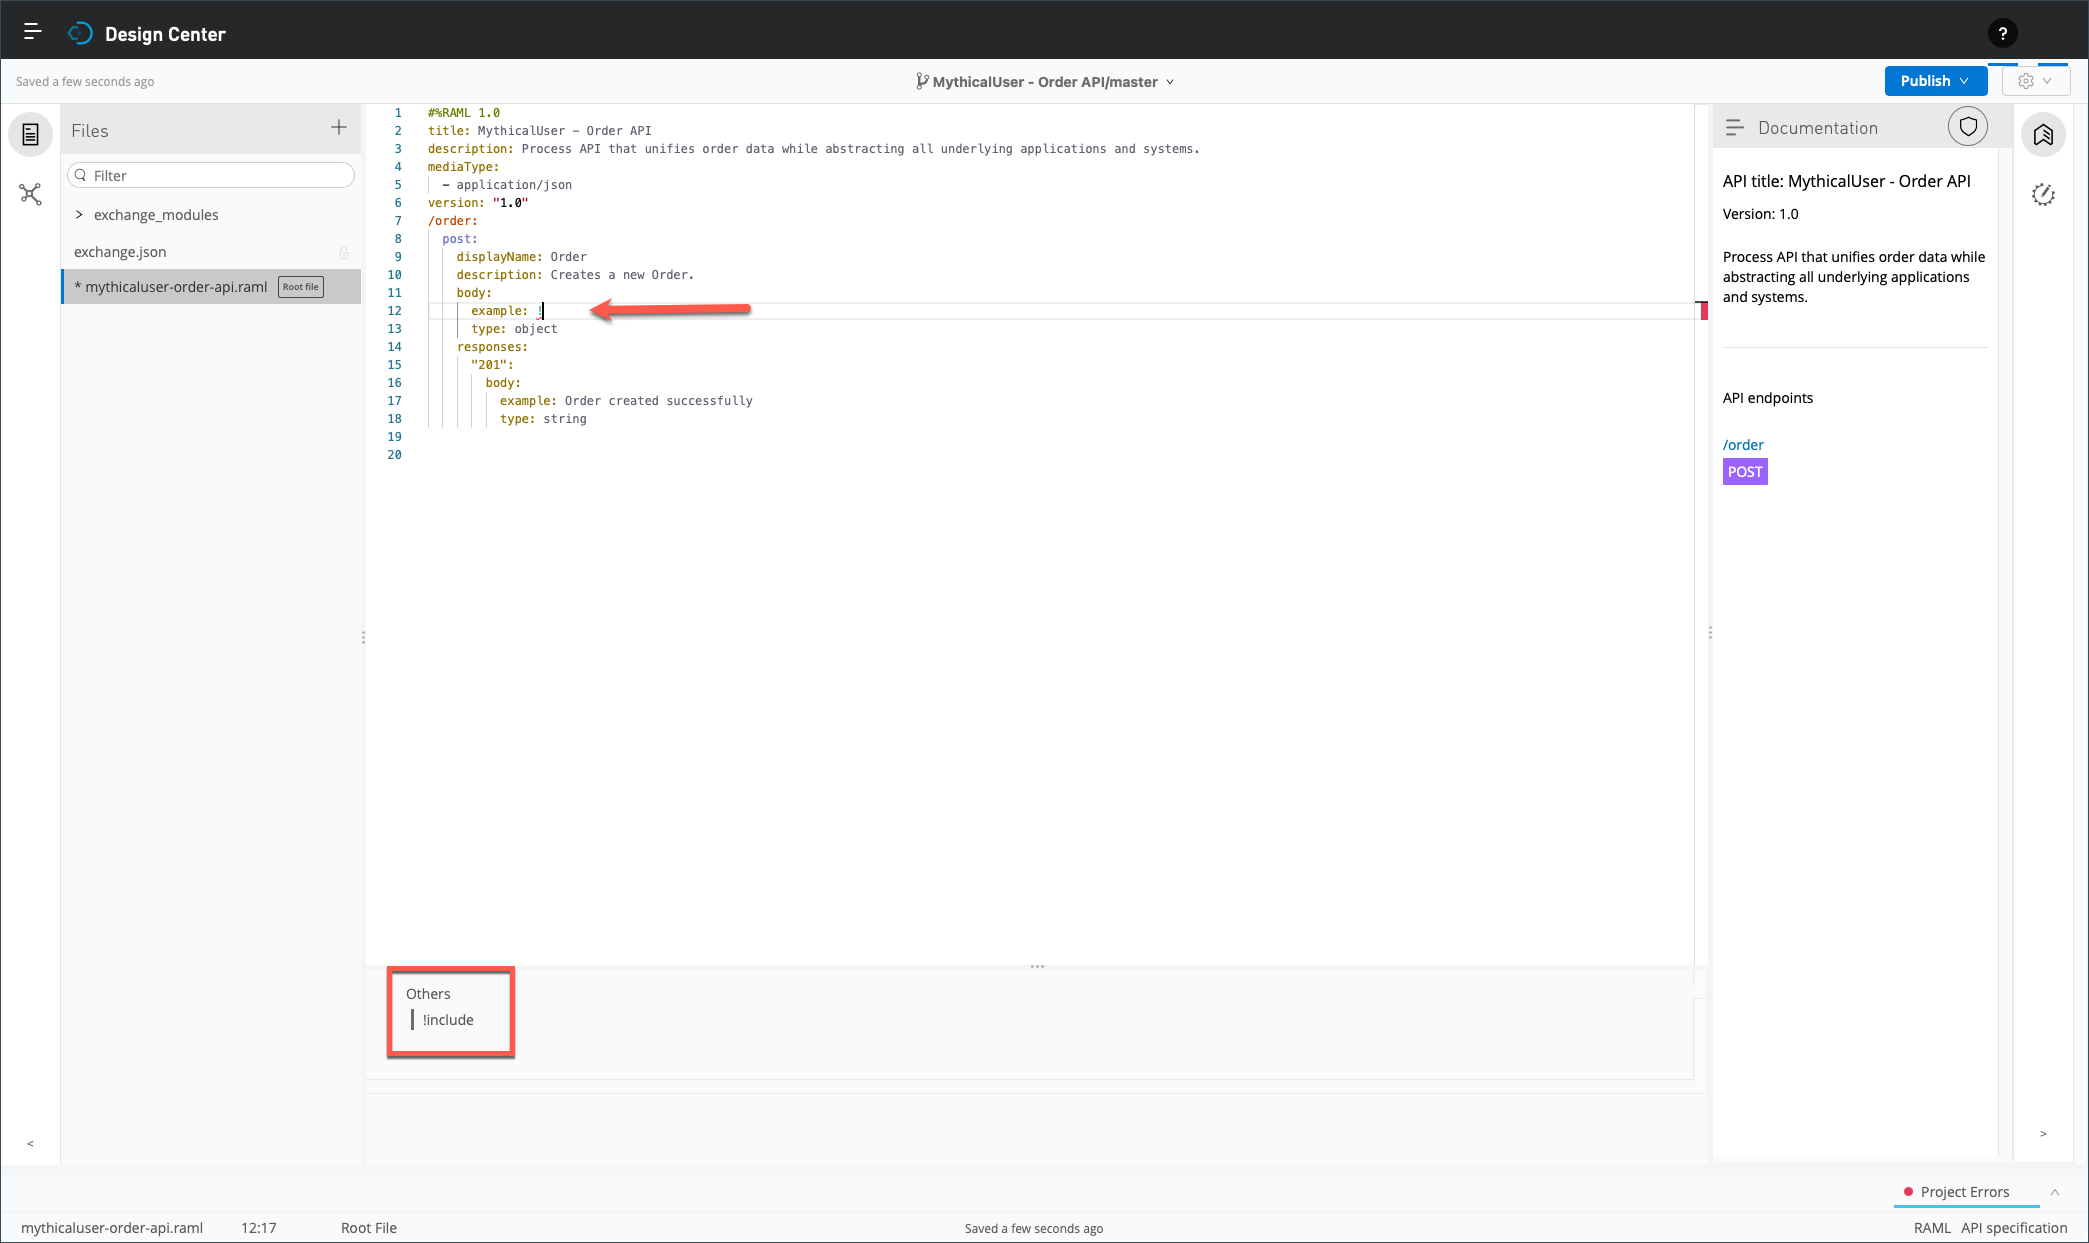
-
Click on the include element in the editor shelf.
-
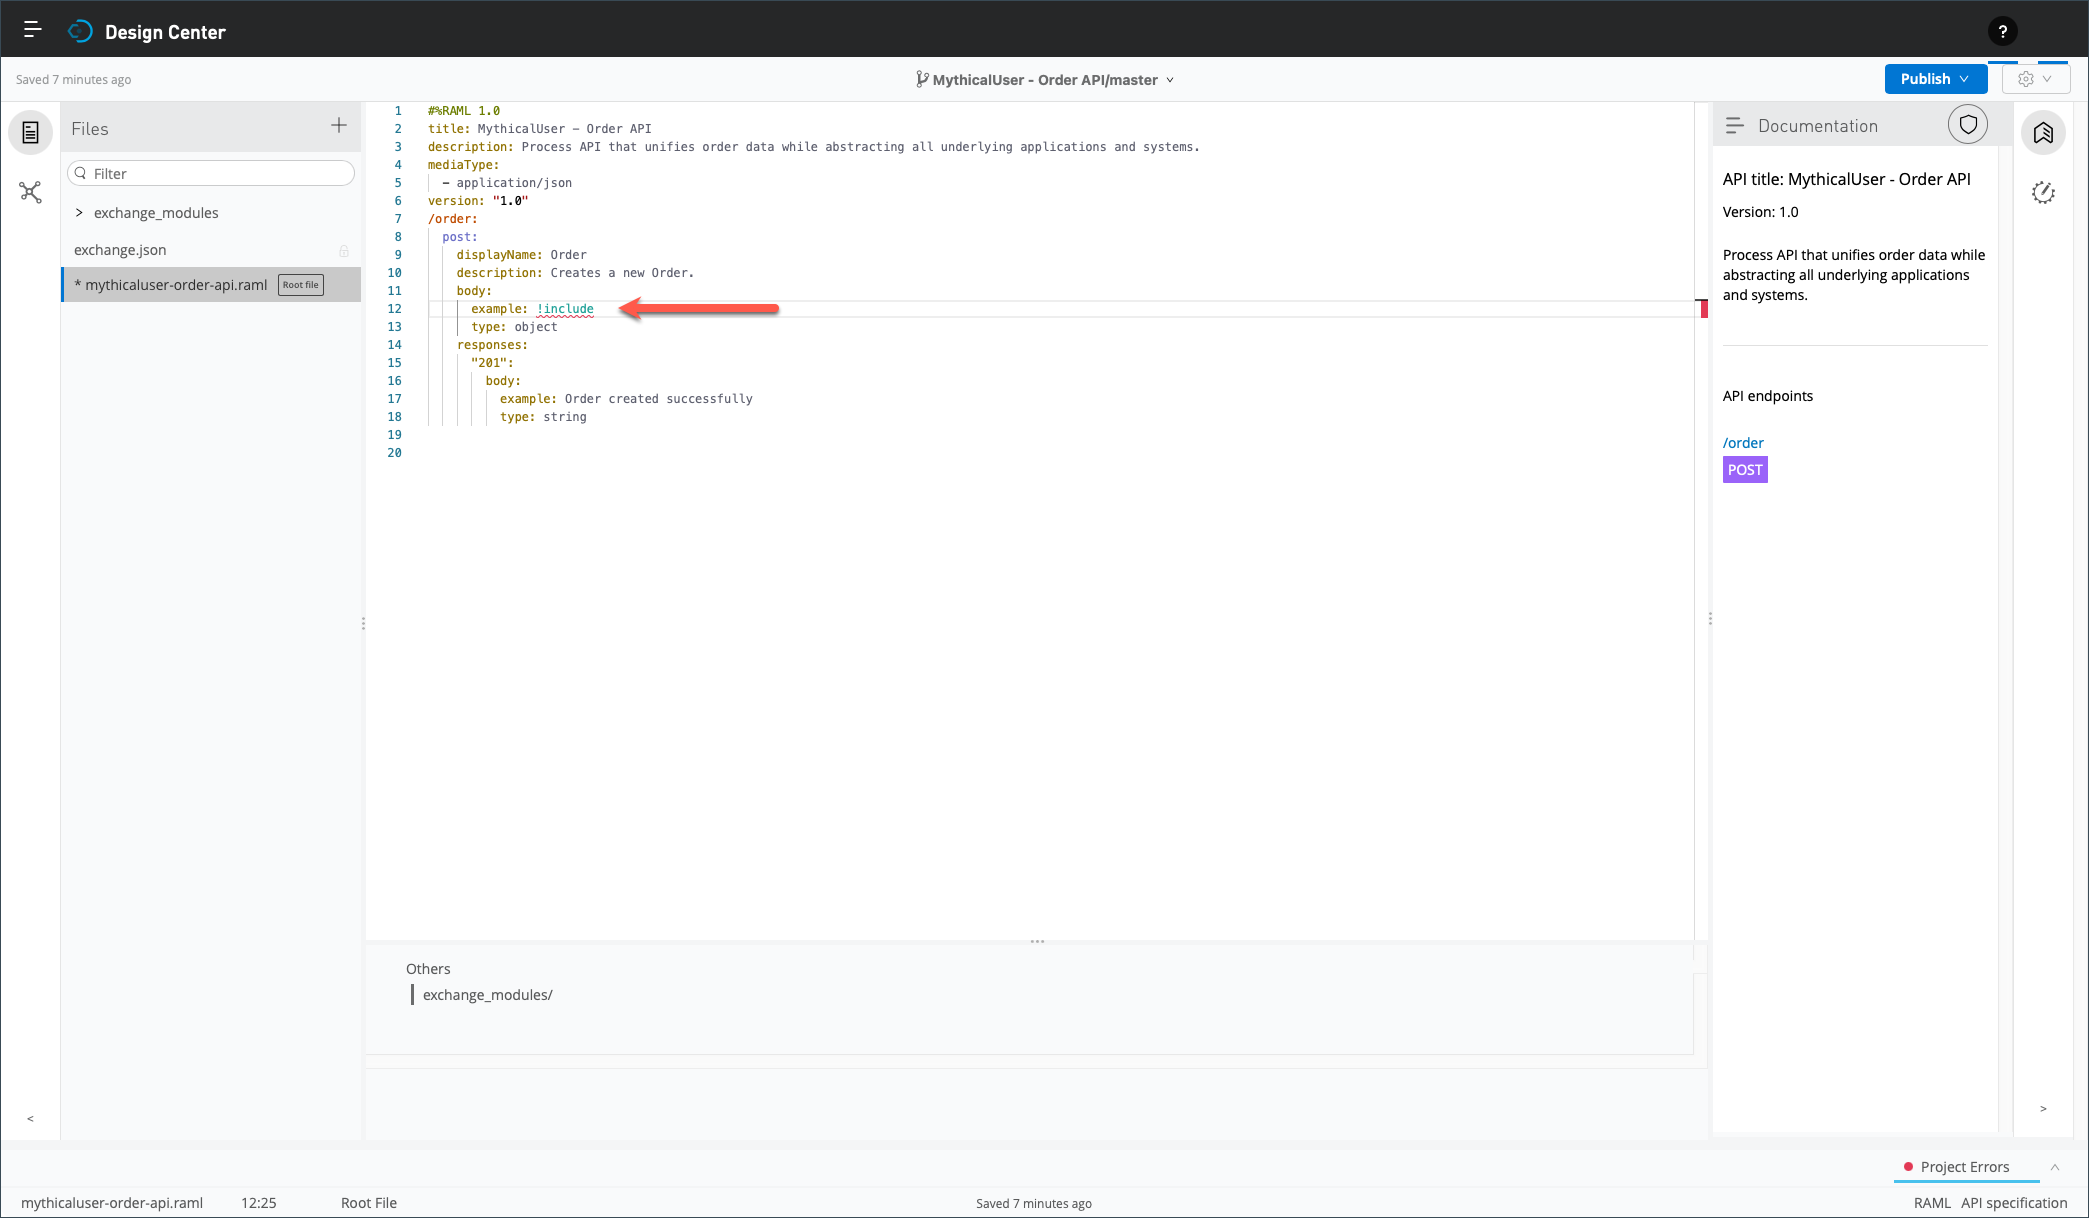
Next, expend exchange_modules and click on the three vertical dots right of order-instance-example.raml.
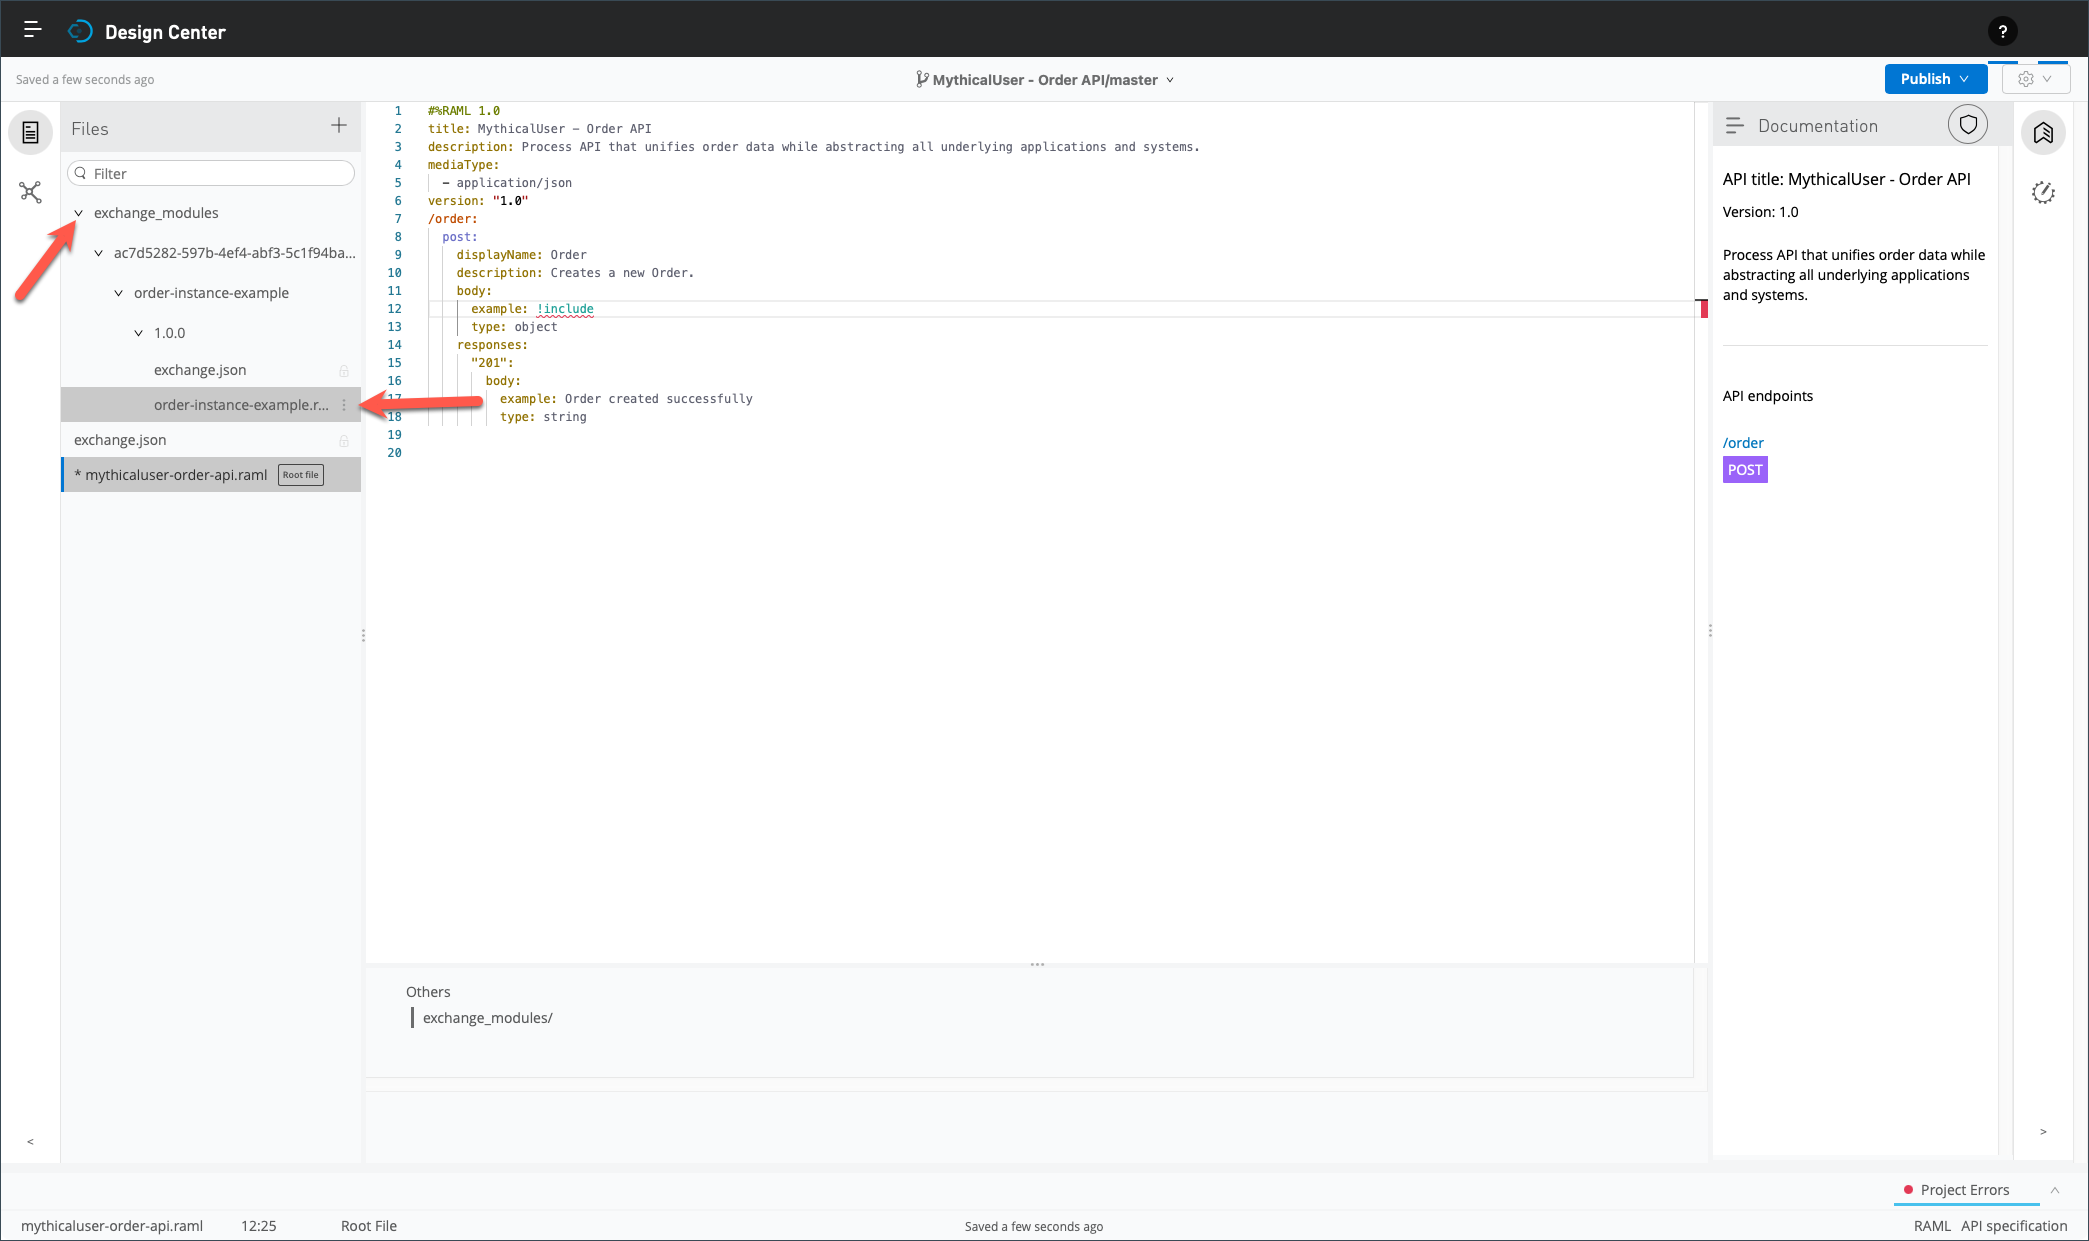
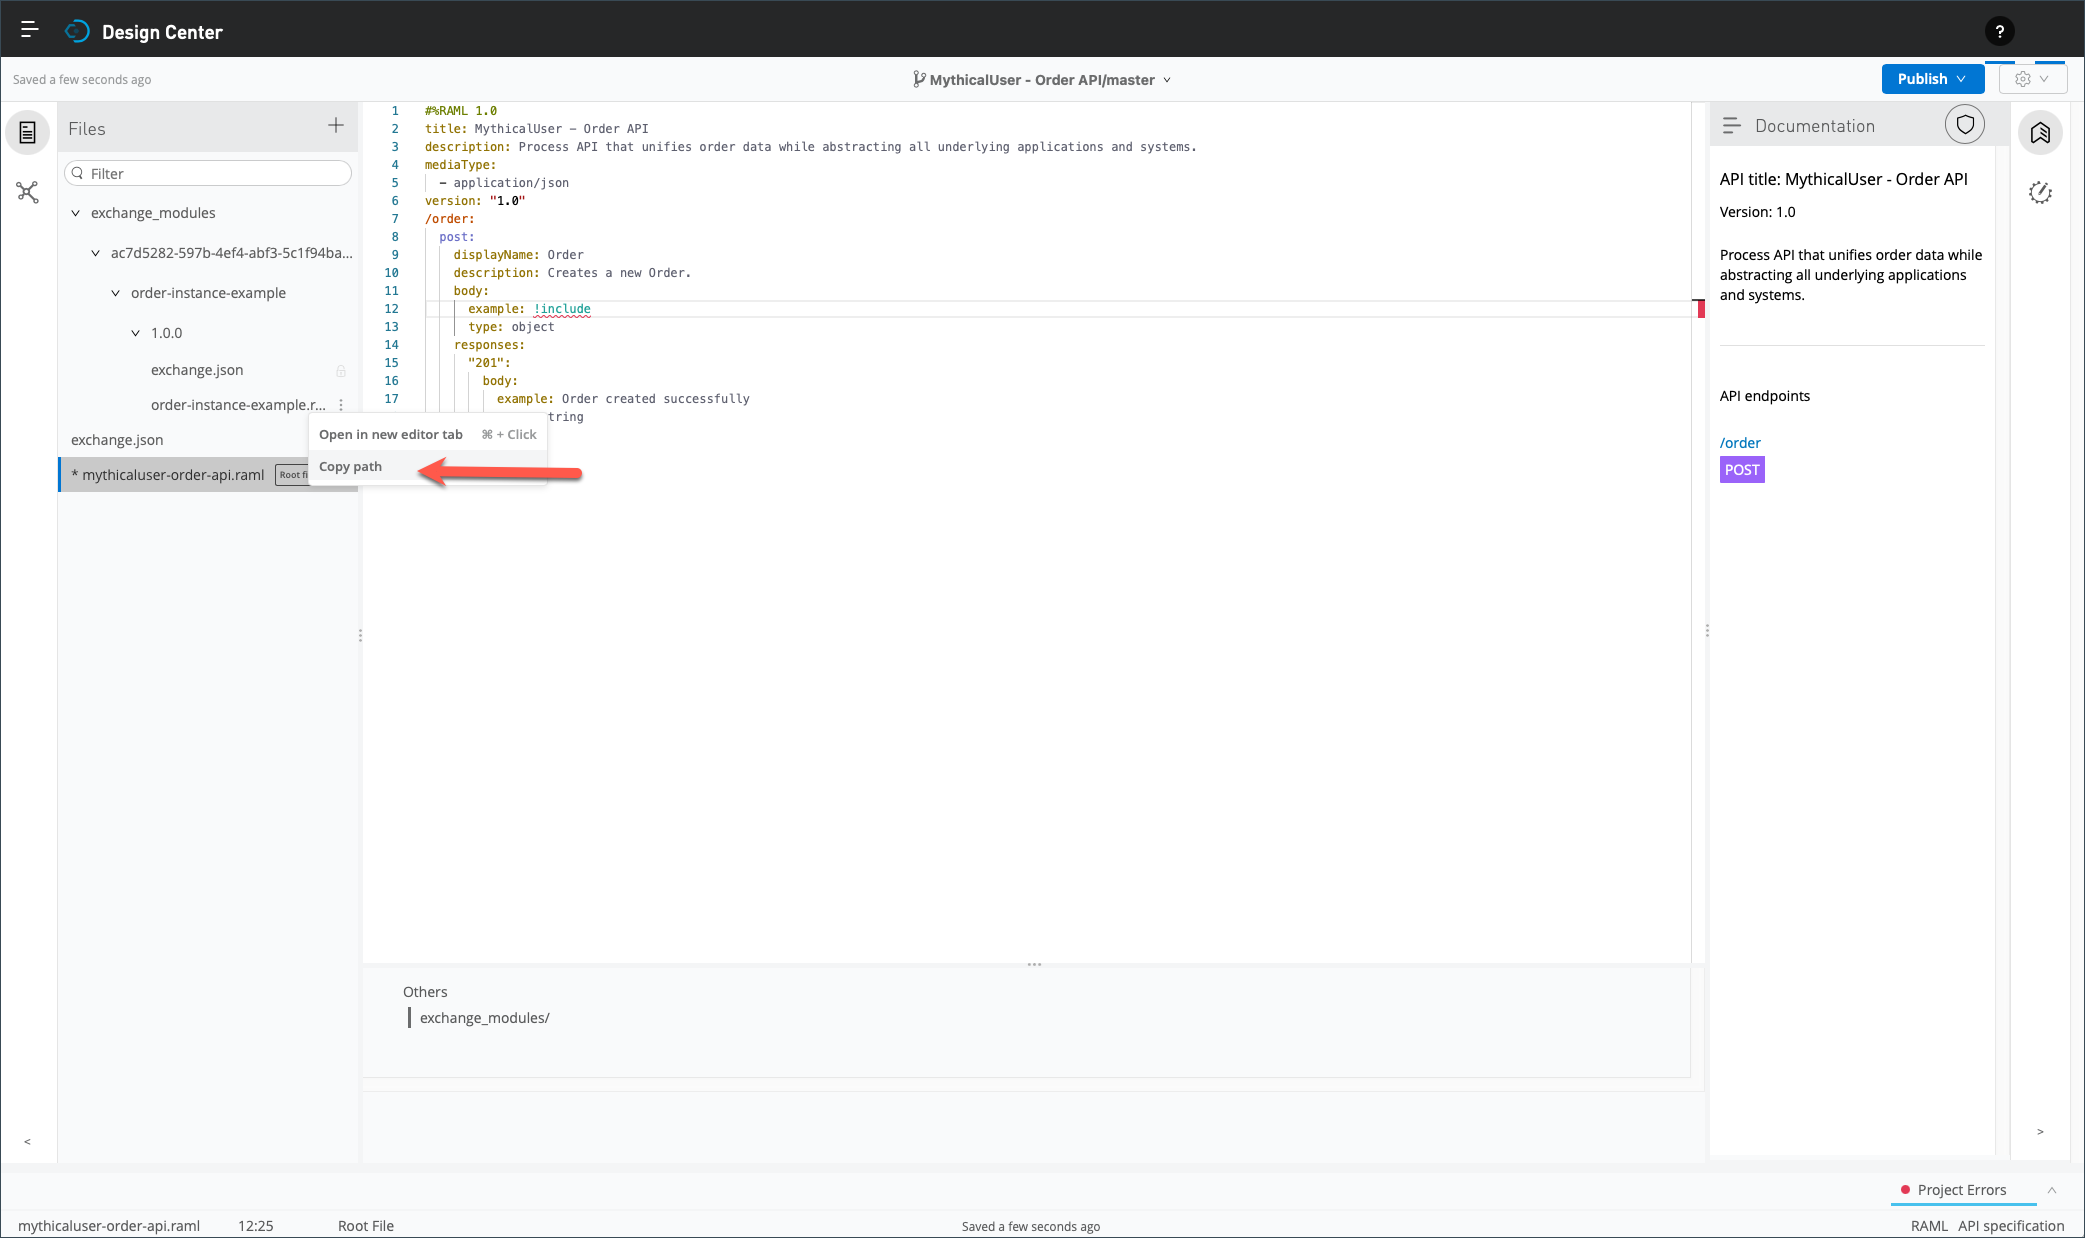
-
Then, select the option Copy path from the context menu.
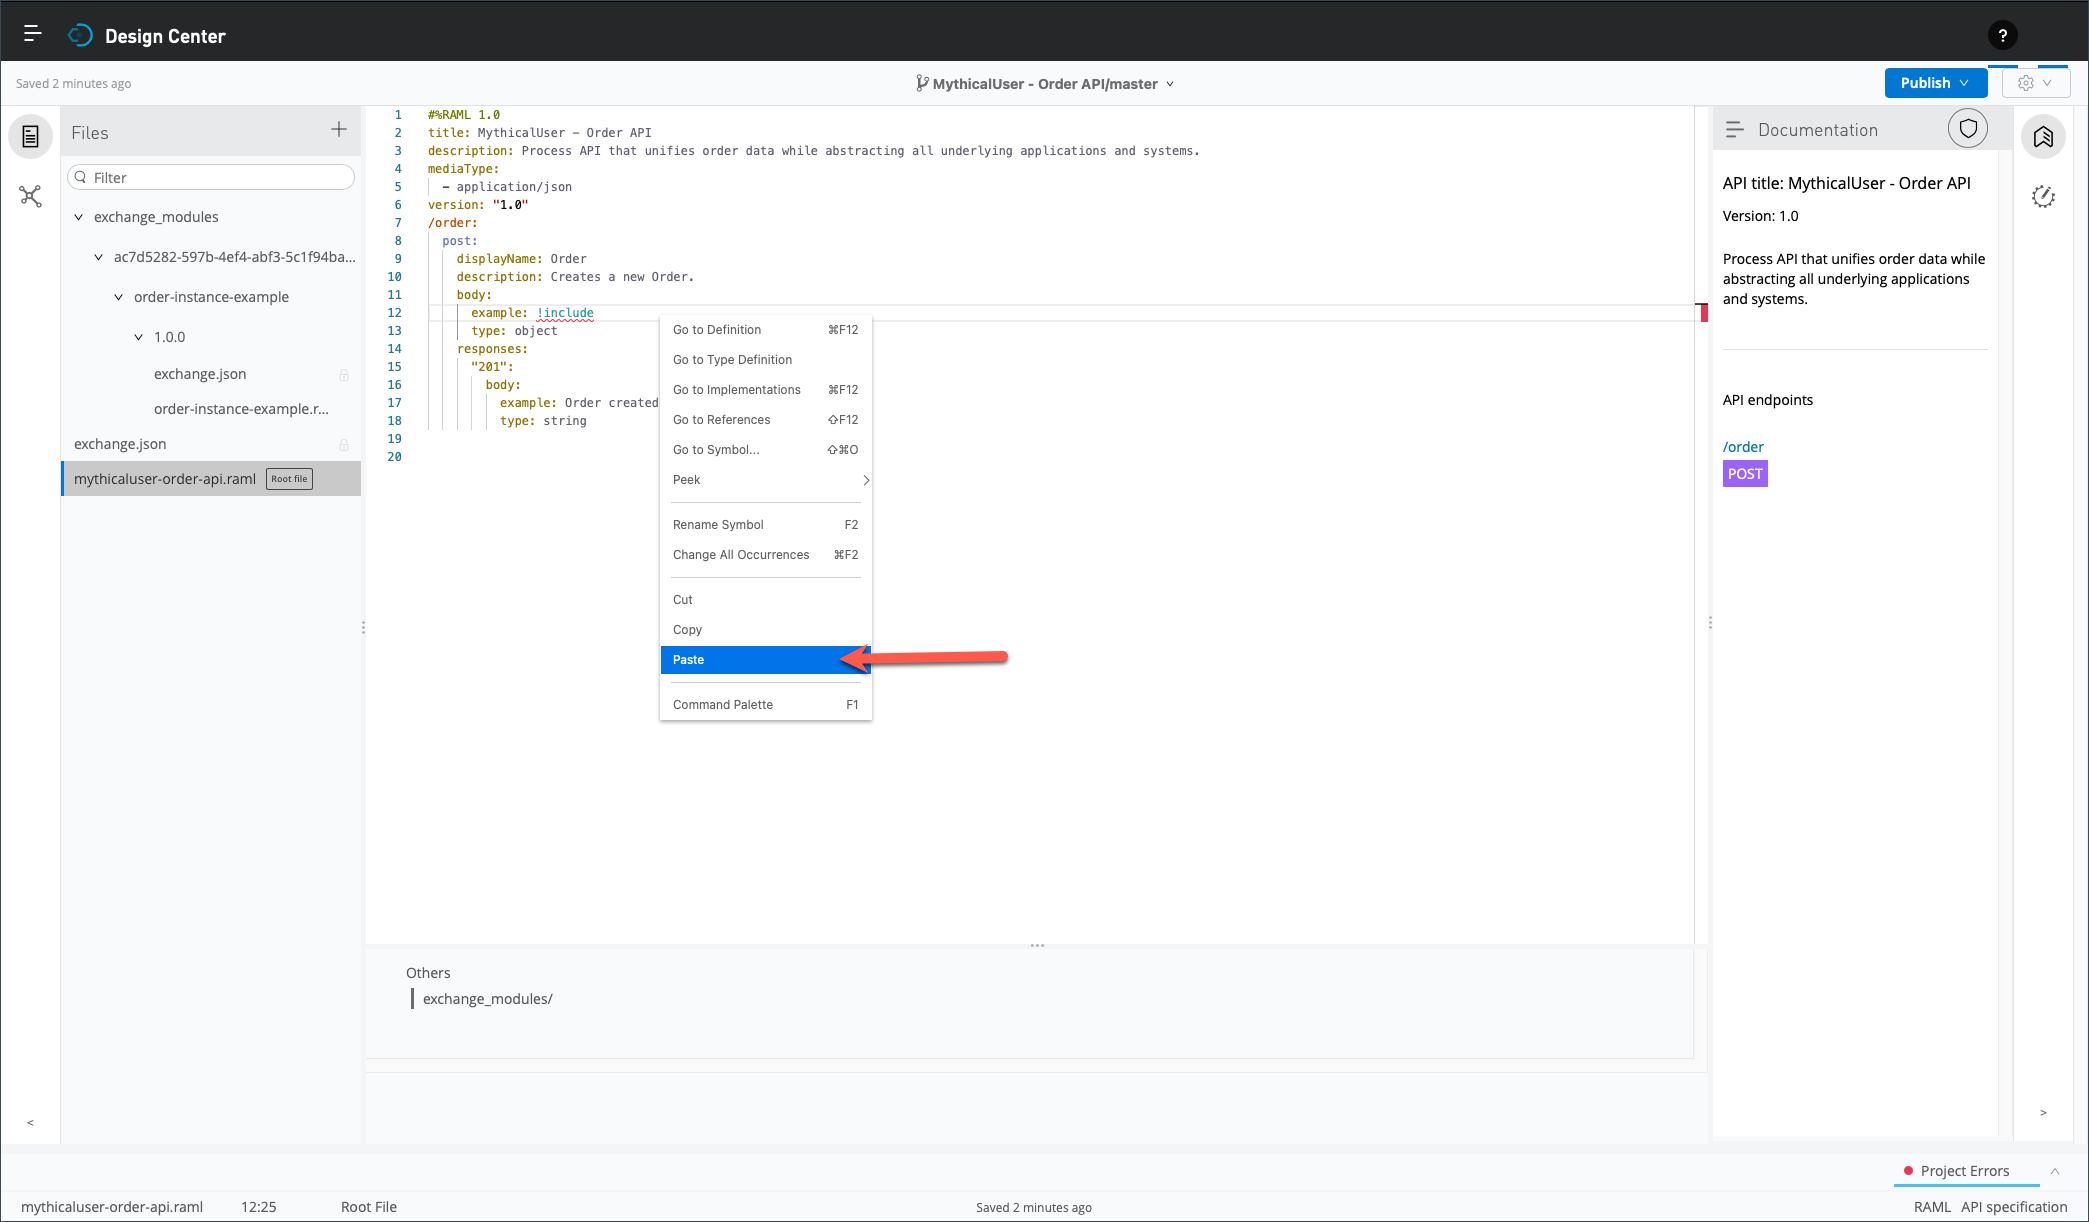
-
In the text editor, position your cursor to the right of the example: !include element, right click your mouse, and select the option Paste from the context
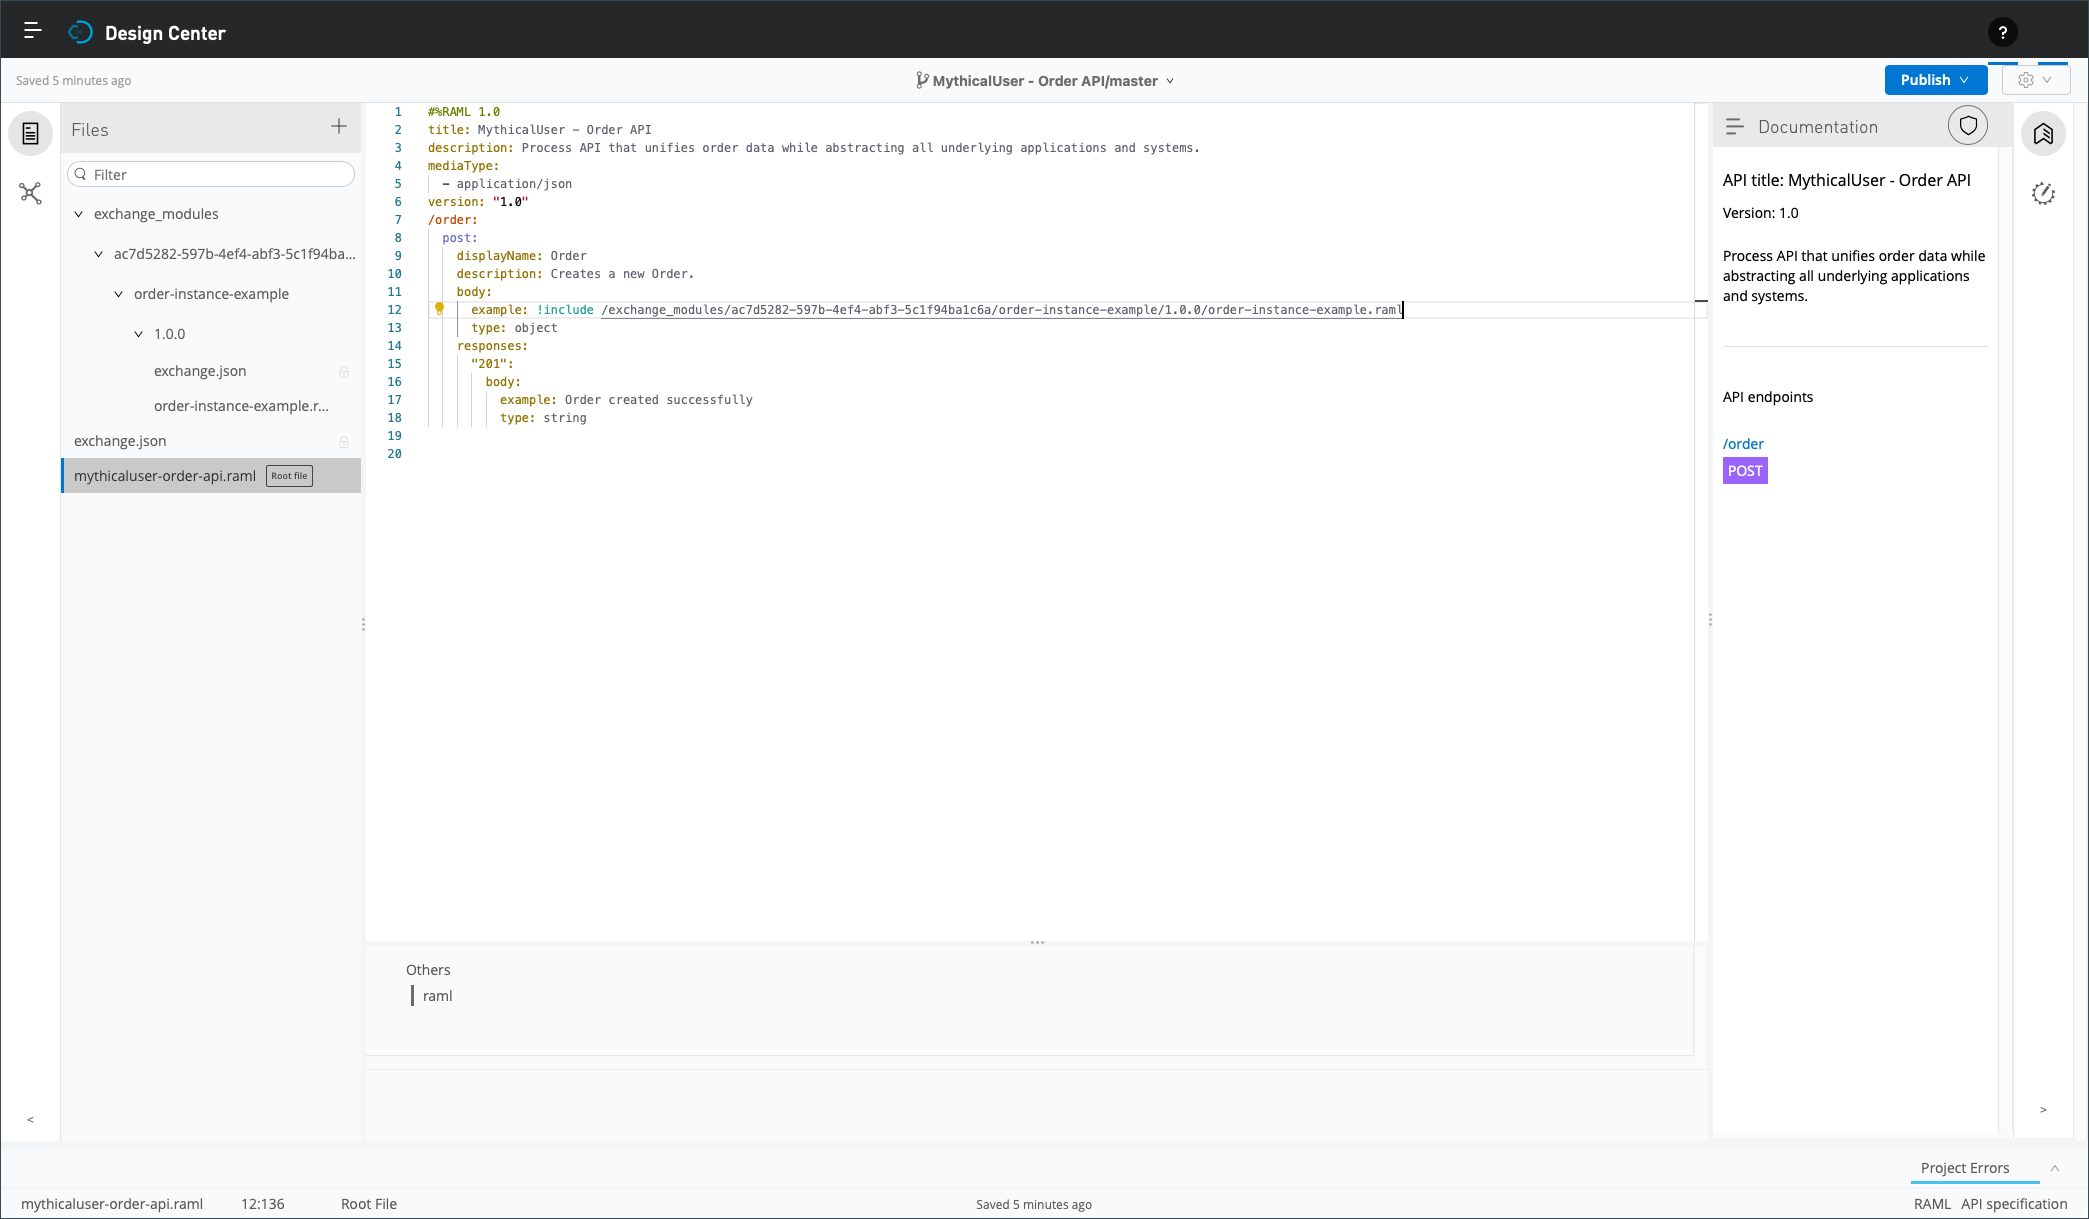
-
You replaced the hard coded example with a RAML fragment.
As discussed previously, the reuse of RAML fragments is not limited to examples. We commonly leverage RAML fragments to promote reuse and maintainability when designing API specifications.
Step 7: Using the Mocking Service
You have created the first revision of your Order API specification at this stage. Now, you will validate it and verify its design using the Mocking Service. The mocking service enables you to simulate the behavior of your API specification. It returns the HTTP status codes and example payloads you defined in your API specification.
-
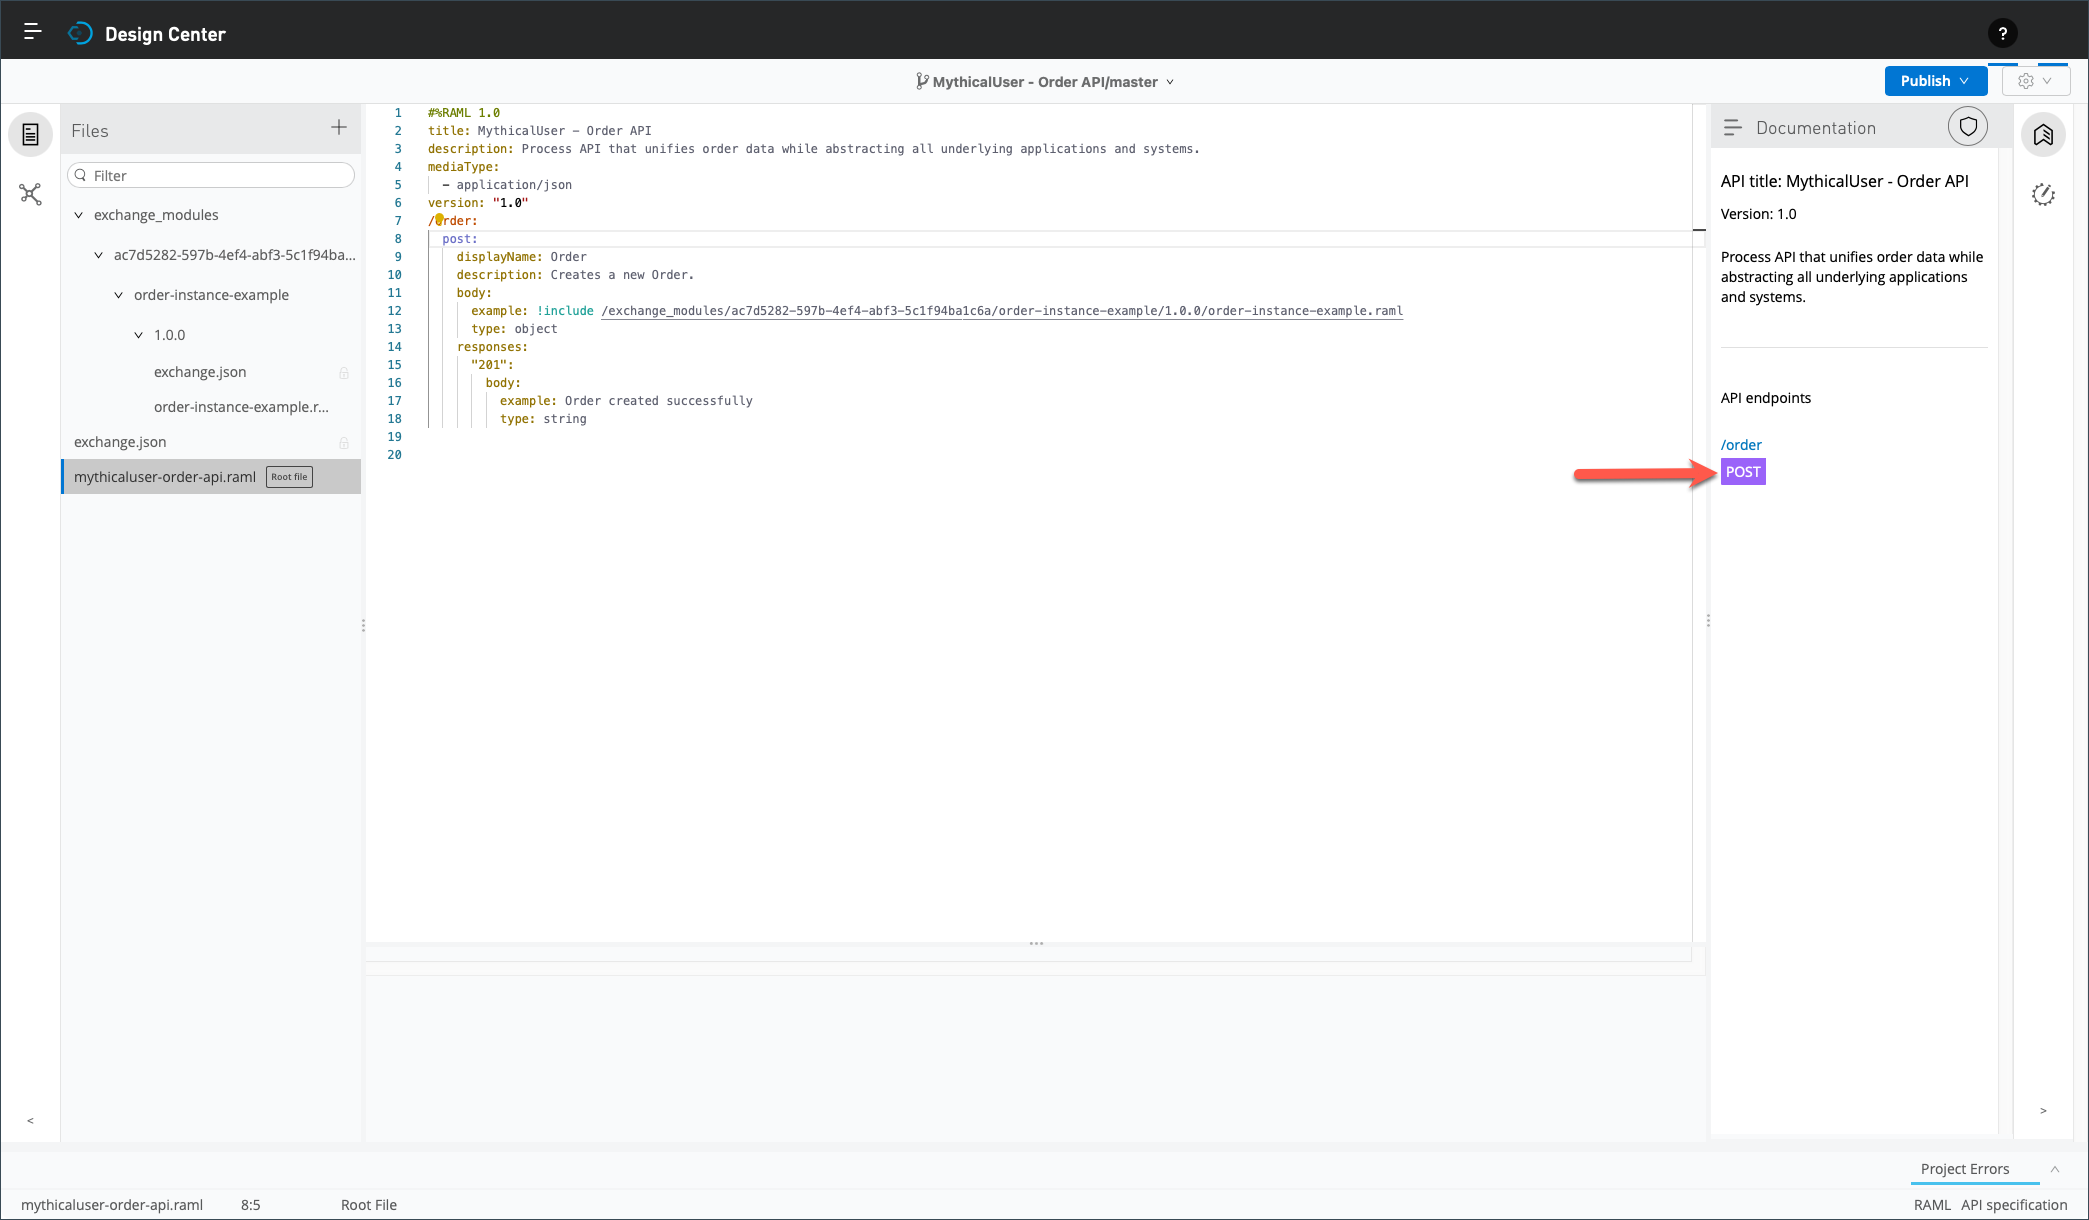
Resuming from the previous step, click on the POST button in the right Documentation panel.
-
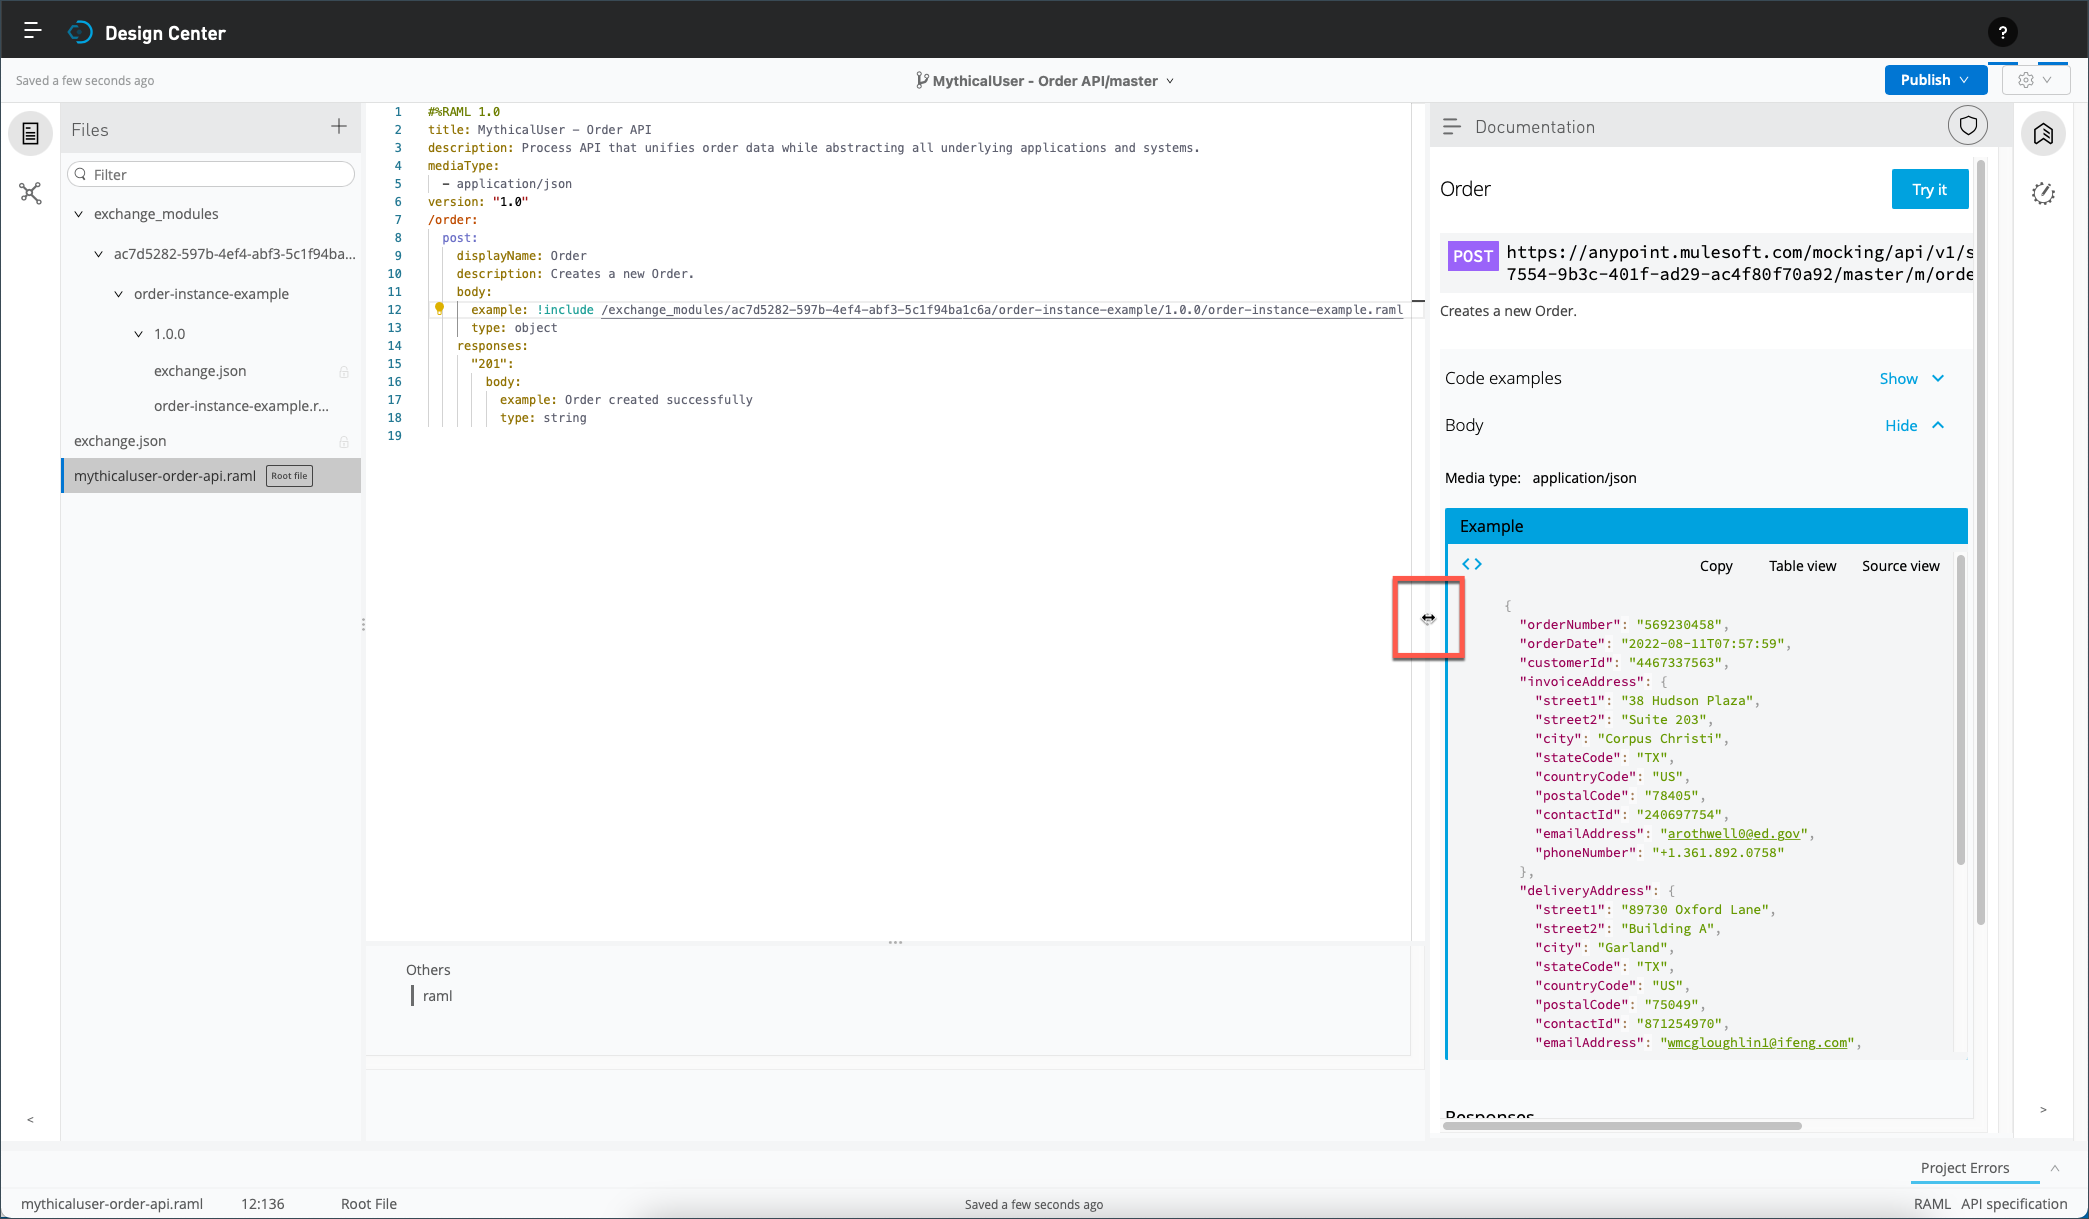
Optionally, expend the right panel. Regardless, the right panel displays the mocking service for the Post method of the Order resource, including the example payload you included in the specification.
-
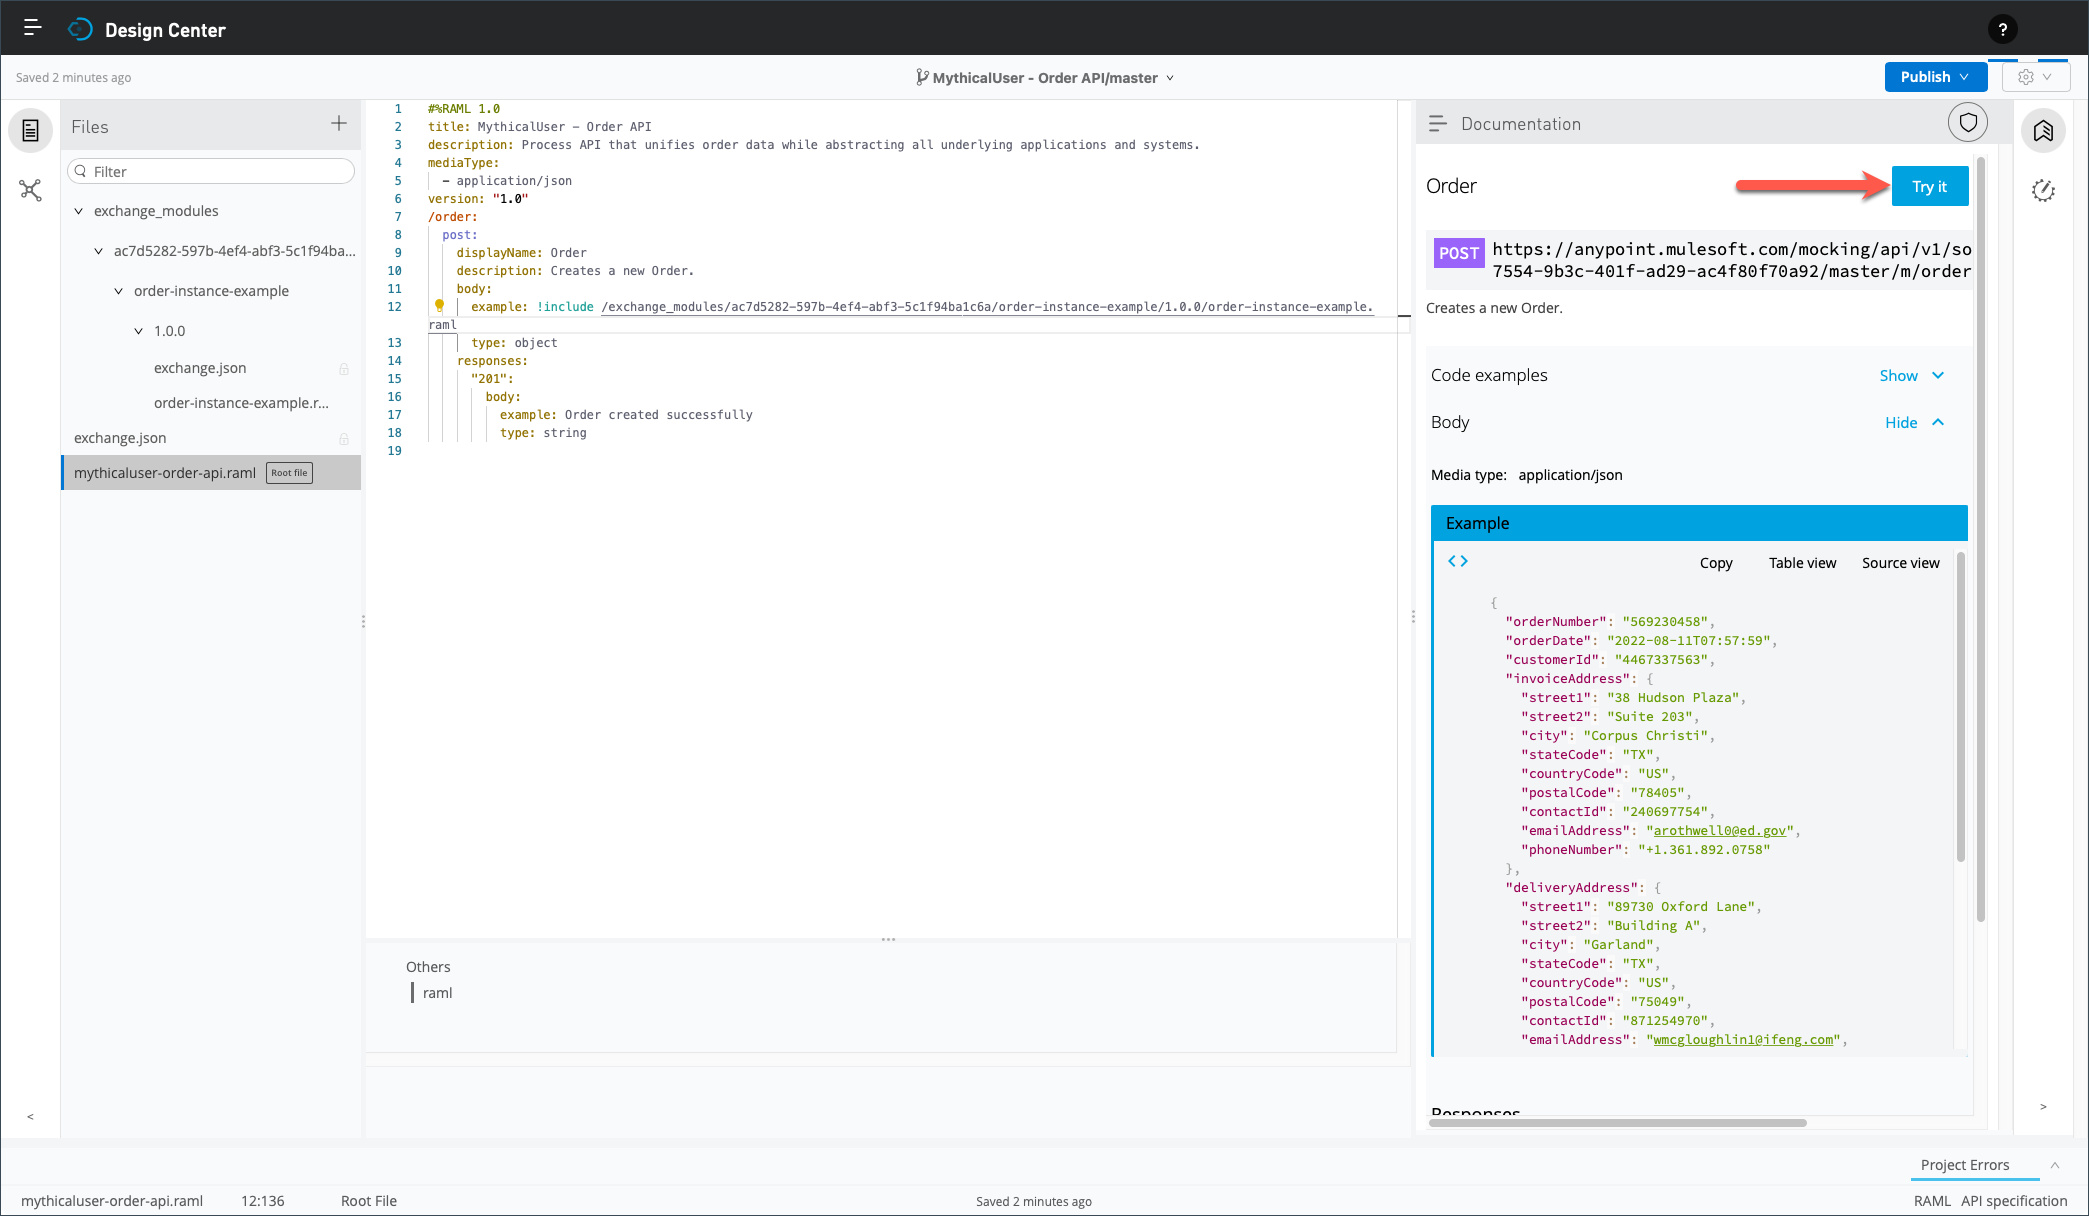
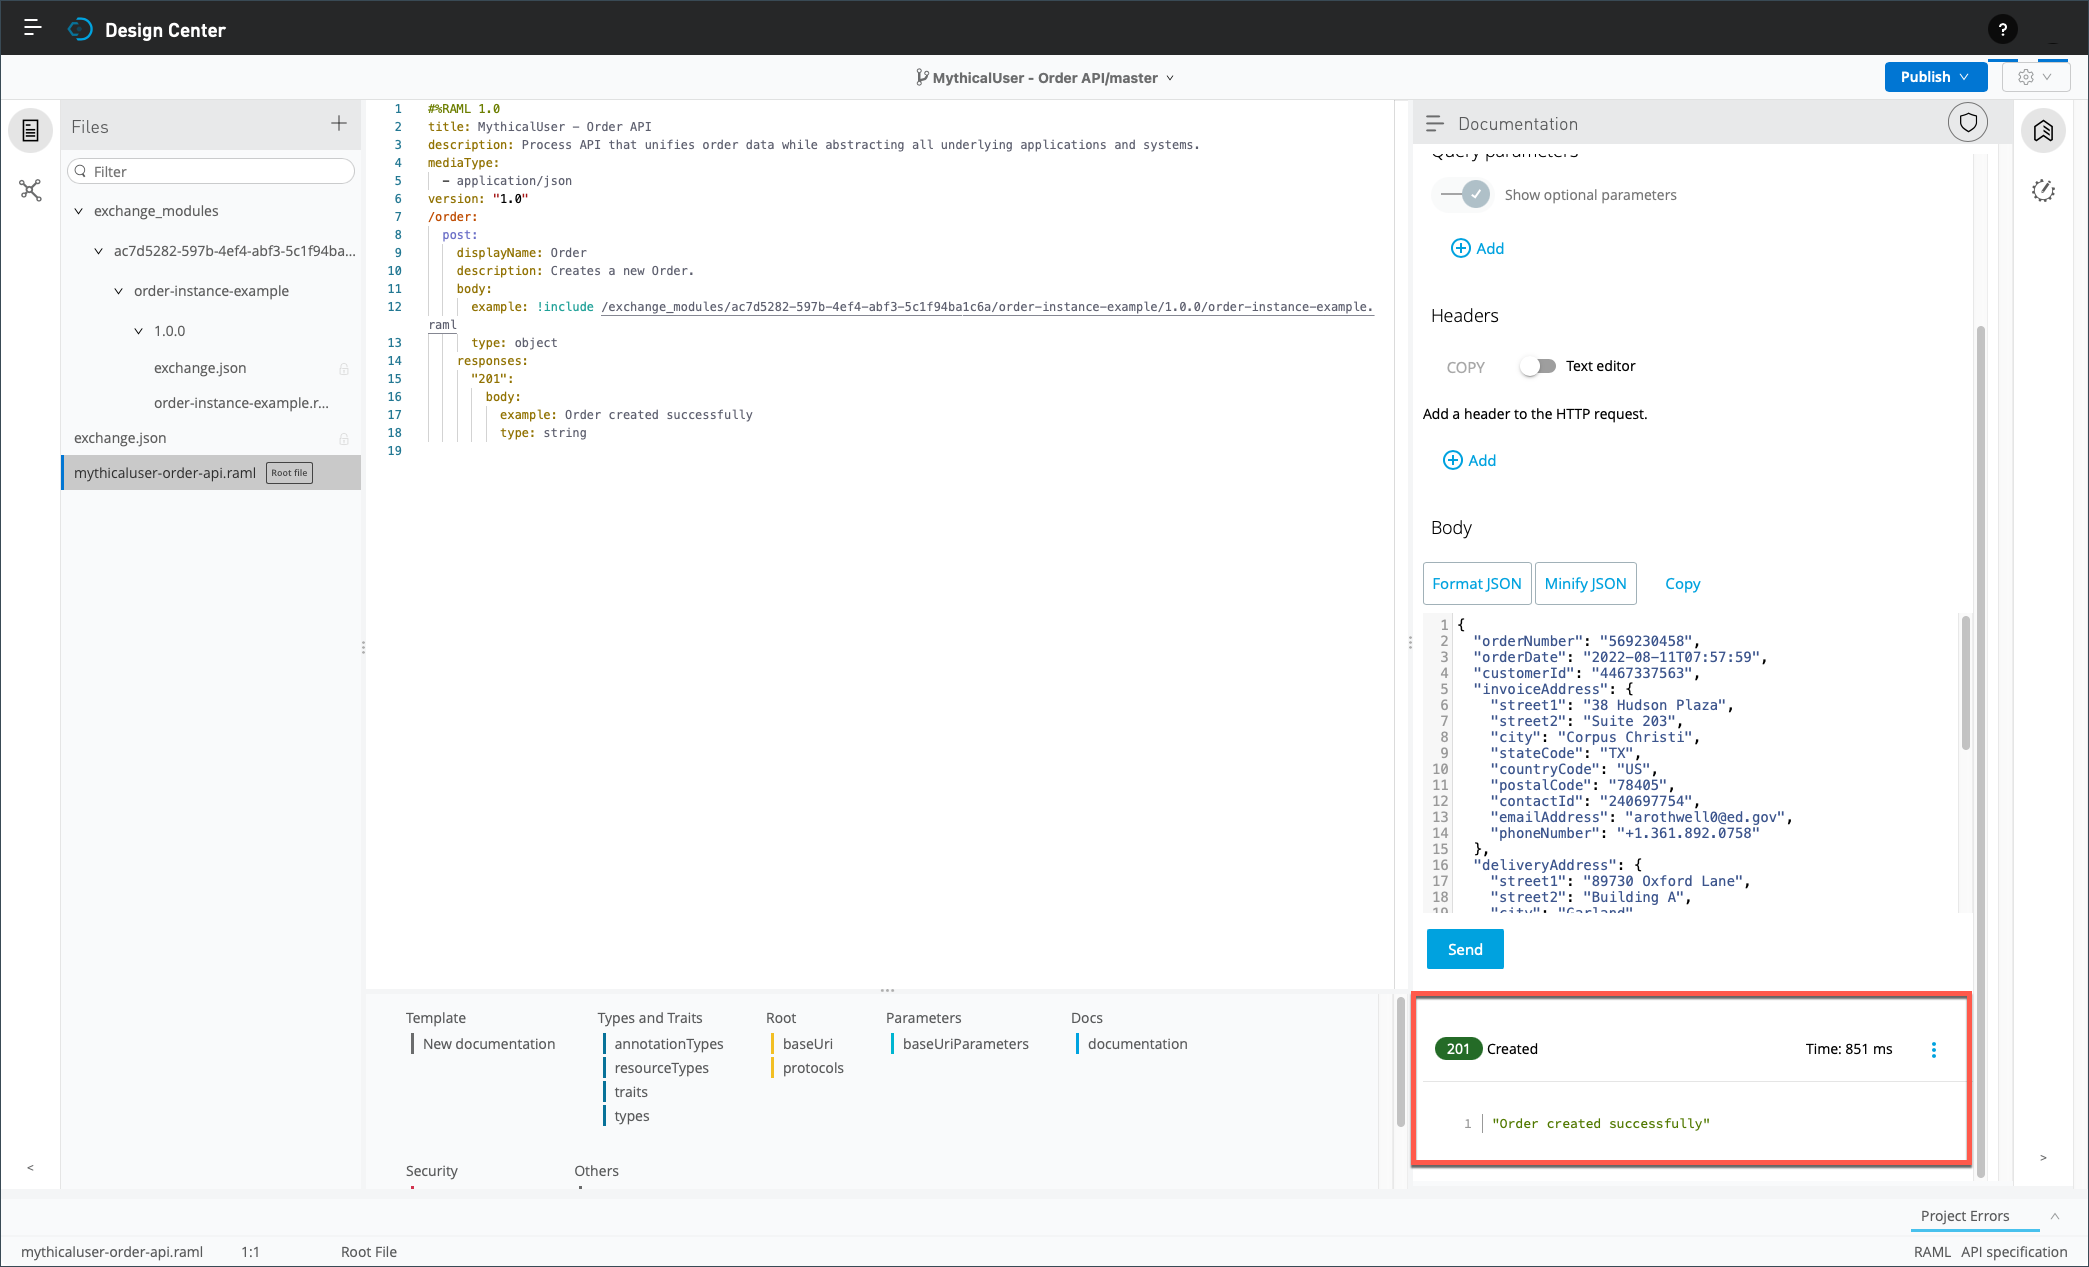
Click on the Try it button to simulate the Post method of the Order resource.
-
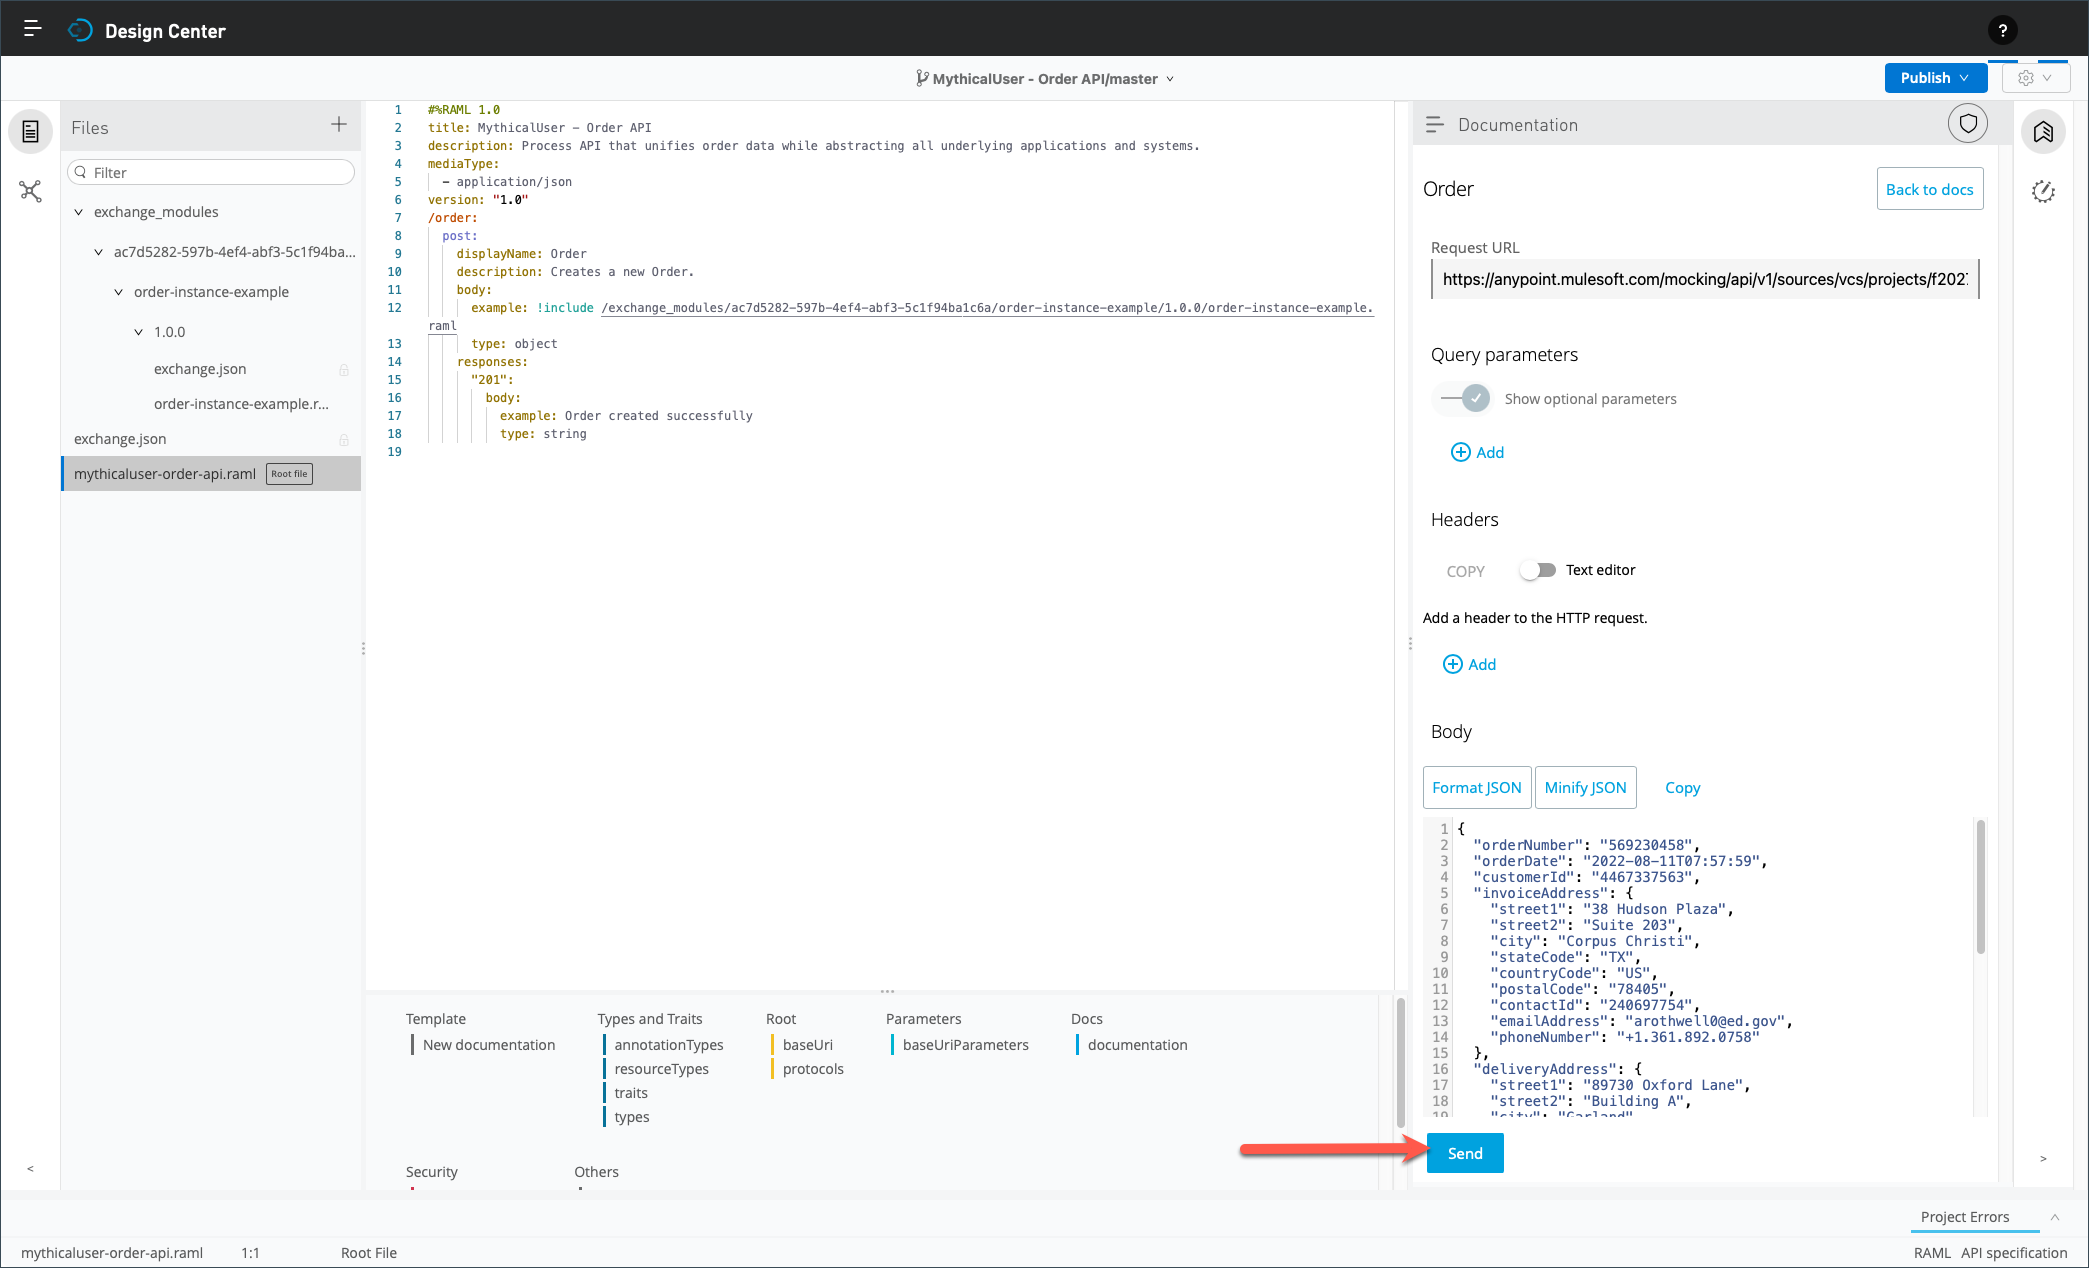
Click on the Send button.
-
Scroll down and notice the 201 status code and example payload you defined in your API specification.
This quick overview only scratched how you can leverage the mocking service to validate assumptions and explore your API’s behavior. Even experienced API designers and developers leverage it before sharing their API’s mocking service URL with consumers for further validation.
Summary
This lab exercise focused on Anypoint Design Center. First, it guided you through the process of designing an API specification using the API Designer visual editor. Then you switched to the API Designer text editor, which enabled you to edit the API specification in RAML. In the next lab exercise, you will publish your Order API specification to Anypoint Exchange.
Proceed to Lab 4: Overview of Anypoint Exchange - Part 2 to continue.