Lab 5: Overview of Anypoint Studio
Temporary Placeholder - This lab exercise was copied from the Life Science workshop and its content is not ideal for manufacturing.
Overview
An API specification alone does not do anything. It is up to an application developer to implement the various functions that make up the API specification.
This lab exercise will focus on using Anypoint Studio to implement an API specification that is downloaded from Anypoint Exchange. You will see how Anypoint Studio "scaffolds" the API specification and creates a skeleton implementation of the API. You will then explore various features of Anypoint Studio that make building out an API implementation fast and easy.
Learning Objectives
-
Become familiar creating an API implementation from an API specification that has been downloaded from Anypoint Exchange.
-
Become familiar with the various message processors that make designing API implementations with MuleSoft more of a "clicks, not code" approach to integration.
-
Learn how to use and test your API implementation by using an integrated MuleSoft runtime that is included in Anypoint Studio.
Step 1: Launch Anypoint Studio
In this step you will launch Anypoint Studio and quickly review some if it’s key features.
-
Launch the Anypoint Studio from the shortcut on your desktop.
-
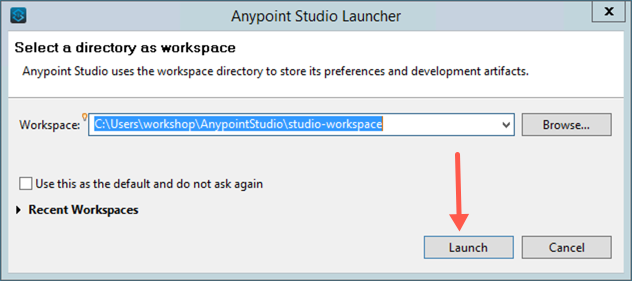
You may be prompted to select a directory to store your workspace. Accept the default value and then click on the Launch button to continue.
-
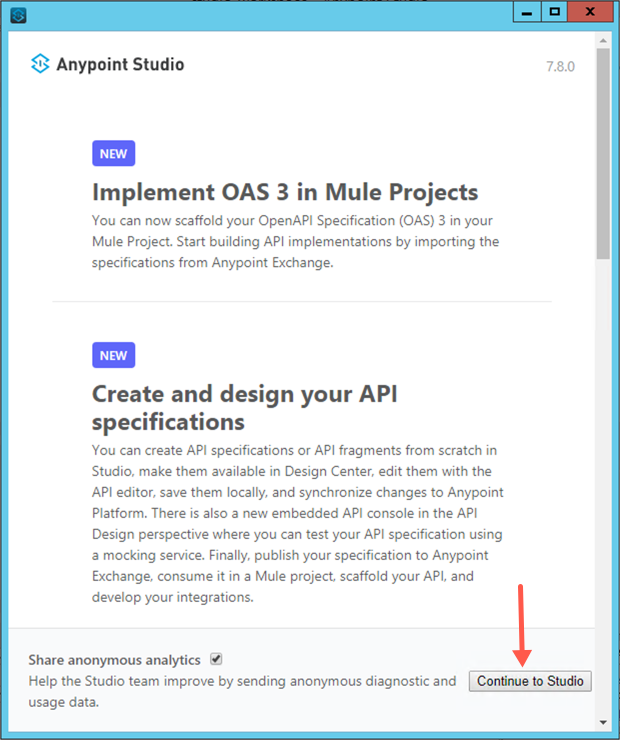
The Anypoint Studio welcome screen may appear. Click on the Continue to Studio button if it appears.
-
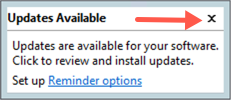
Whenever you launch Anypoint Studio it will check all of the projects in the current workspace for updates to MuleSoft components. If the Updates Available window appears simply close the window to continue. (Updating components is not required to complete this workshop.)
Step 2: Review Key Features of Anypoint Studio
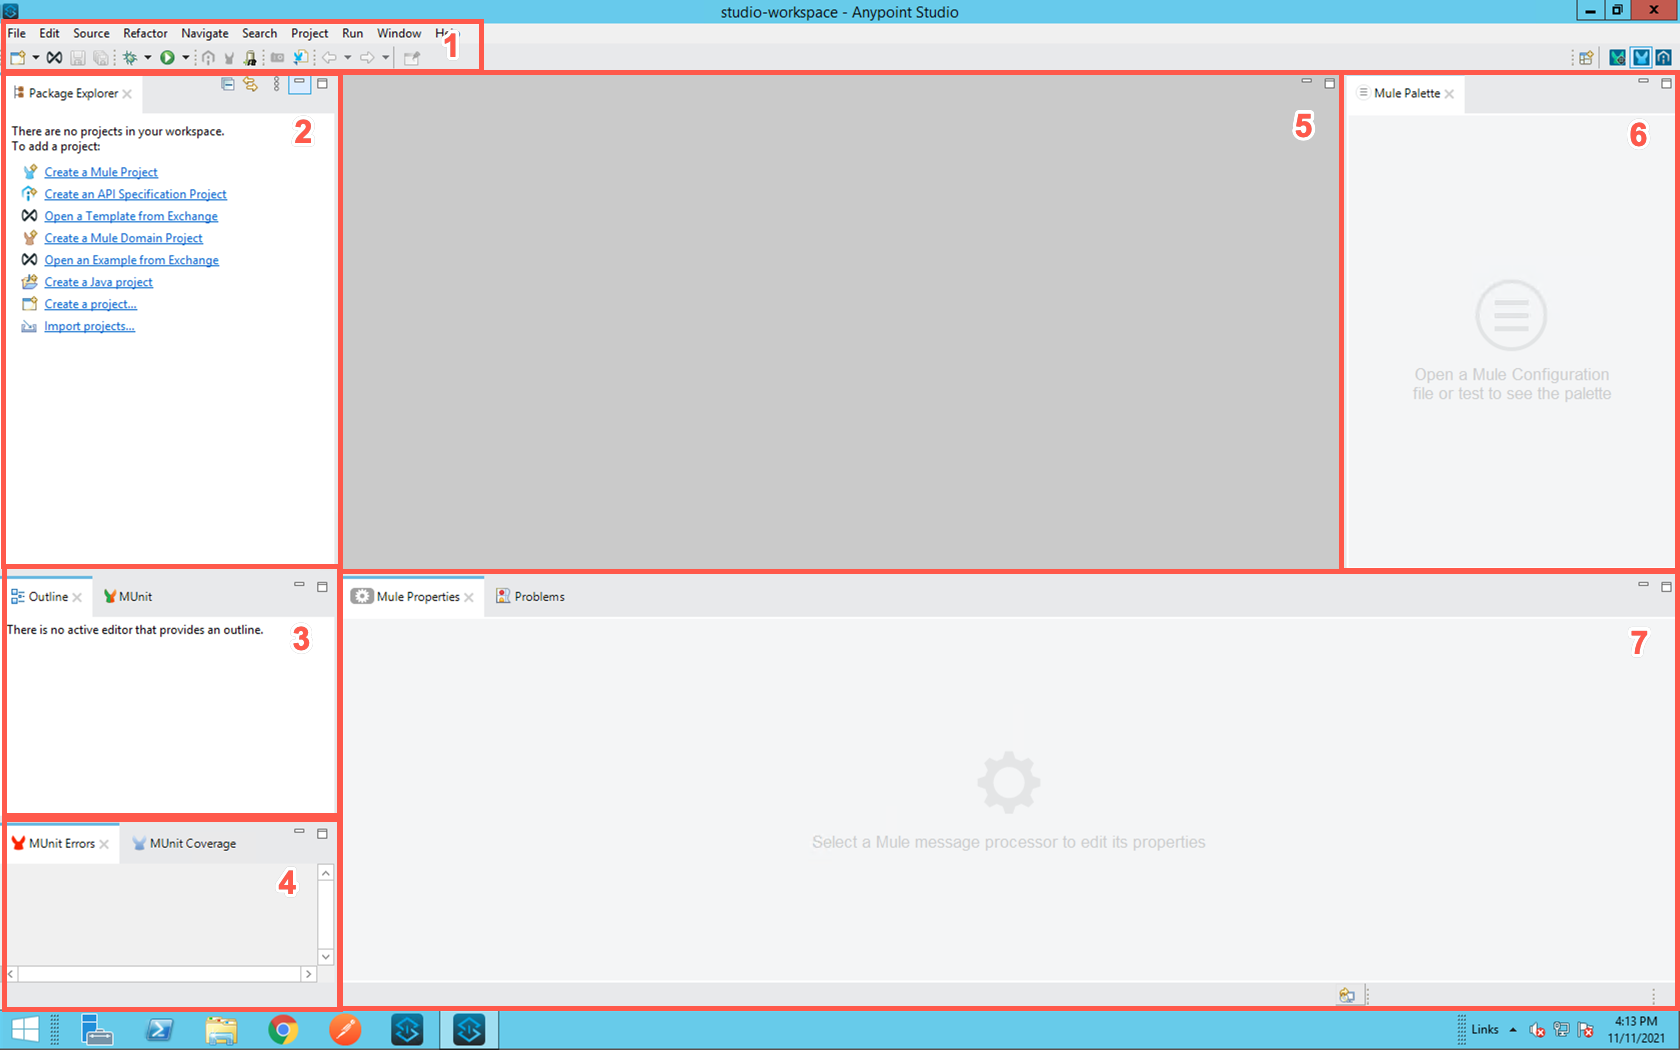
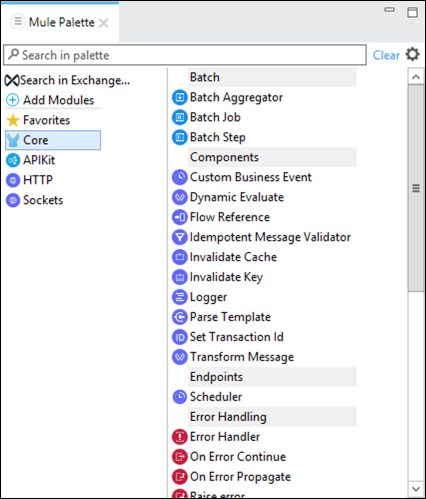
Anypoint Studio is an Eclipse based developer toolkit that is used to develop, test and deploy MuleSoft applications. It supports integration with popular developer tools such as Maven, Git and MUnit (A version of JUnit that is extended to support testing of MuleSoft components.) Refer to the following screen capture to understand organization of the Studio.
-
The menu bar and tool bar provide quick access to many of the functions within the studio.
-
The Package Explorer is used to work with the various MuleSoft applications that are stored in the current workspace. Note that if the workspace does not have any projects in it you will see a number of hyperlinks to create projects of various types.
-
This section includes several supplemental tabs that provide easier navigation through a project or MUnit testing tools. Depending on your current activity in the Studio, additional tabs may be displayed.
-
This section inlcudes MUnit specific tabs to help with testing of applications before they are deployed.
-
This section is the main editor window. Depending on the specific asset that you are currently editing, you may see differnt types of editors such as graphcal flow designer, an XML editor or a schema editor.
-
This section contains the Mule Palette, which is a list of the available message processors that you may drag-and-drop onto your Mule flow. It’s contents will be populated when you are currently editing a Mule flow.
-
This section includes several different types of tabs. Depending on your current activity you may see:
-
A properties editor for the artifact that is currently selected in the main editor window.
-
A console log that displays typical "system_out" and "system_error" messages as well as the output of any Logger processors that may be in your flows.
-
A view of the warning and errors that may exist in the project(s) that are in your workspace.
-
Step 3: Create a new MuleSoft Project from an API Specification
In this step you will create a new Mule application in Anypoint Studio from the Omni Channel API specification that you had reviewed earlier. This will be the implementation of your first MuleSoft hosted REST API.
-
Start by clicking either the Create a Mule Project hyperlink:
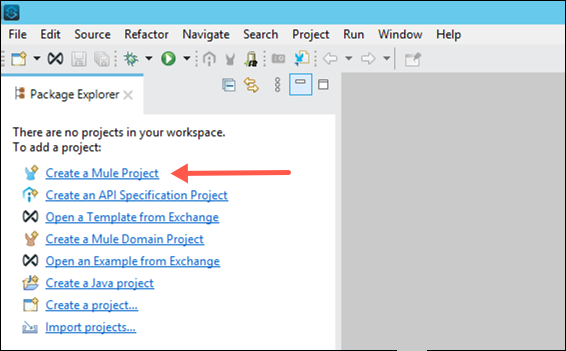
or by using the File → New → Mule Project menu item.

-
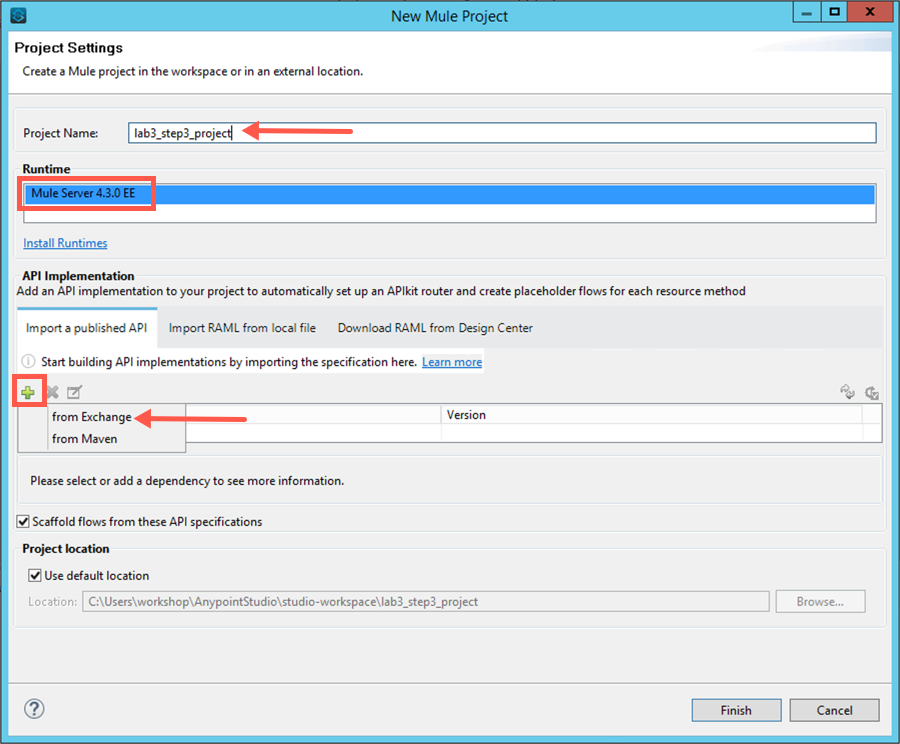
Enter a name for your project, select the latest Mule runtime version and then click on add new dependency icon. Select from Exchange once the popup menu appears.
-
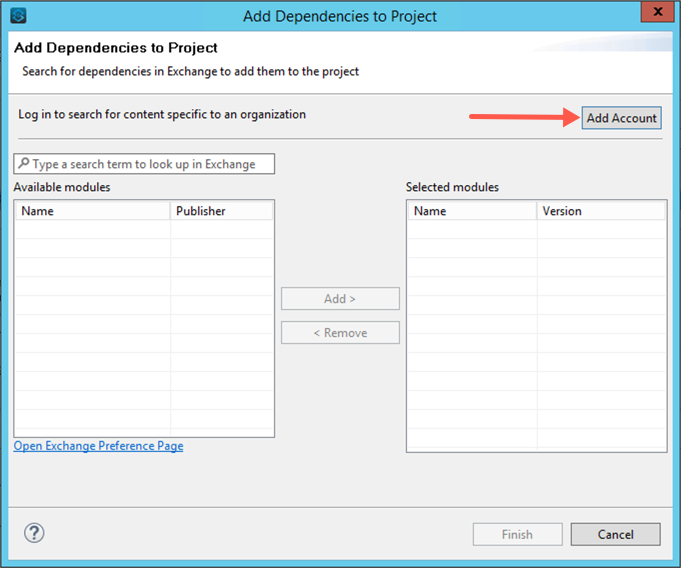
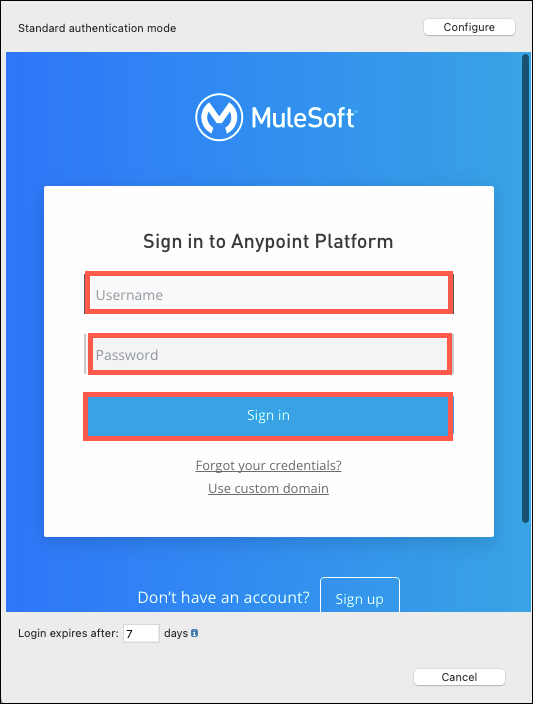
You will need to search Anypoint Exchange for the API that you wish to implement. In order to access the API specification you will first need to login. Click on the Add Account button to login.
-
Enter your credentials and then click on the Sign in button.
-
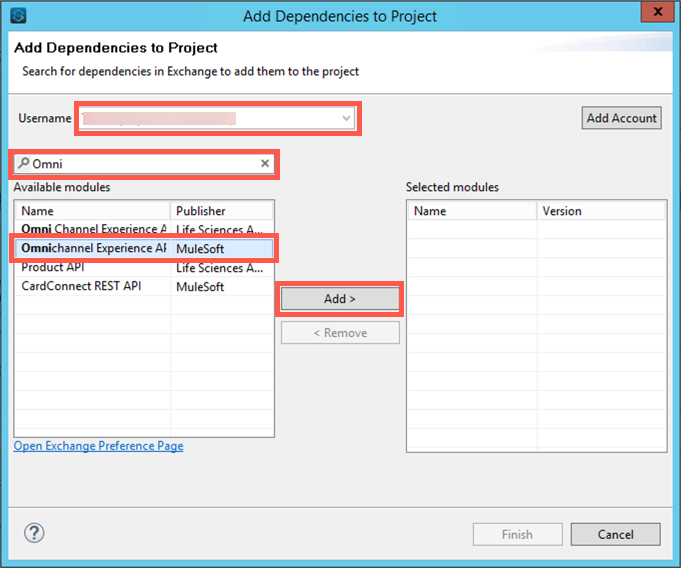
Your Username should appear in the text box at the top. Now, enter "Omni" in the search field. A list of available API specifications will appear. Select the Omnichannel Experience API that is published by MuleSoft and then click on the Add > button.
-
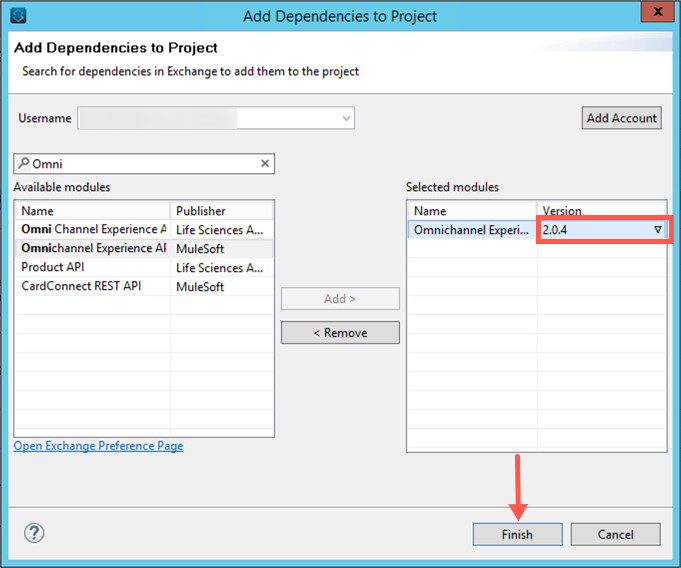
Note that you have an opportunity to select a specific version of an API, if multiple versions have been published. For this lab exercise you should selecte the most current version and then click on the Finish button.
-
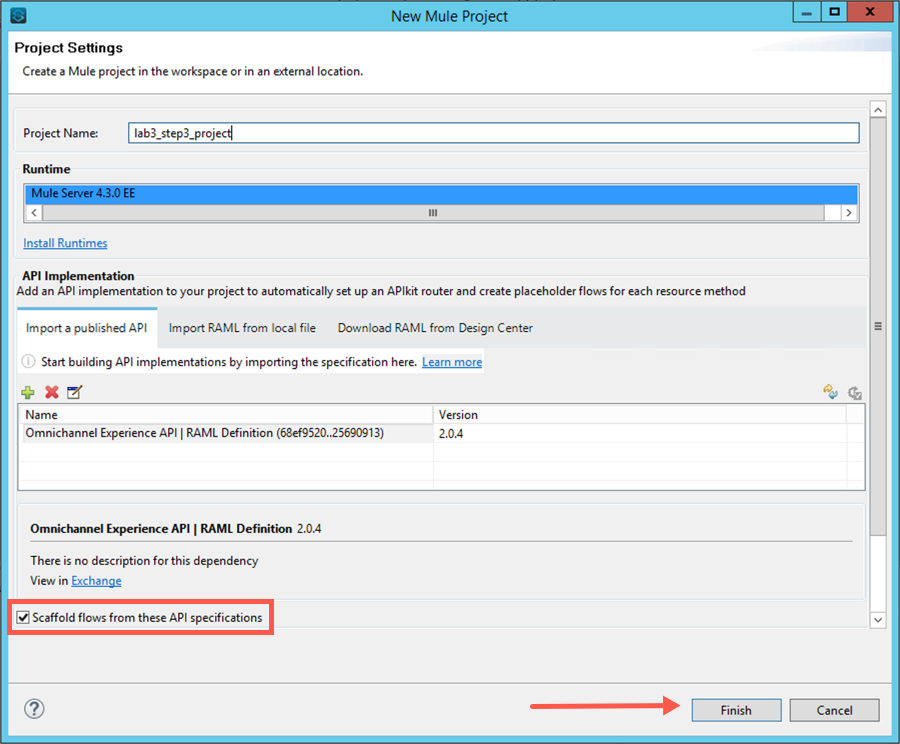
Ensure that the Scaffold flows from these API specifications checkbox is selected. This feature will build out ("scaffold") Mule flows that implement all of the methods, URI parameters, query parameters and other features that were specified in the API specification. Click on the Finish button to start the scaffolding process.
Step 4: Explore the Scaffolded Project
Explore the flows that were automatically generated.
-
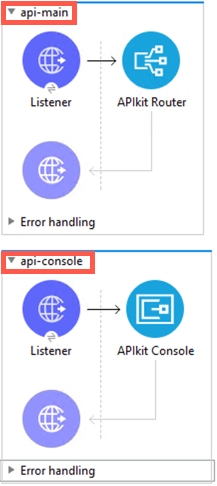
At the top of the diagram you will see two flows that are included in all scaffolded APIs: api-main and api-console. These are followed by additional flows that were created as a part of the scaffolding process. There is one flow for each of the methods and resources defined in the API specification.
-
api-main This is the main flow. It exposes an HTTP service and processes the requests using the APIkit Router.
-
The HTTP request will be converted to a mule message, and redirected to the requested flow by the APIkit router.
-
By default the HTTP listener will listen for requests on http://localhost:8081/api.
-
-
api-console This is used to enable testing of the API when it has been deployed to a MuleSoft runtime. It is similar to the mocking service that you saw in Anypoint Exchange. This flow is typically removed when deploying an API implementation to a MuleSoft runtime.
-
-
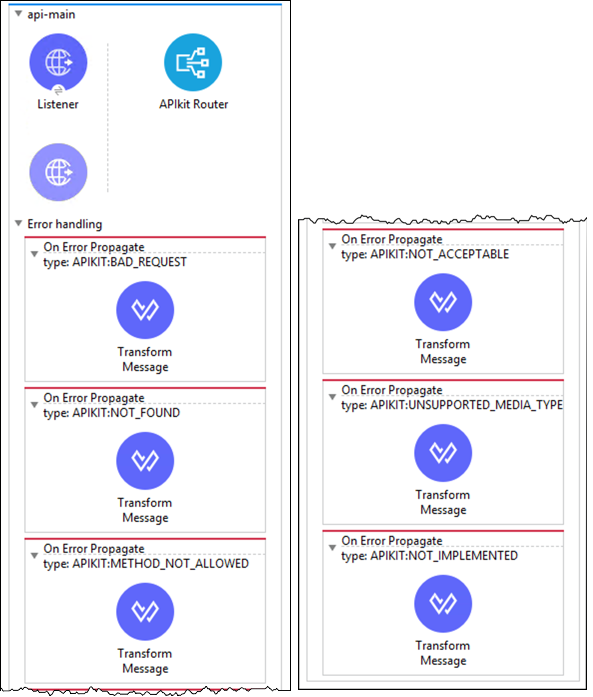
Inside the api-main flow an Error handling block is also included. In this block multiple On Error Propagate definitions are autogenerated for common API error responses such as METHOD_NOT_ALLOWED, BAD_REQUEST etc.
-
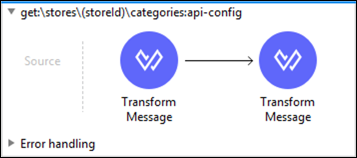
The remaining flows are defined by your API Design in the RAML file. Typically, there will be flows that look like this get:\resource, post:\resource, put:\resource, etc. Note that the name of the flow is very important for the APIkit router to be able to route the request to the appropriate flow - you don’t want to change these. An illustration of an automatically generated flow is shown below.
-
A RAML based API specification can contain example data that illustrates what is returned from the API. When APIkit detects example data in the API specification it will insert a Dataweave Transform Message component into the flow, which will then return a static response specified by the example data reference.
The static response returned by the auto-generated Dataweave Transform Message allows you to test the API as a stub immediately after generation. Obviously these flows can be enhanced to provide more advanced mock services as well as evolve them into full API implementation as we will see in the next lab.
-
Take a moment to explore the various flows that have been scaffolded.
Step 5: Test the Generated API Project
As mentioned at the start of this lab, Anypoint Studio includes a built-in instance of the MuleSoft runtime. This facilitates easy testing and debugging of applications right from the developer’s desktop. Complete the following steps to test out the generated API.
-
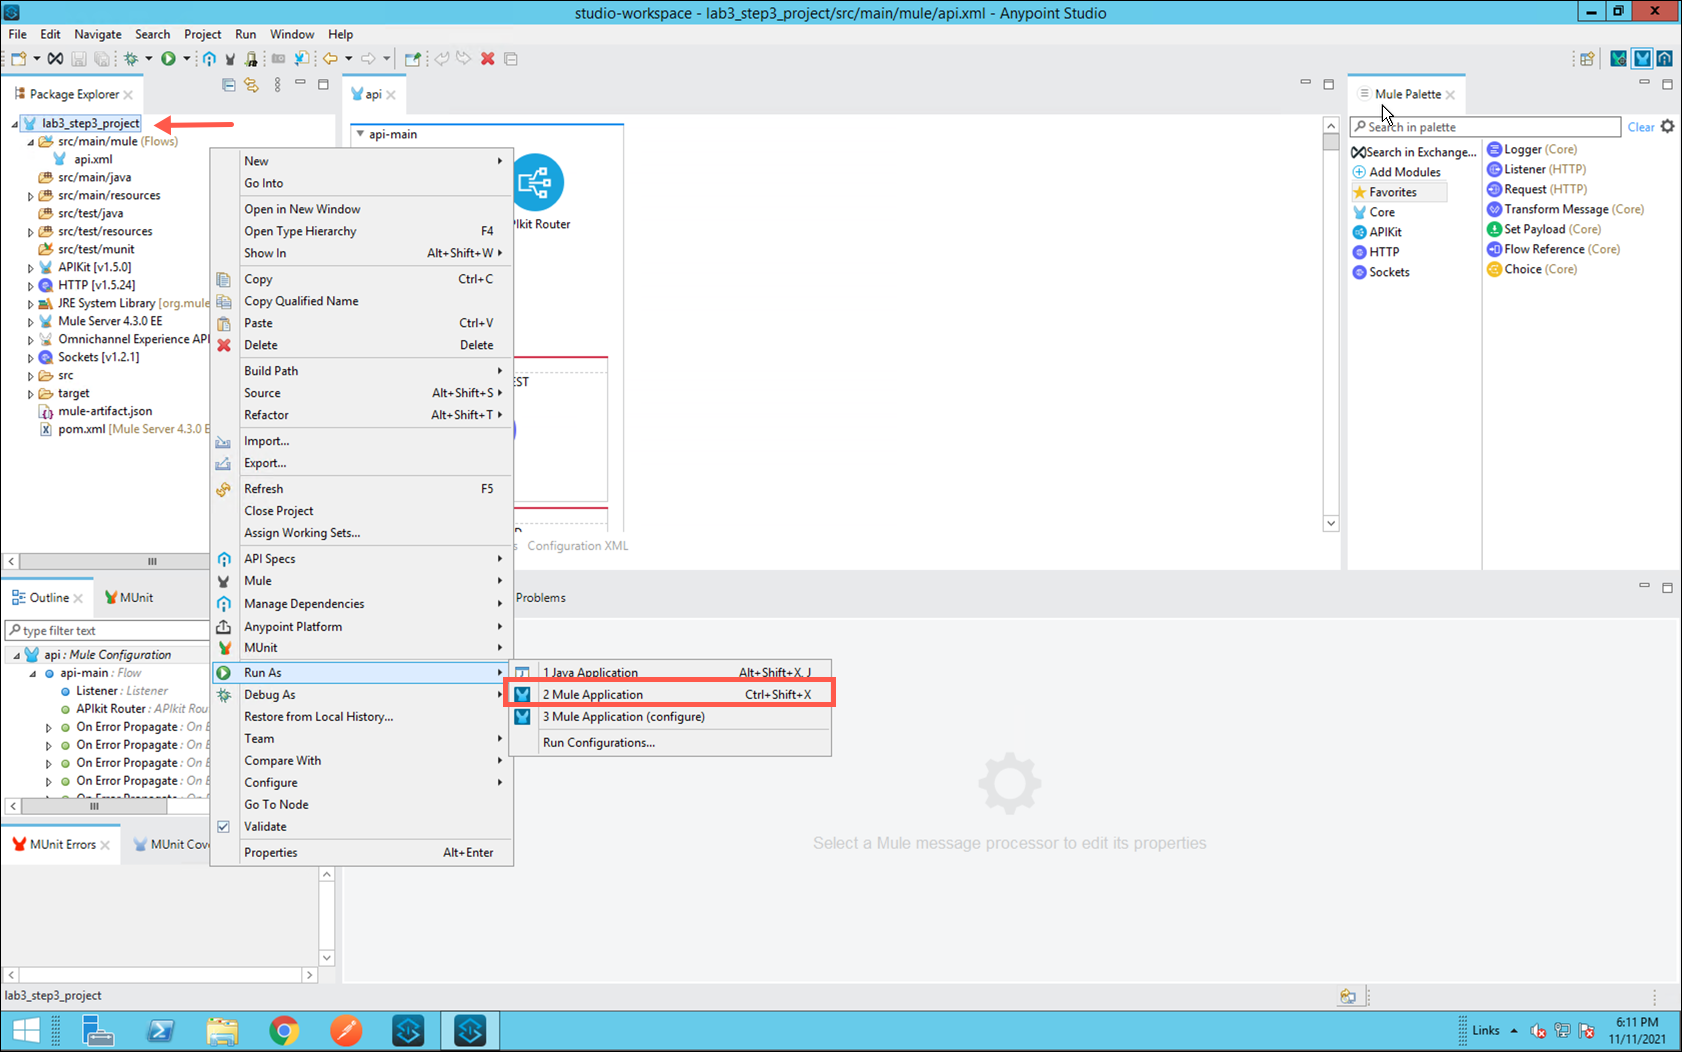
To test your application you may either click on the Run → Run As → Mule Application menu item:
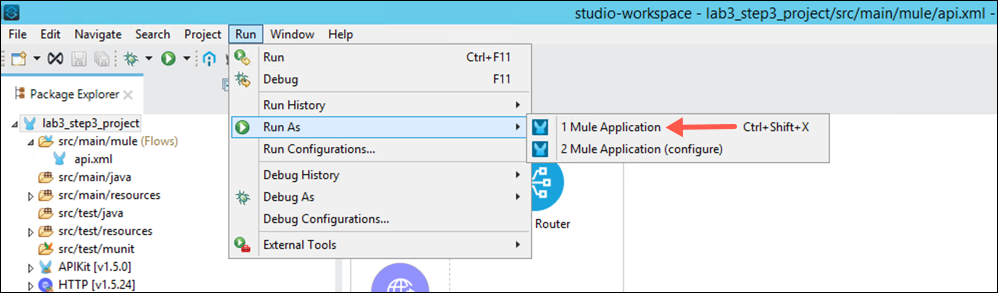
Or by right clicking on the project and then selecting the Run as → Mule Application menu item.
-
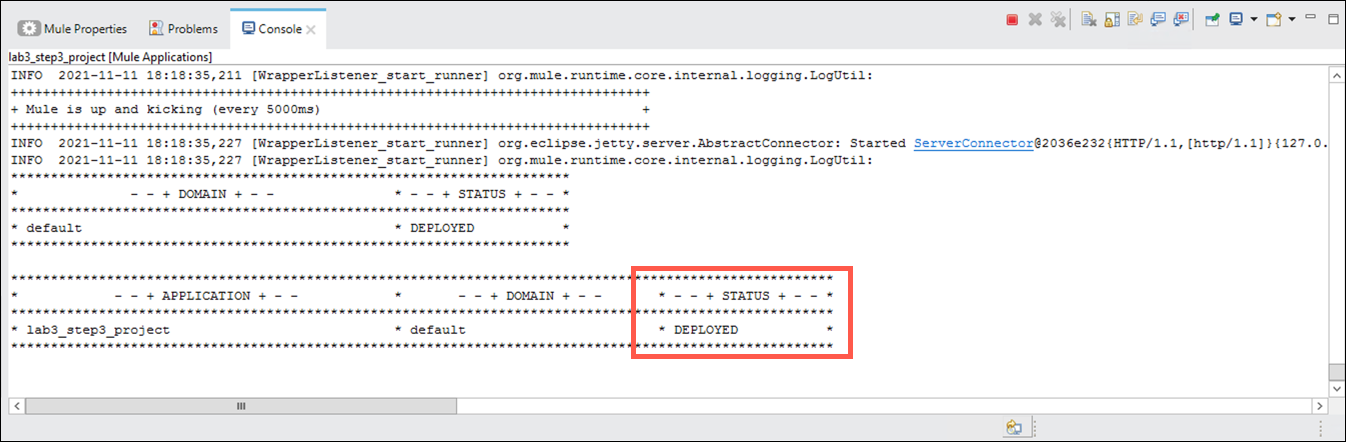
The application will start, and in the lower section of the Studio the Console tab will appear. Startup messages will appear during application initialization, and eventually you should see where your application is in a Deployed status.
-
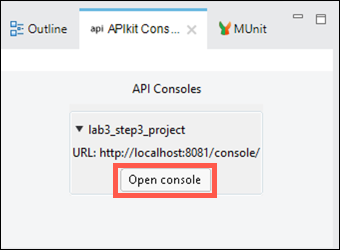
Anypoint Studio includes an additional feature known as the APIkit Console that is generated when a project is scaffolded. You may access the APIkit Console by clicking on the Open console button that has appeared in the lower left pane of Anypoint Studio.
-
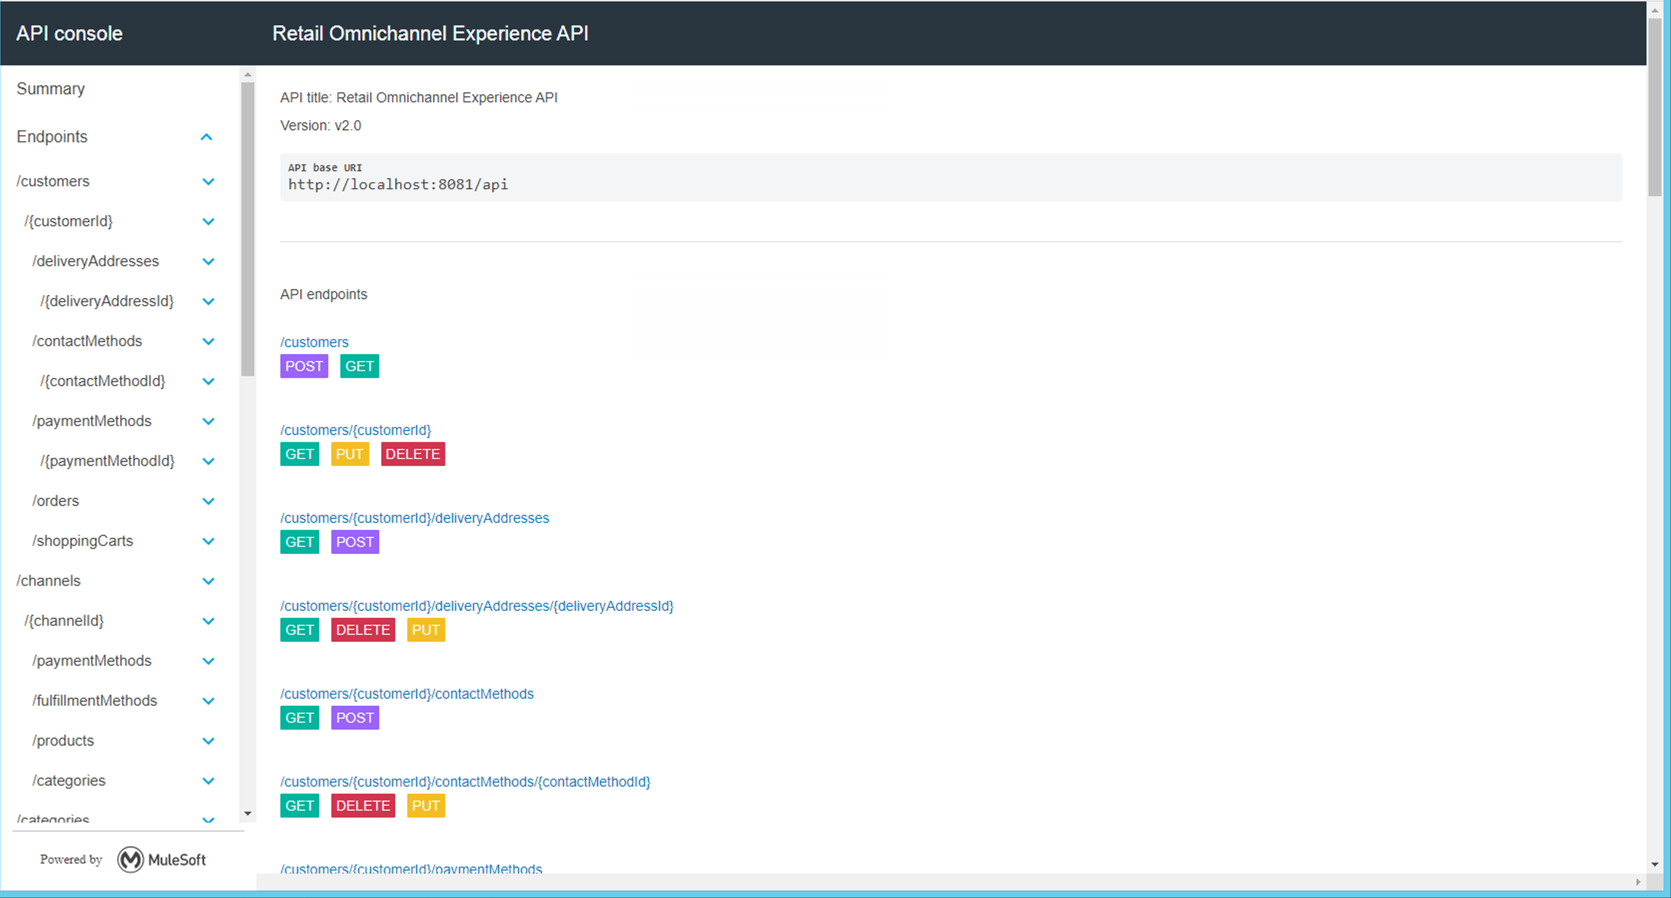
The APIkit Console will open a new browser window/tab in your default browser and will display the various methods and resources that are a part of the API specification.
-
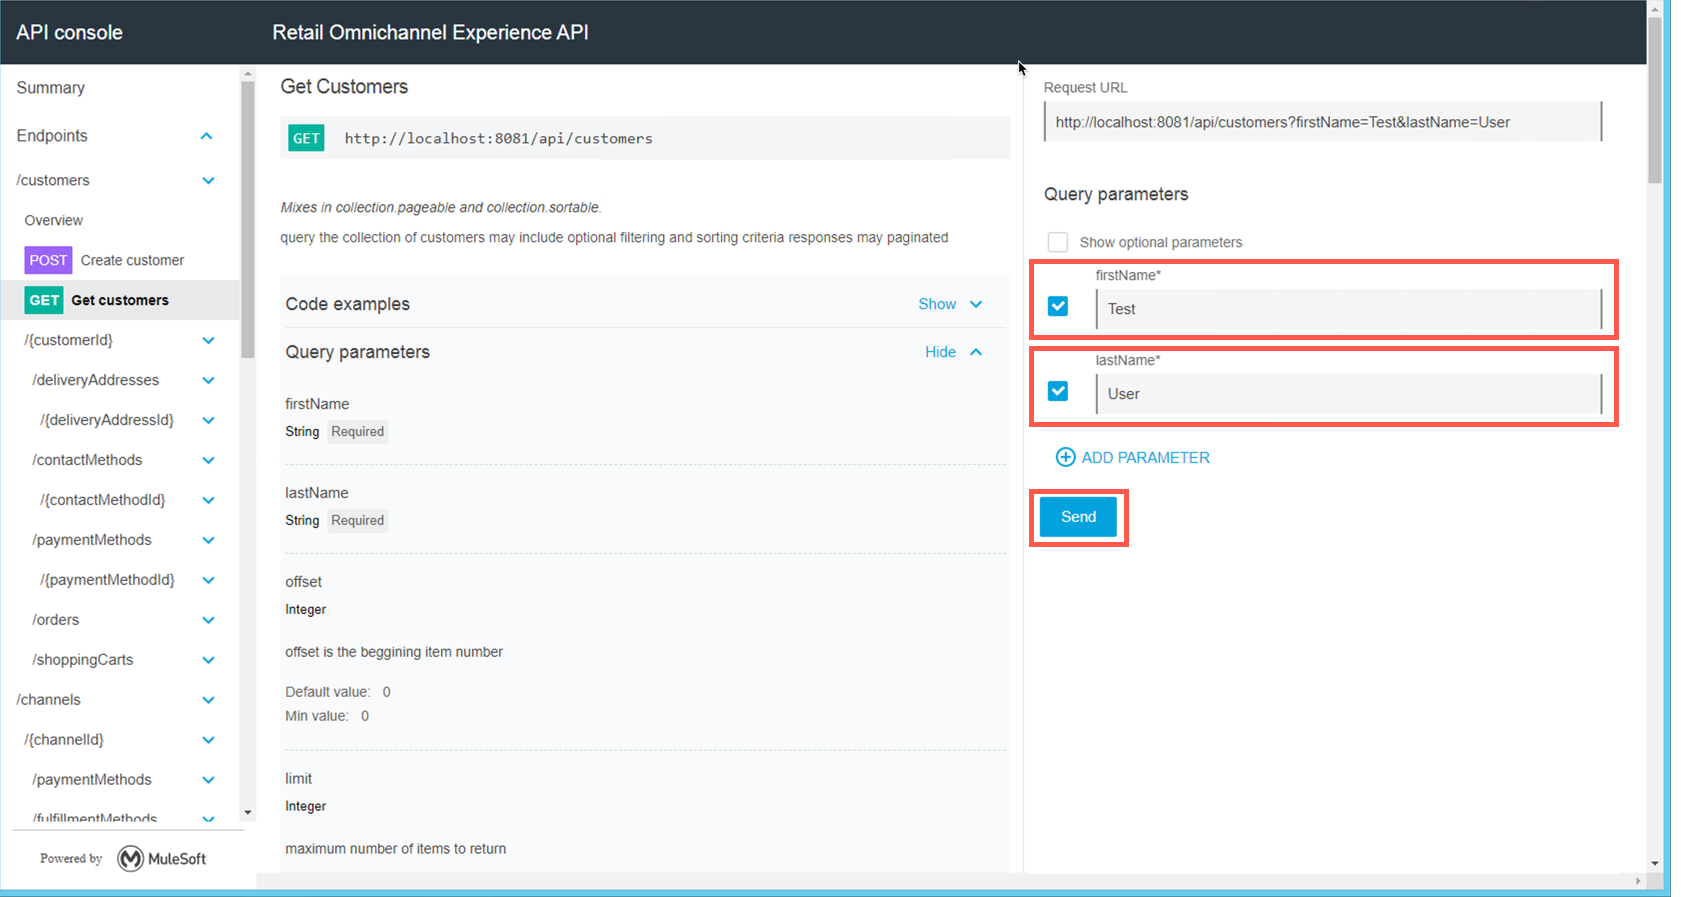
Testing is done by clicking on one of the methods that are listed for a resource, entering any mandatory fields that are required and then clicking on the Send button.
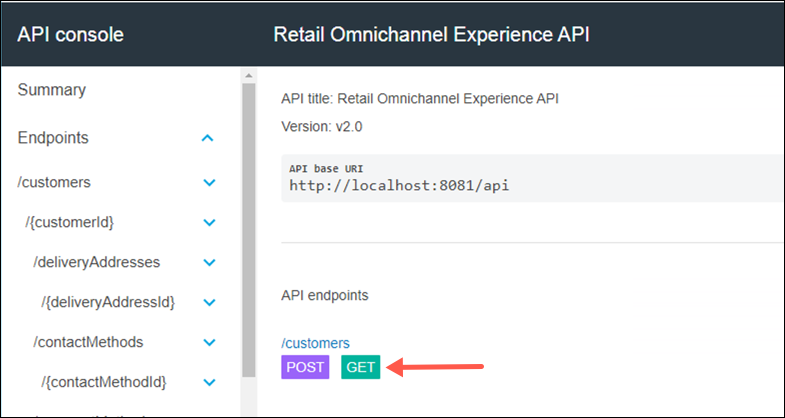
Test the Get Customers operation by clicking on the GET icon as shown below.
-
Enter data in the fields marked as mandatory, then click on the Send button.
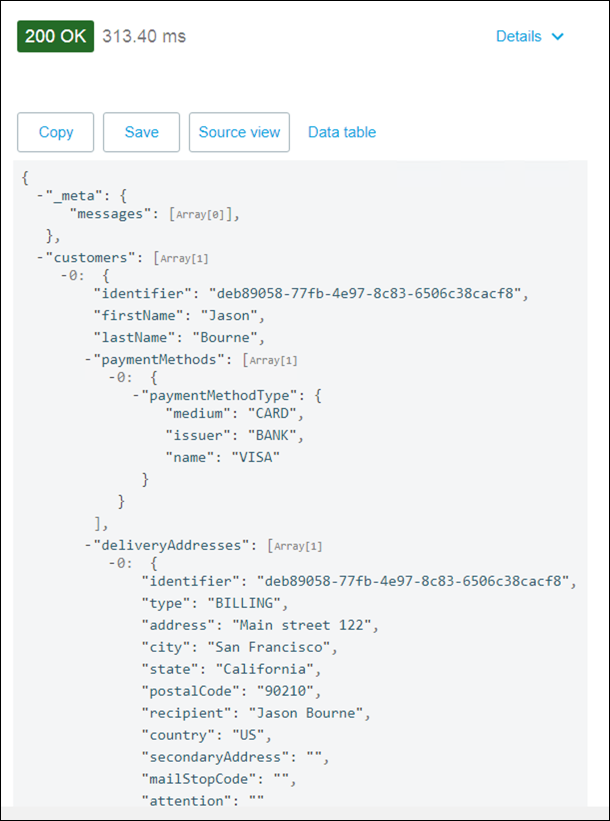
-
Test data will appear. Notice that the firstName and lastName fields do not match what was submitted. Remember: the scaffolded project at this point in time only contains the sample data that was included in API specification.
-
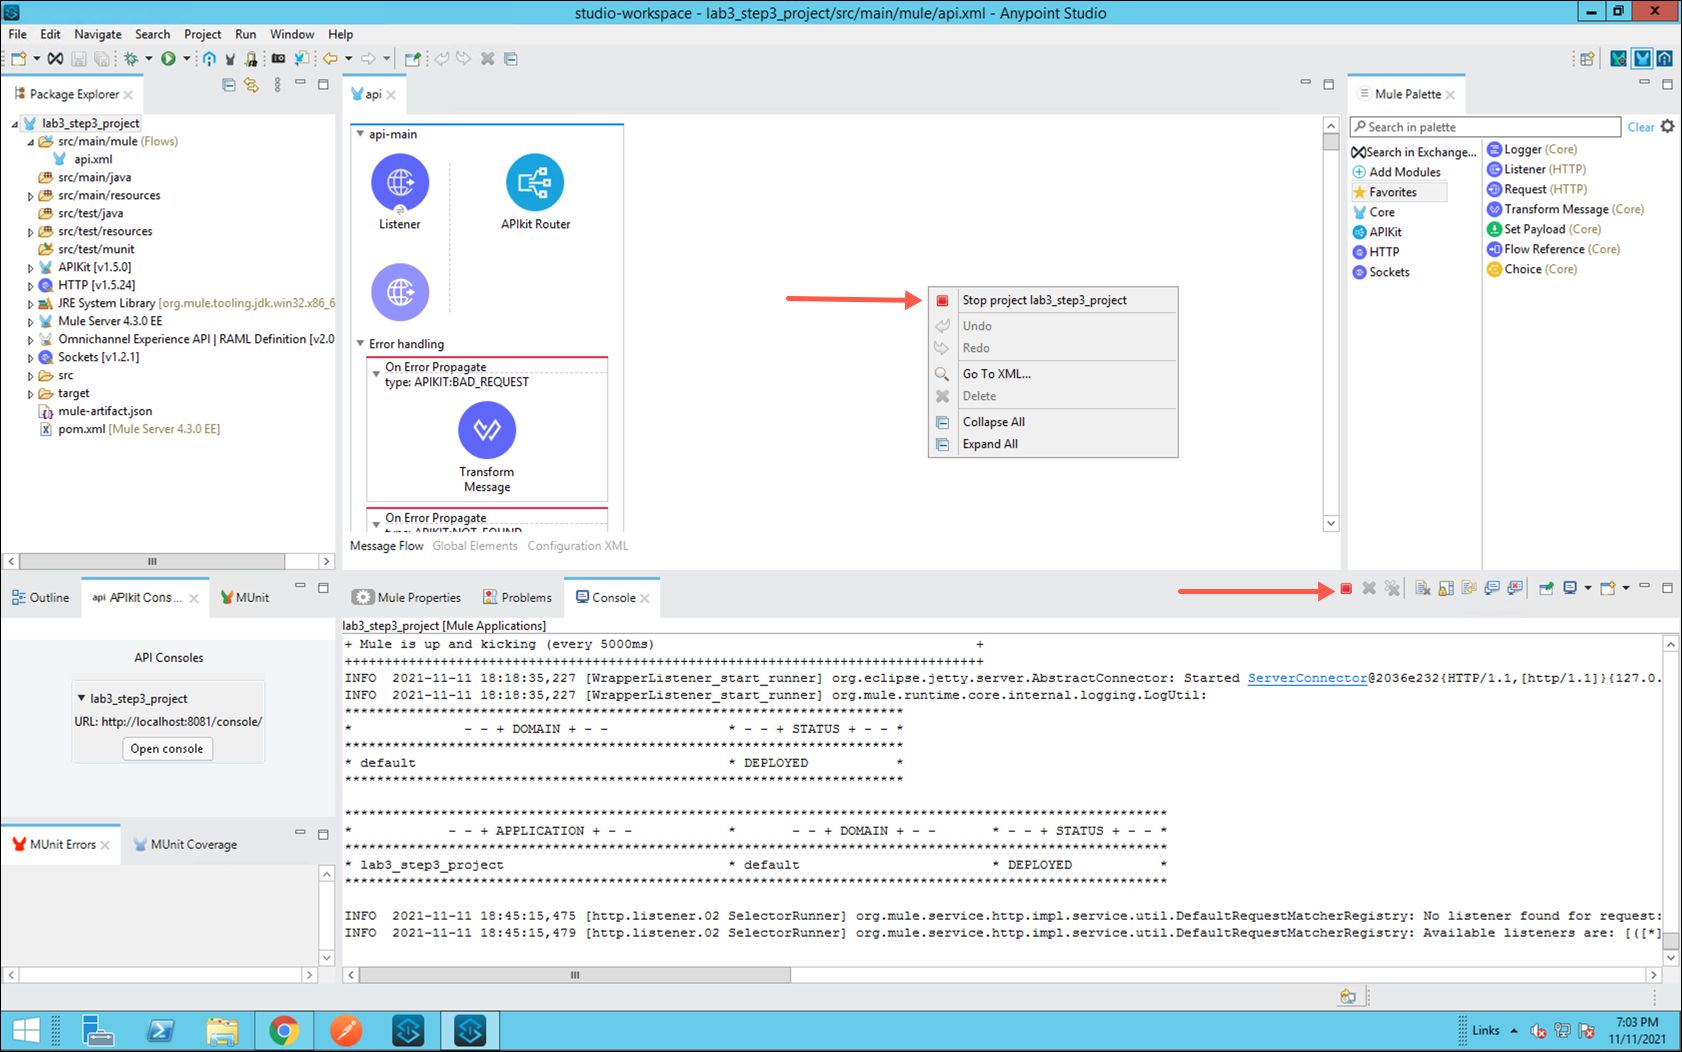
Stop the test instance of the MuleSoft runtime by clicking on the red Terminate button, or by right clicking in the Flow editor and selecting the Stop project… menu option.
Step 6: Explore the Mule Pallete
MuleSoft emphasize a clicks, not code approach to building applications. One of the key features that makes that possible is the wide range of message processors that are available in the Mule Palette. Take a moment to review the various message processors that are available in the palette.
-
Locate the Mule Palette in the upper right of Anypoint Studio.
Notice that there are two sections in the palette.
-
The left section lists categories of message processors that are available. Additional categories may be added by clicking on the Add Modules link, or by using the Search in Exchange link.
-
The right section lists all of the message processors that are a part of the cateogry that is selected in the left section.
-
-
To see how to include additional message processors that are not visible with the default project layout, click on the Add Modules link. Next, click and drag the Salesforce category from the right section to the left section.
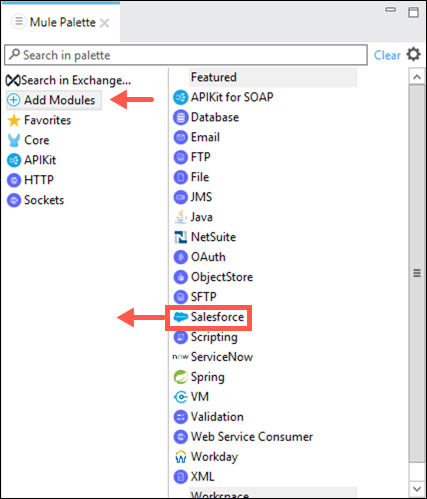
-
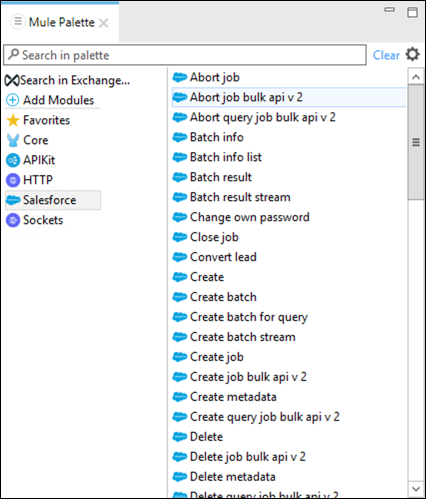
Salesforce should be added as an additional category to the palette. Next, click on Salesforce if it isn’t already selected. Note the large number of message processors that are now available for you to use in your project.
-
You may now drag-and-drop any of the message processors from the palatte to a flow that is in your flow editor.
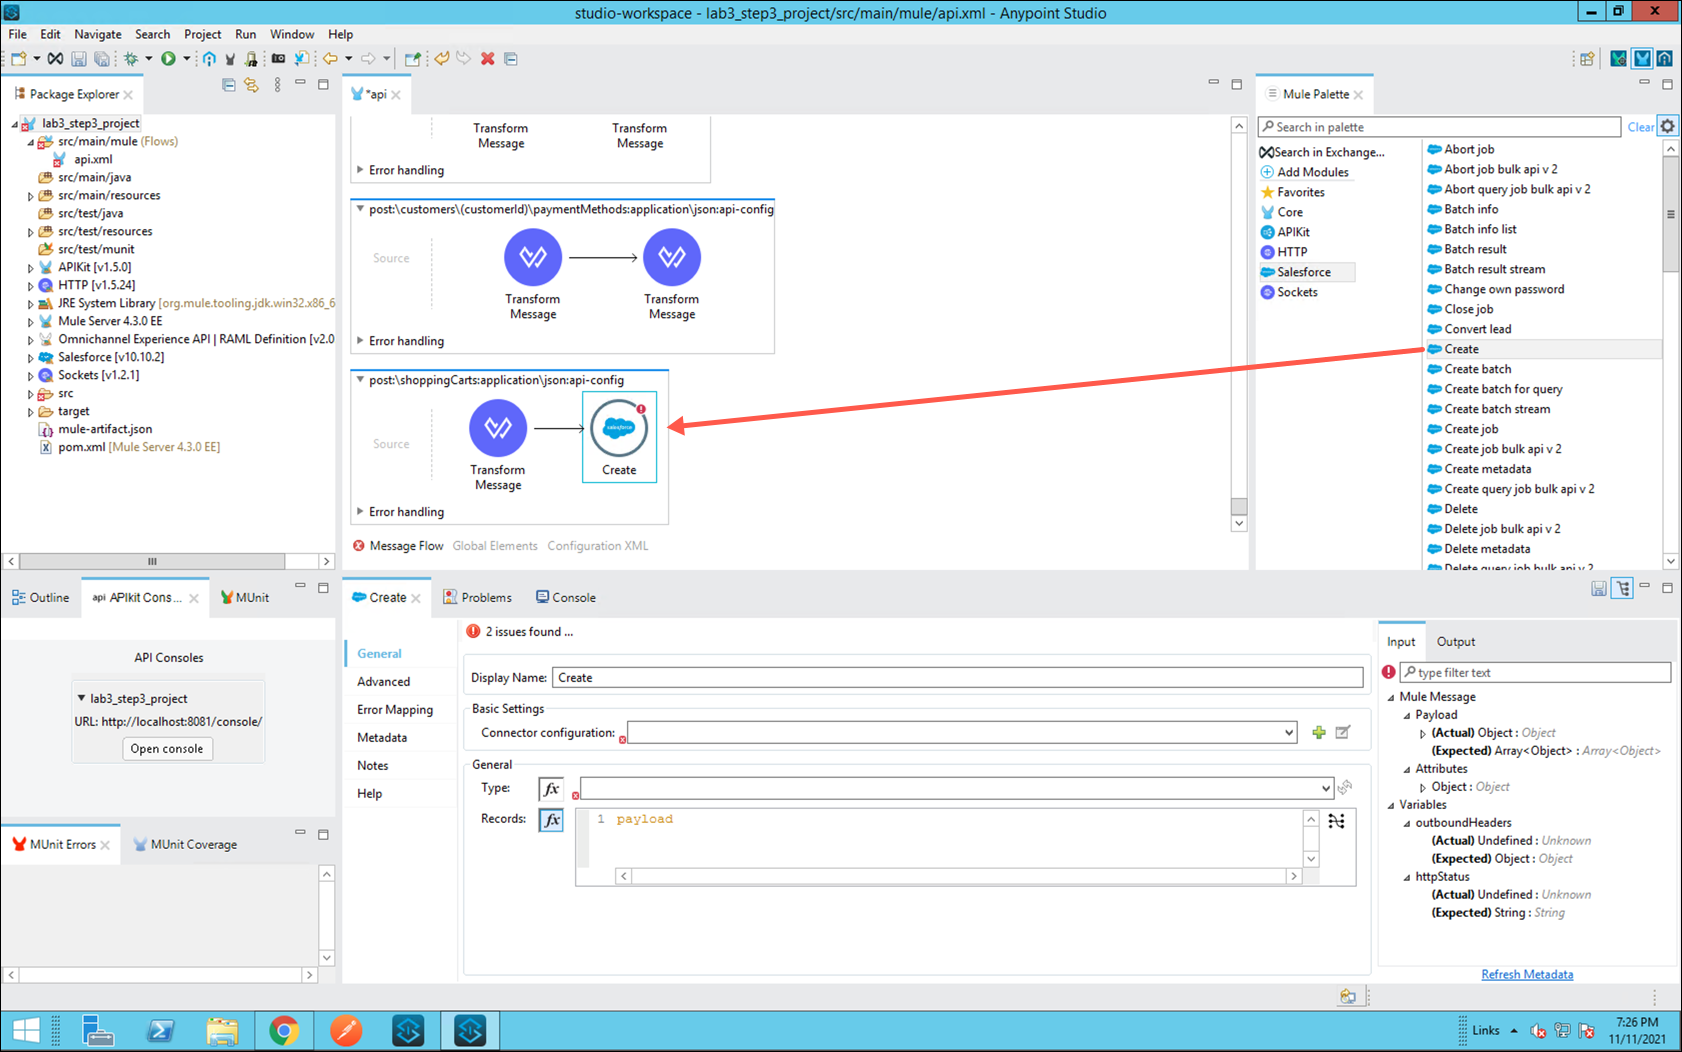
Notice that the Properties Editor is not displaying the various properties that may be configured to create an object in Salesforce,